FLEX-6000 Signature Series – Maestro User Guide
Copyright 2024 FlexRadio, Inc. All Rights Reserved. | Page 166
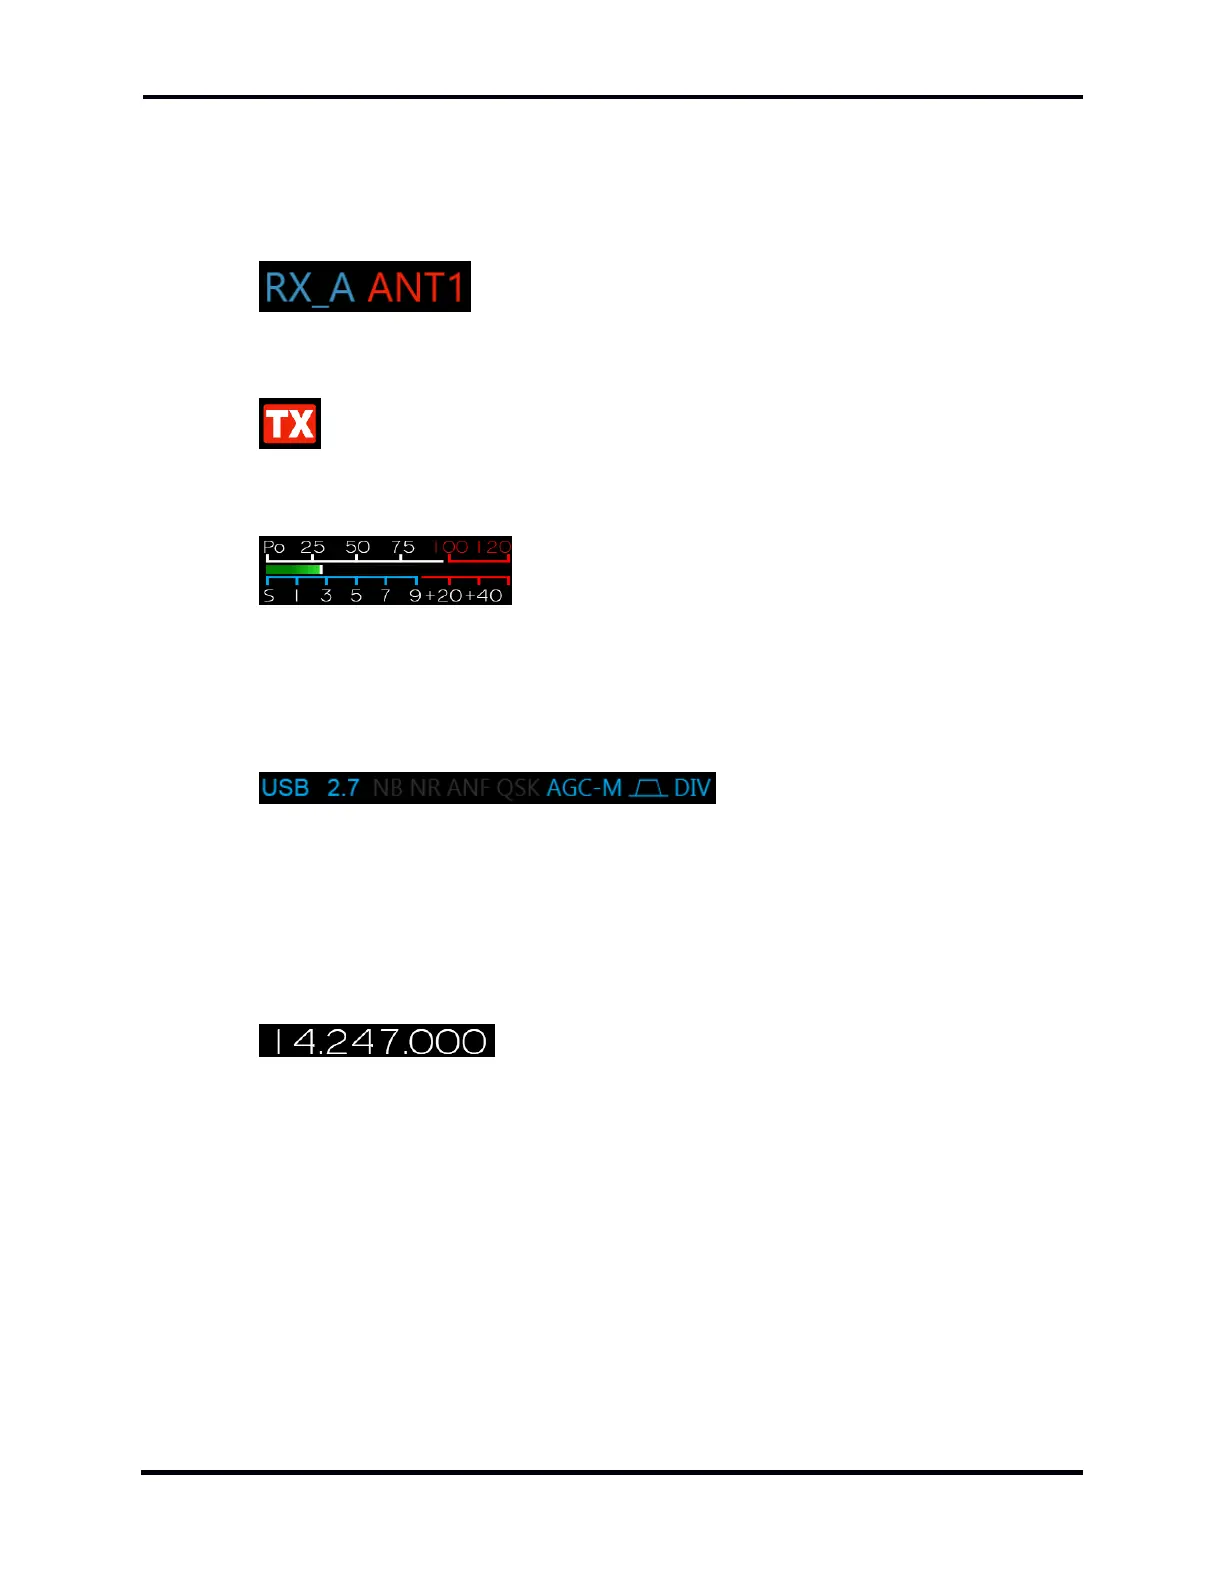
If two Panadapters are active in the Maestro display, tapping a Slice Receiver identifier
button creates a Slice Receiver in the upper Panadapter if it doesn’t already exist. Tapping
the button again removes the Slice Receiver from the upper Panadapter and creates it in
the lower Panadapter. Another tap removes the Slice Receiver altogether. Either the A or
B Slice Receiver can be moved to either Panadapter this way.
The Slice Receiver Antenna Menu. Tap this indicator to open the
antenna control panel. Using this panel, choices can be made for reception and transmit
antennas. Tap the indicator again to close the control panel. A complete discussion of the
control panel is found in section 25, How to Configure Antennas.
Transmitter indicator. Tap this indicator to move control of the transmitter to or
from the associated Slice Receiver. The front panel TX buttons will illuminate as the
changes are made. Note that it is possible to assign the transmitter to Slice A, Slice B, or to
neither Slice by appropriate taps of the indicator.
Signal Meters. A choice of several meters is available in the
middle of the Slice Flag. An “S” meter showing the received signal strength is always
displayed in the lower half of the meter. A sliding white marker shows the recent peak
value on the scale. Tapping the meter reveals a choice of meters for the upper half of the
meter display. Choices include transmitted power level, SWR, microphone level, audio
signal compression level, and ALC signal level. See section 35.3.9, Auxiliary Meters for
more information.
Annunciators. Below the signal meter
is a row of annunciators. From left to right, these show the Slice Receiver operational
mode (LSB, USB, CW, etc.), the receiver filter width in kHz, and a list of annunciators for
options such as noise blanking (NB), noise reduction (NR), automatic notch filters (ANF),
QSK mode and AGC recovery rate. At the right of the list, a graphic indicates the mode of
the bandwidth control. When the graphic appears as it does above, the bandwidth control
is in Low/Hi mode. When a vertical bar appears in the middle of the graphic, the control is
in Center/Width mode. See section 11.6, How to Change the RX filter of a Slice Receiver
for more details.
The tuned frequency. The bottom element of the Slice Flag
shows the tuned frequency. Tapping this element opens the Slice Receiver Menu which
covers the entire Panadapter portion of the display.

 Loading...