Limitorque MX Maintenance and Spare Parts FCD LMENIM2314-00 – 07/08
122
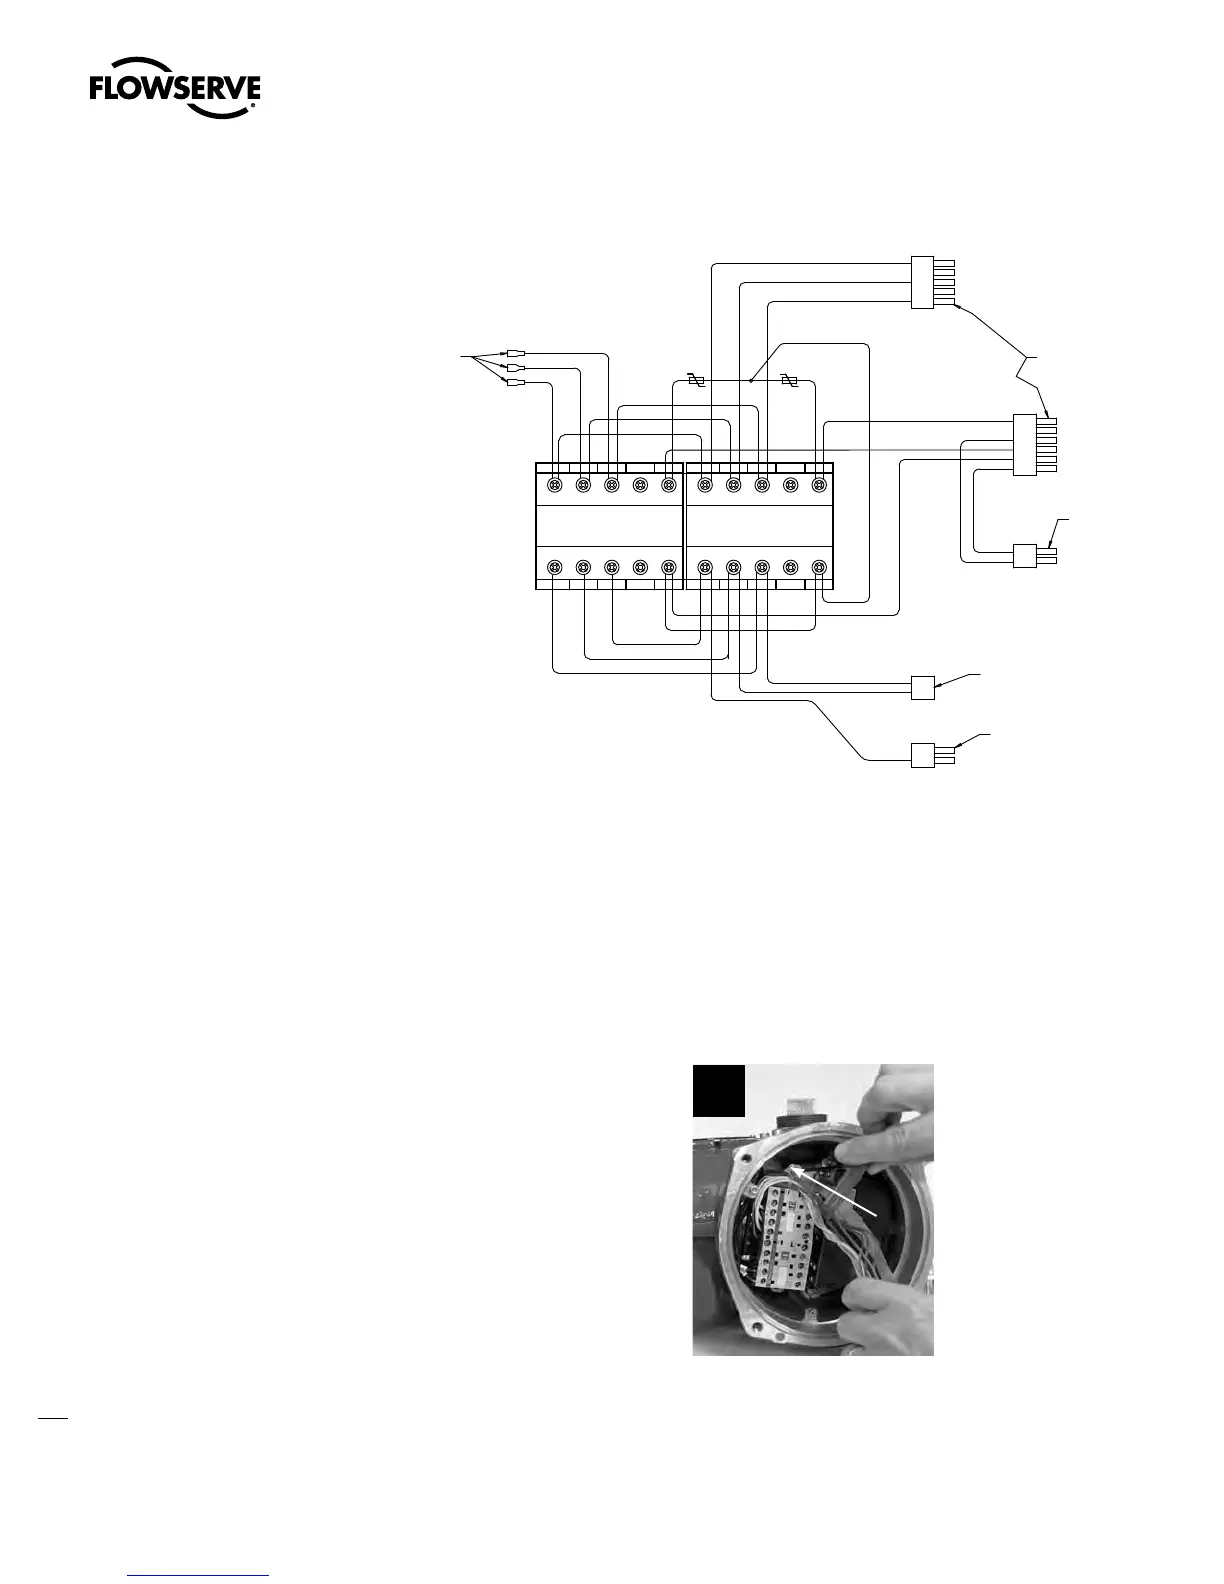
Figure 5.15 – (continued)
".14)631-6(
$POOFDUPS
$POOFDUPS/P
$POOFDUPS/P
$POOFDUPS/P
$POOFDUPS/P
5P0QUJPO#PBSE1
$POOFDUPS/P
5P.PUPS1
$POOFDUPSTBOE
QJO".1.BUFO-PDL
1MVH)PVTJOH
5P1PXFS#PBSE11
1JO.PMFY
3FDFQUBDMF
1JO.PMFY
3FDFQUBDMF
1JO".1.BUFO-PDL
1MVH)PVTJOH
1JO".1.BUFO-PDL
1MVH)PVTJOH
5 5 5
"
5 5 5
"
- - - /$
"
- - - /$
"
5.10.1 Removal
First Remove
1. Remove motor (subassembly #4). (See Section 4.1.1.)
2. Remove control panel (subassembly #7). (See Section 5.1.)
3. Remove control module (subassembly #8). (See Section 5.2.1.)
4. Remove terminal block (subassembly #15). (See Section 5.8.1.)
STEP 1
Using an M3 hex key, loosen the two 4 mm
screws (#8-28) that mount the contactor
assembly to the actuator.
1
8-28
Swanson Flo | 800-288-7926 | www.swansonflo.com