15
Limitorque QX Electronic Actuator FCD LMENIM3306-06 – 07/14
flowserve.com
2.1.3 Entering the Setup Mode
To access the Setup Mode after initial setup has been exited, use these steps:
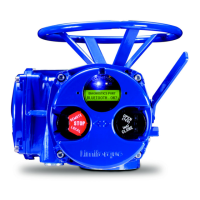
1. Place the red selector knob in the “STOP” position.
2. Within 10 seconds, place the black control knob in the “YES” position, then the “NO” position, then again in the
“YES” position (in quick succession—approximately one to two seconds).
3. The message “SETUP?” will appear in the LCD display for 10 seconds. Select “YES”. If no setup action is taken
within 10 seconds, the unit will reset.
4. Use the black control knob to answer “YES” or “NO” to the questions appearing in the display.
2.2 DDC Option
The following instructions assume that all DDC option parameters are set with the exception of the address.
1. After setting position limits, remain in the “SETUP” mode. If not in the “SETUP” mode, enter the “SETUP” mode as
detailed in Section 2.1.3, Entering the Setup Mode.
2. When LCD reads “CHANGE SETTINGS?”, select “YES.”
3. The LCD will display the “CHANGE SETTINGS” mode menu items. Select “NO” until screen displays “CHANGE
DDC?” Select “YES.” LCD will display DDC menu items.
4. Select “YES” for each menu item until “DDC ADDRESS OK?” appears. Select “NO.”
5. Enter an address from 1 to 250 by toggling “NO” until the correct address is displayed. User may select to hold
the knob in the “NO” direction and the number will automatically increment by one until the preferred address is
reached.
NOTE: The DDC address does not have to be set to exit the setup.
a
CAUTION: The network address must be entered in accordance with the user address assignment sheet. This
assignment sheet should correspond to the contract specifications. The same address must not be used
anywhere else in the same network. The DDC address does not have to be set to exit the setup.
2.3 Check the Settings
1. Operate the valve to the fully “CLOSE” position. Verify that the “CLOSE” (default GREEN) LED illuminates just as
the travel limit is reached, and the valve position is displayed as “0% OPEN.”
2. Operate the valve to the fully “OPEN” position. Verify that the “OPEN” (default RED) LED illuminates just as the
travel limit is reached, and the valve position is displayed as “100% OPEN.”

 Loading...

