43
EN-US
Connect the inverters with Fronius Datamanager 2.0 or Fronius Datamanager Box 2.0
in Fronius Solar Net
IMPORTANT! Inverters Fronius IG, Fronius IG Plus, Fronius IG Plus V, Fronius IG
Plus A, Fronius CL, Fronius CL USA, and Fronius IG 300–500 must always be located
at the beginning or end of the Fronius Solar Net ring.
For Fronius Galvo/Fronius Symo/Fronius Primo only and when linking multiple invert-
ers in Fronius Solar Net:
Set the Fronius Solar Net master/slave switch on the Fronius Datamanager 2.0 plug-
in card as required
- One inverter with Fronius Datamanager 2.0 = master
- All other inverters with Fronius Datamanager 2.0 = slave (the LEDs on the Fro-
nius Datamanager 2.0 plug-in cards are off)
Switch the device to service mode
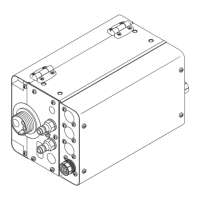
Inverter with Fronius Datamanager 2.0 plug-in card:
- Switch the IP switch on the Fronius Datamanager 2.0 plug-in card to position A
or
- Activate the WIFI Access Point via the Setup menu of the inverter
(the performance of this function depends on the inverter software)
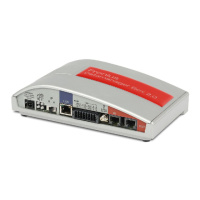
Fronius Datamanager Box 2.0:
- Switch the IP switch on the Fronius Datamanager Box 2.0 to position A
WARNING! An electric shock can be fatal. Danger from grid voltage and DC volt-
age from solar modules.
Before opening the inverter:
- You must wait until the capacitors have discharged.
- Follow the operating instructions when opening the inverter.
- Observe the safety rules and safety instructions contained in the inverter's
operating instructions.
1
2
3
Stand by
WiFi Access Point
DATCOM
USB
Clock