172
Chapter 7 Installing Internal Options
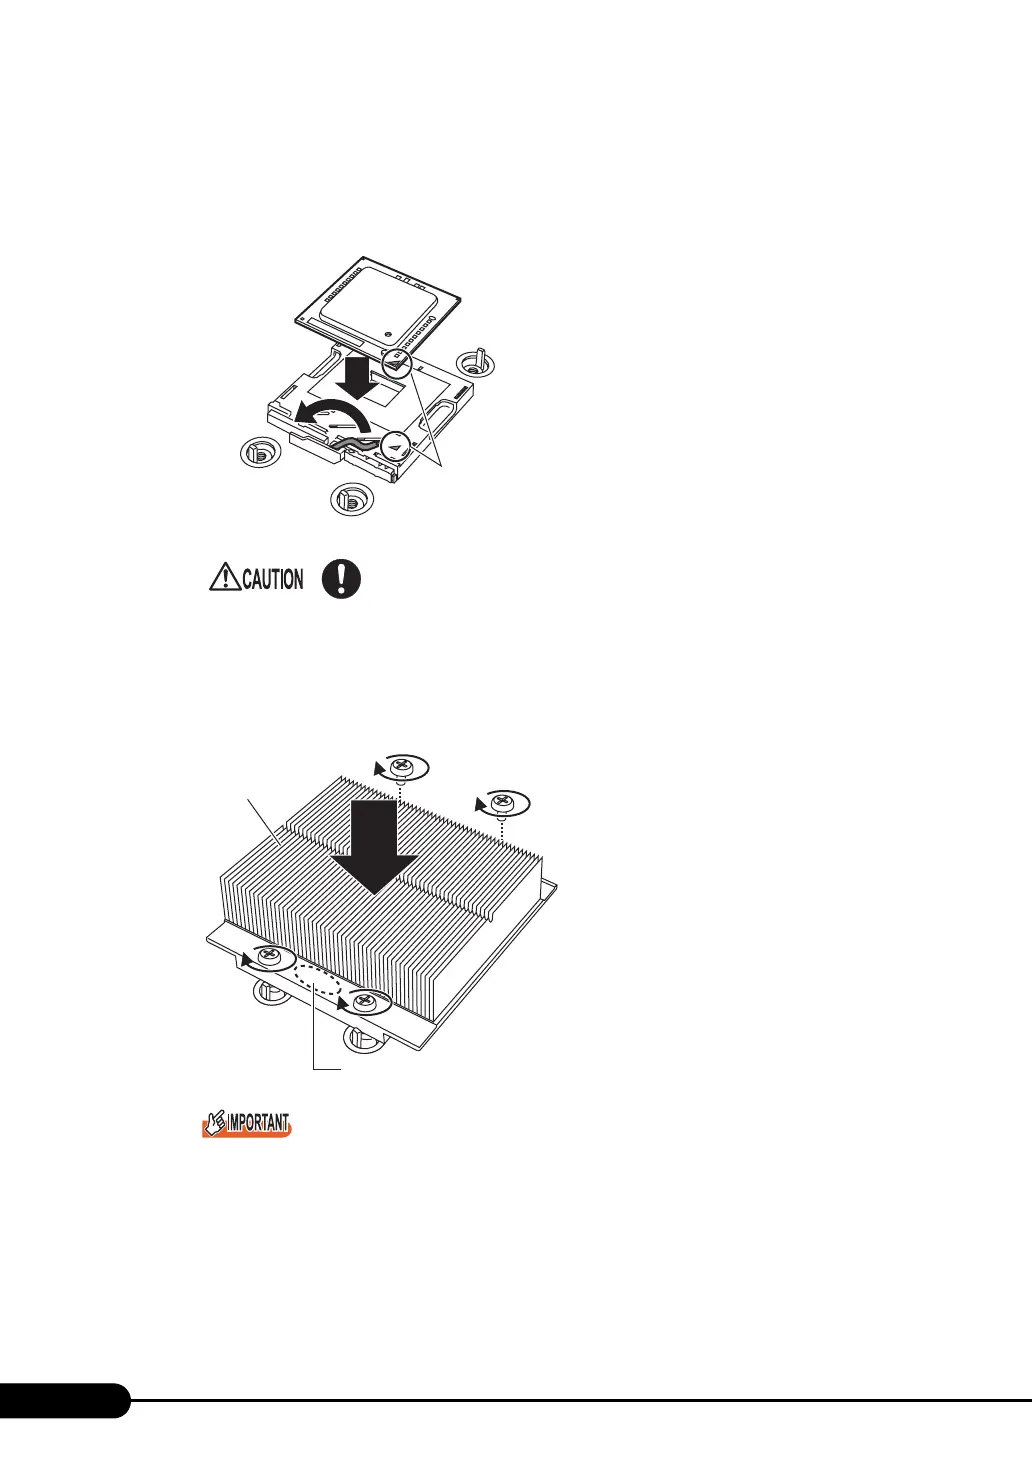
5 Install the CPU.
1. Align the pin 1 marking (small triangle) on the CPU socket with the triangle on the
CPU, and insert the pins into the socket.
2. Return the socket lever to fasten the CPU.
6 Install the heat sink.
Install the heat sink in the direction so that the "FRONT" side comes to the front of the server.
Fasten it using the four screws.
Carefully tighten the screws in diagonal order.
Make sure that the four screws are tightened securely.
7 Return the CPU duct to the original position.
8 Install the top cover and return the server back into the rack.
"7.2 Removing and Attaching the Top Cover" (pg.166)
• When installing the CPU in the socket, be careful not to bend the CPU
pins.
Pin 1 marking
1
2
Heat sink
Indicated "FRONT"
[Front]

 Loading...