Cloud Services (for Mac OS Users)
411
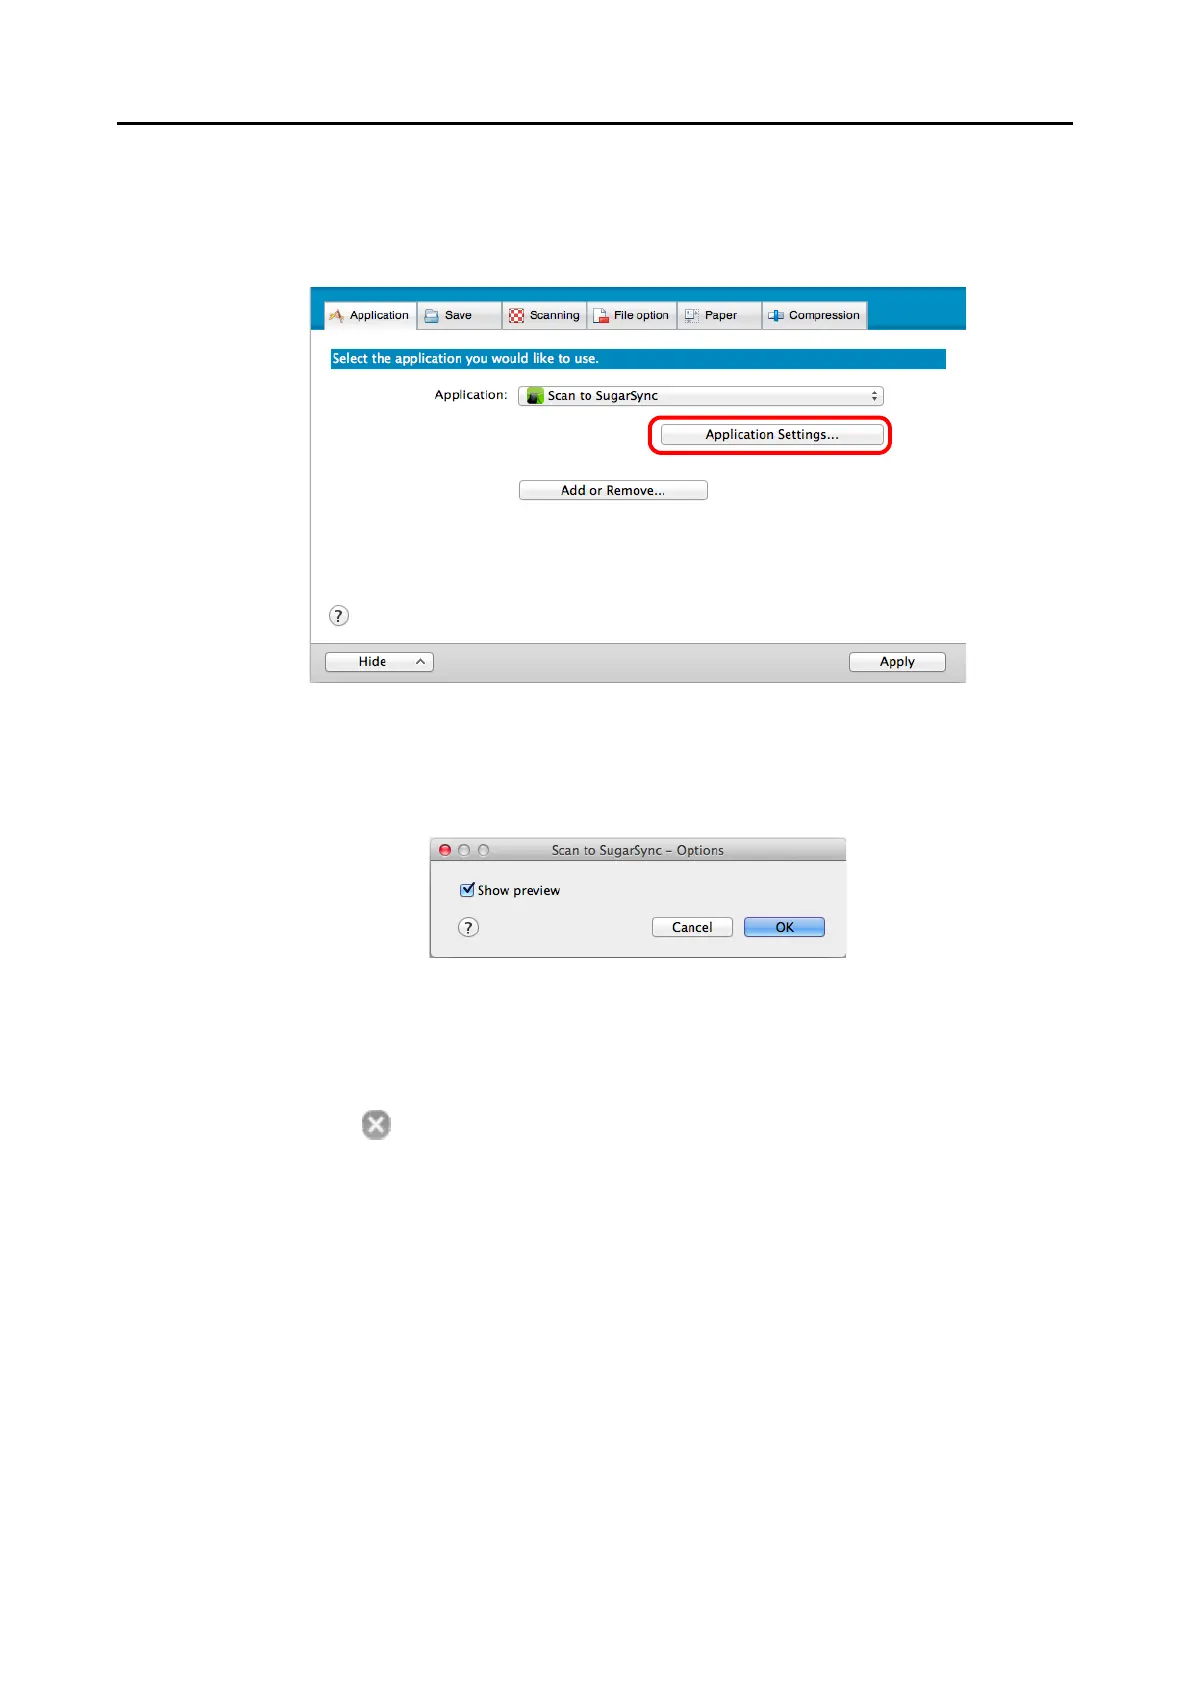
3. Change the settings for [Scan to SugarSync] (If you do not want to
change any settings, go to step 4.).
1. Click the [Application Settings] button.
DThe [Scan to SugarSync - Options] window appears.
2. Change the setting.
For details about the [Scan to SugarSync - Options] window, refer to the ScanSnap
Manager Help.
3. Click the [OK] button to close the [Scan to SugarSync - Options] window.
4. Click the [Apply] button.
5. Click the [ ] button in the upper left corner to close the ScanSnap
setup window.
6. Load a document in the ScanSnap.
For details about how to load documents, refer to "How to Load Documents" (page 33).
7. Press the [Scan] button on the ScanSnap to start a scan.
D The [Scan to SugarSync] window appears when the scanning is completed.
If you clear the [Show preview] checkbox in step3., the scanned image is directly
saved to your SugarSync folder.

 Loading...