www.gateway.com
17
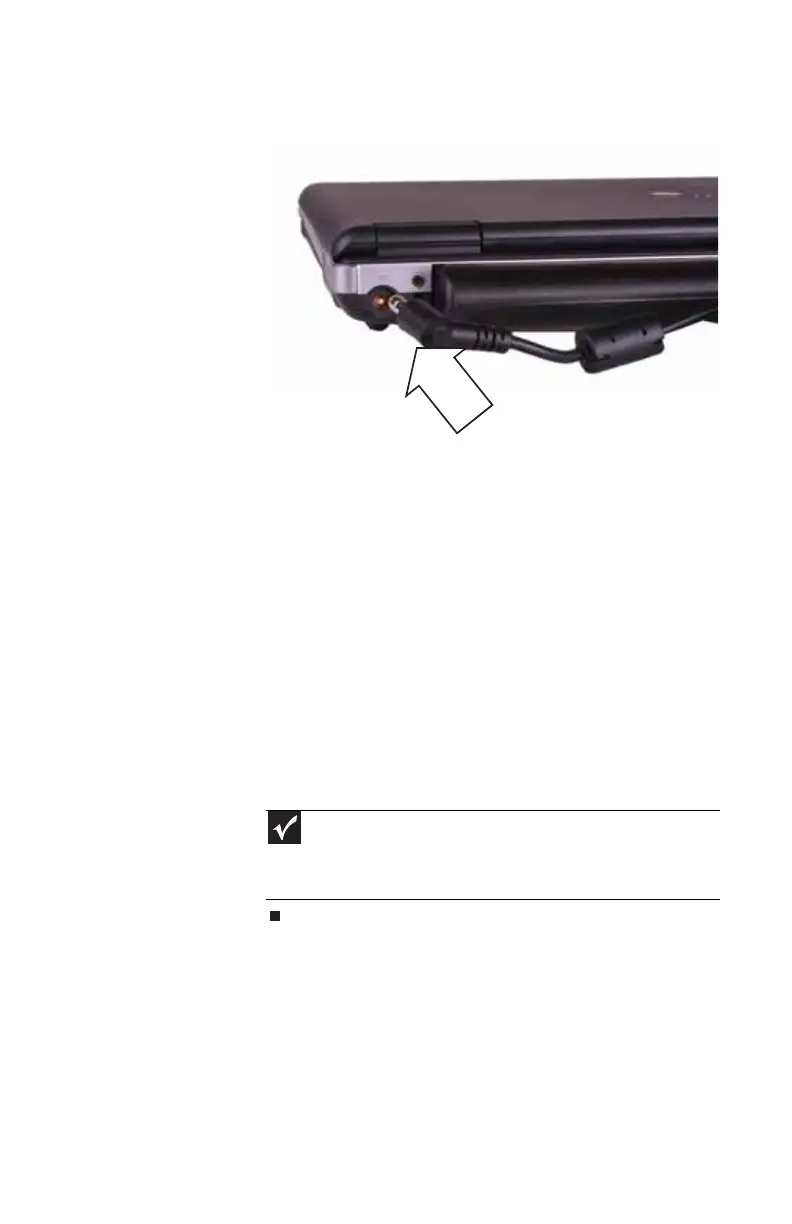
2 Connect the AC adapter to your notebook’s power
connector.
3 Plug the power cord into a wall outlet. The battery
charge indicator turns on (see “Front” on page 6 for the
location of the battery charge indicator). If the battery
charge indicator does not turn on, complete the
following steps until it turns on:
a Unplug the adapter from your notebook, then plug
it back in.
b Press FN+F1 to toggle the status lights on and off.
c Make sure the power cord is firmly attached to the
AC adapter.
d Plug the power cord into a different wall outlet.
4 When you finish using your notebook for the first time,
turn off your notebook and leave your notebook
connected to AC power until the battery charge
indicator turns blue.
Important
If the battery charge indicator does not turn blue after three
hours, contact Gateway Customer Care at the location shown on the
Customer Care label. For more information, see “Gateway contact
information” on page 3.