www.gateway.com
51
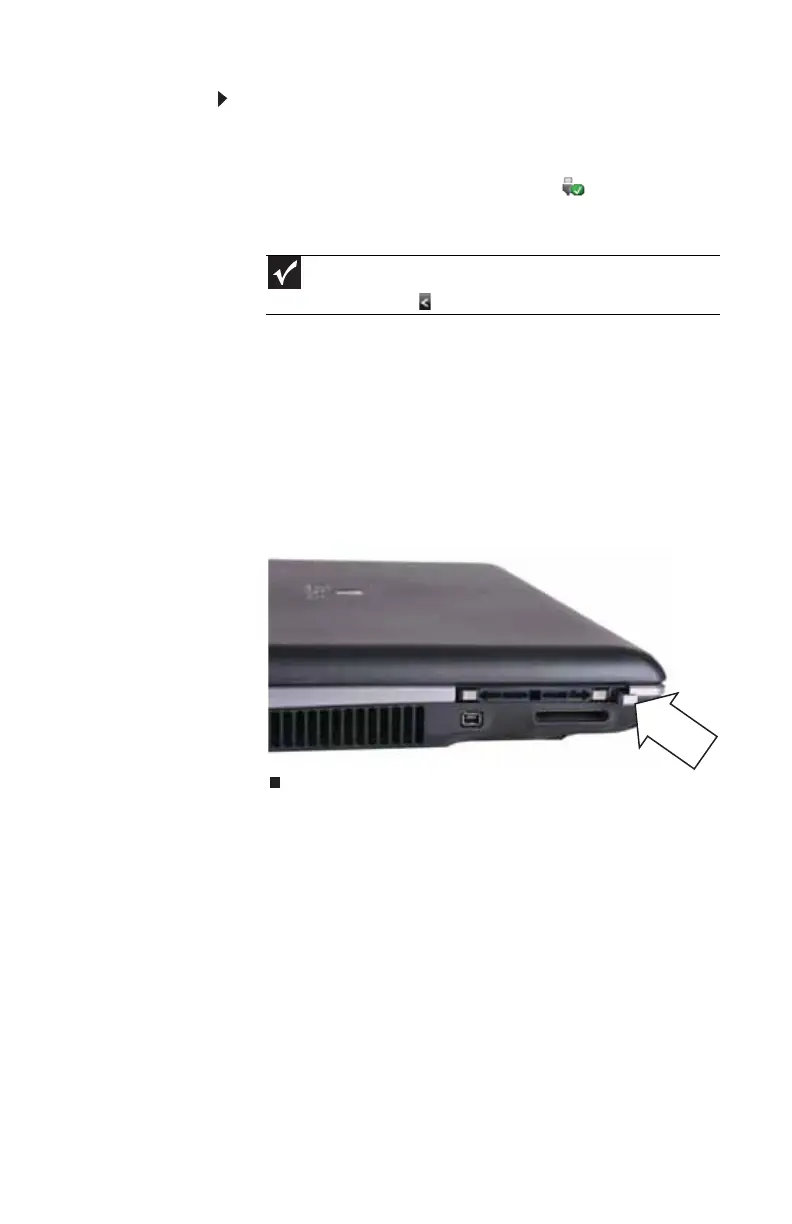
To remove a PC Card:
1 Turn off your notebook, then go to Step 5.
-OR-
Double-click the remove hardware icon in the
taskbar. The Safely Remove Hardware dialog box
opens.
2 Click the PC Card name, then click Stop. The Stop a
Hardware device dialog box opens.
3 Click the PC Card name, then click OK. The Safe to
Remove Hardware dialog box opens.
4 Click OK.
5 Release the eject button by pressing the PC Card eject
button once.
6 Eject the PC Card by pressing the eject button again.
Using a port replicator
Although you can attach devices directly to your notebook, a
port replicator lets you make all of those connections at one
time. When you travel with your notebook, you merely
disconnect from the port replicator instead of unplugging all
the devices.
A port replicator also provides additional ports and other
expansion features not included with your notebook. For
more information about using a port replicator, see the port
replicator user guide.
Important
If the remove hardware icon does not appear on the taskbar, click
the show hidden icons button.