52 TruVision DVR 40 User Manual
4. Select OK to confirm the changes and to return to the Camera menu.
5. When you have made all the changes required in the Camera menu, go to OK and press Enter or
left-click the mouse to save all changes and return to the main menu. Press the Menu button to
return to live mode.
Privacy masks
You can mask a sensitive area on screen so that it remains hidden from view. An example would be
when the view of a camera overlooks onto residential premises. The area hidden by the privacy mask
will not be viewed live nor recorded but will appear as a blank area on screen.
To setup a privacy mask
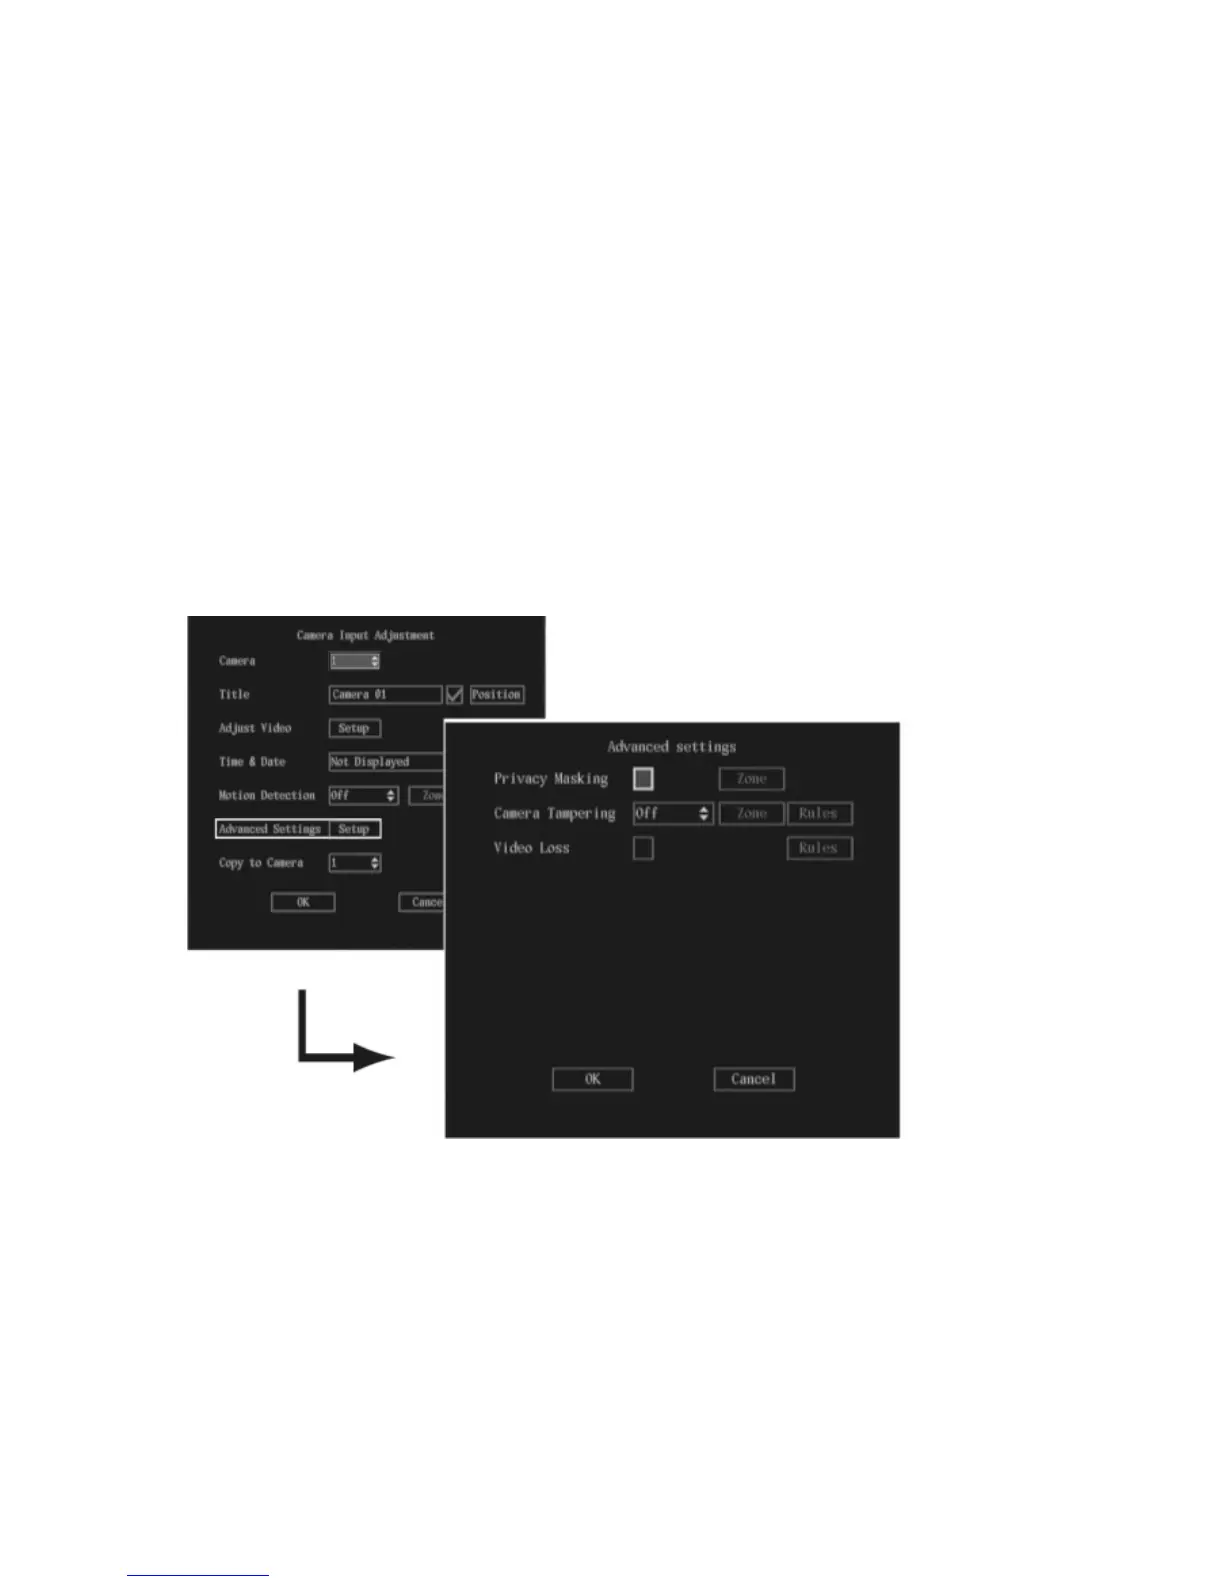
1. In the Camera menu go to Advanced Settings setup box and press Enter or left-click the mouse.
The Advanced Settings submenu appears.
2. Go to the Privacy Masking check box and press Enter or left-click the mouse to enable (). The
Zone option is activated. Privacy masking is disabled by default.
Note: No masked zone appears on-screen when Privacy Mask is disabled.
3. Go to the Zone button and press Enter or left-click the mouse.
The matrix screen appears. For PAL there are 22 x 18 panes in the matrix. In the top left-hand
corner of the matrix there is a white pane.