DIRECTION 5750007-1EN, REV. 1 LOGIQ E10 BASIC SERVICE MANUAL
Chapter 8 Replacement Procedures 8 - 67
Printer Filler Storage removal
Printer Filler Storage installation
Table 8-76 Printer Filler Storage removal
Steps Corresponding Graphic
1.
Raise the Upper OP to the highest position.
2.
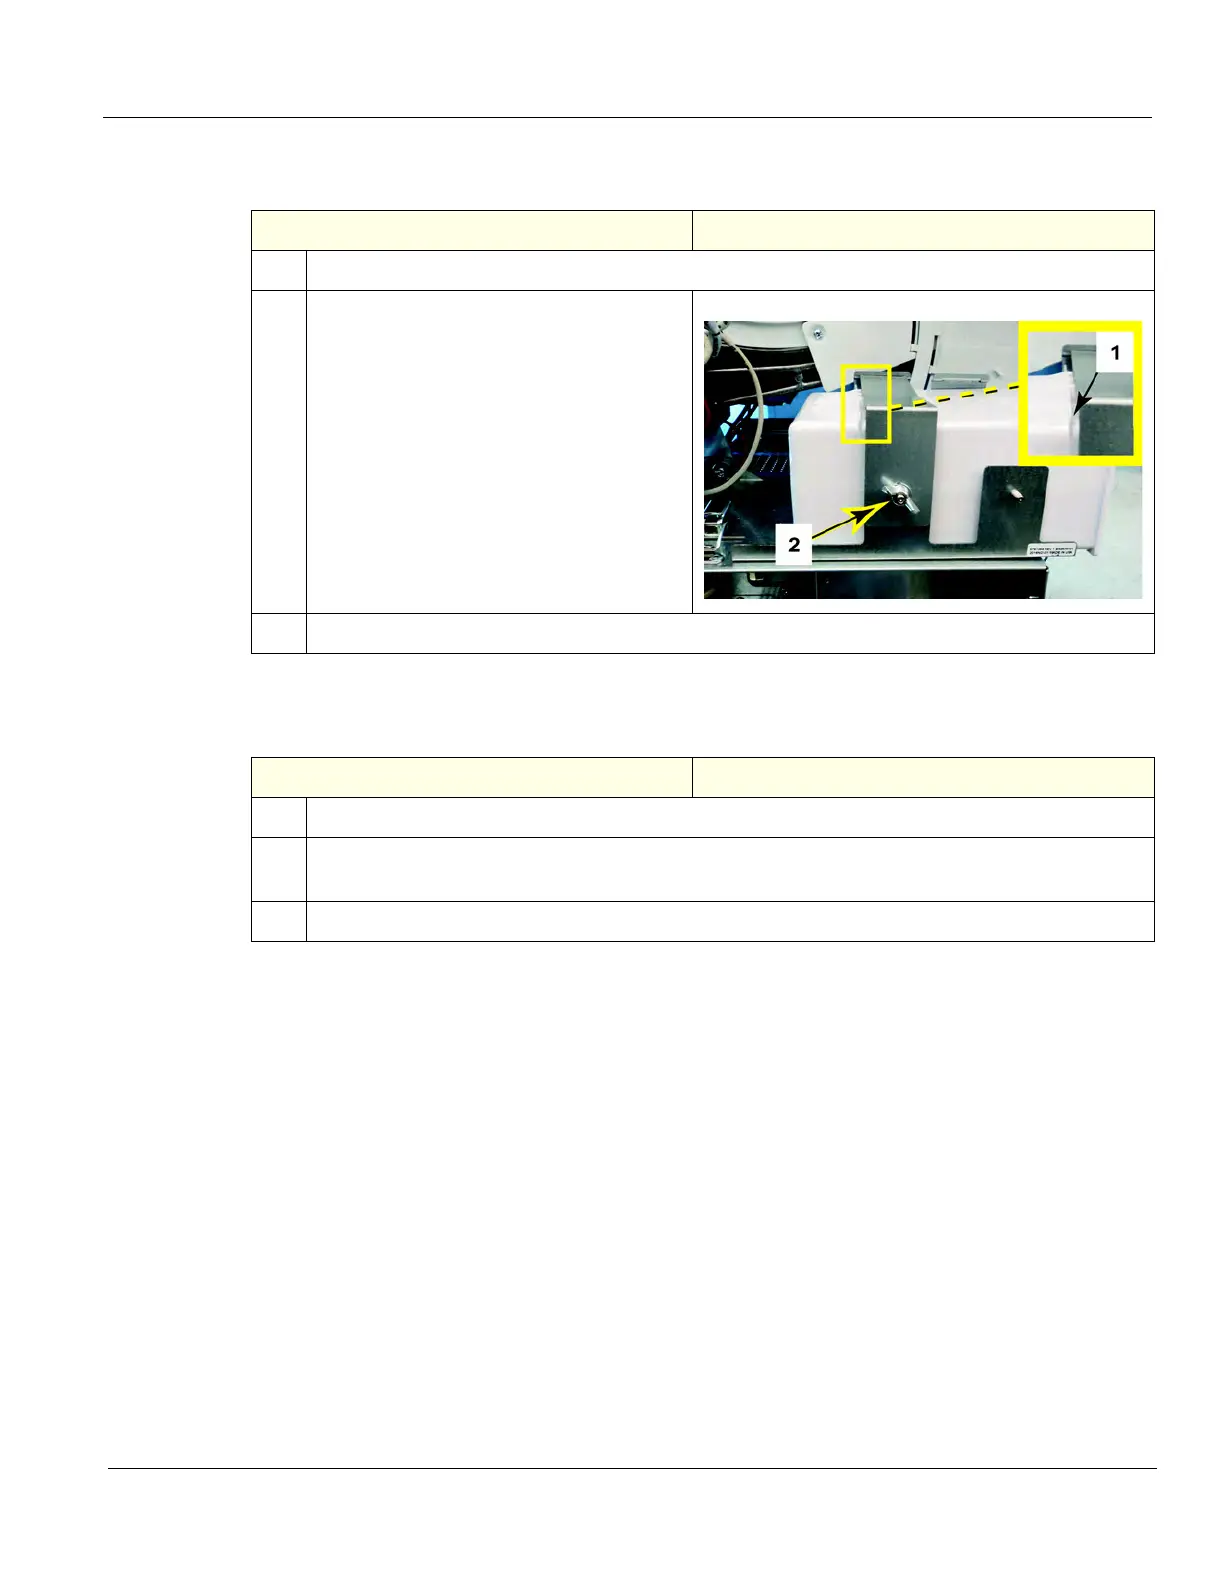
Note the location of the Filler (1) in the
fixing bracket of the Tray. When the
replacement Filler is installed, it should be
in this same position.
Remove the flange nut (2), using a 7 mm
driver and release the fixing bracket.
3.
Slide the Filler out of the Tray.
Table 8-77 Printer Filler Storage installation
Steps Corresponding Graphic
1.
Slide the Filler into the Tray as noted in removal.
2.
Re-install flange nut and apply slight pressure, down on the fixing bracket while tightening the
nut.
3.
Re-install all Covers removed.