DIRECTION 5750007-1EN, REV. 1 LOGIQ E10 BASIC SERVICE MANUAL
Chapter 8 Replacement Procedures 8 - 109
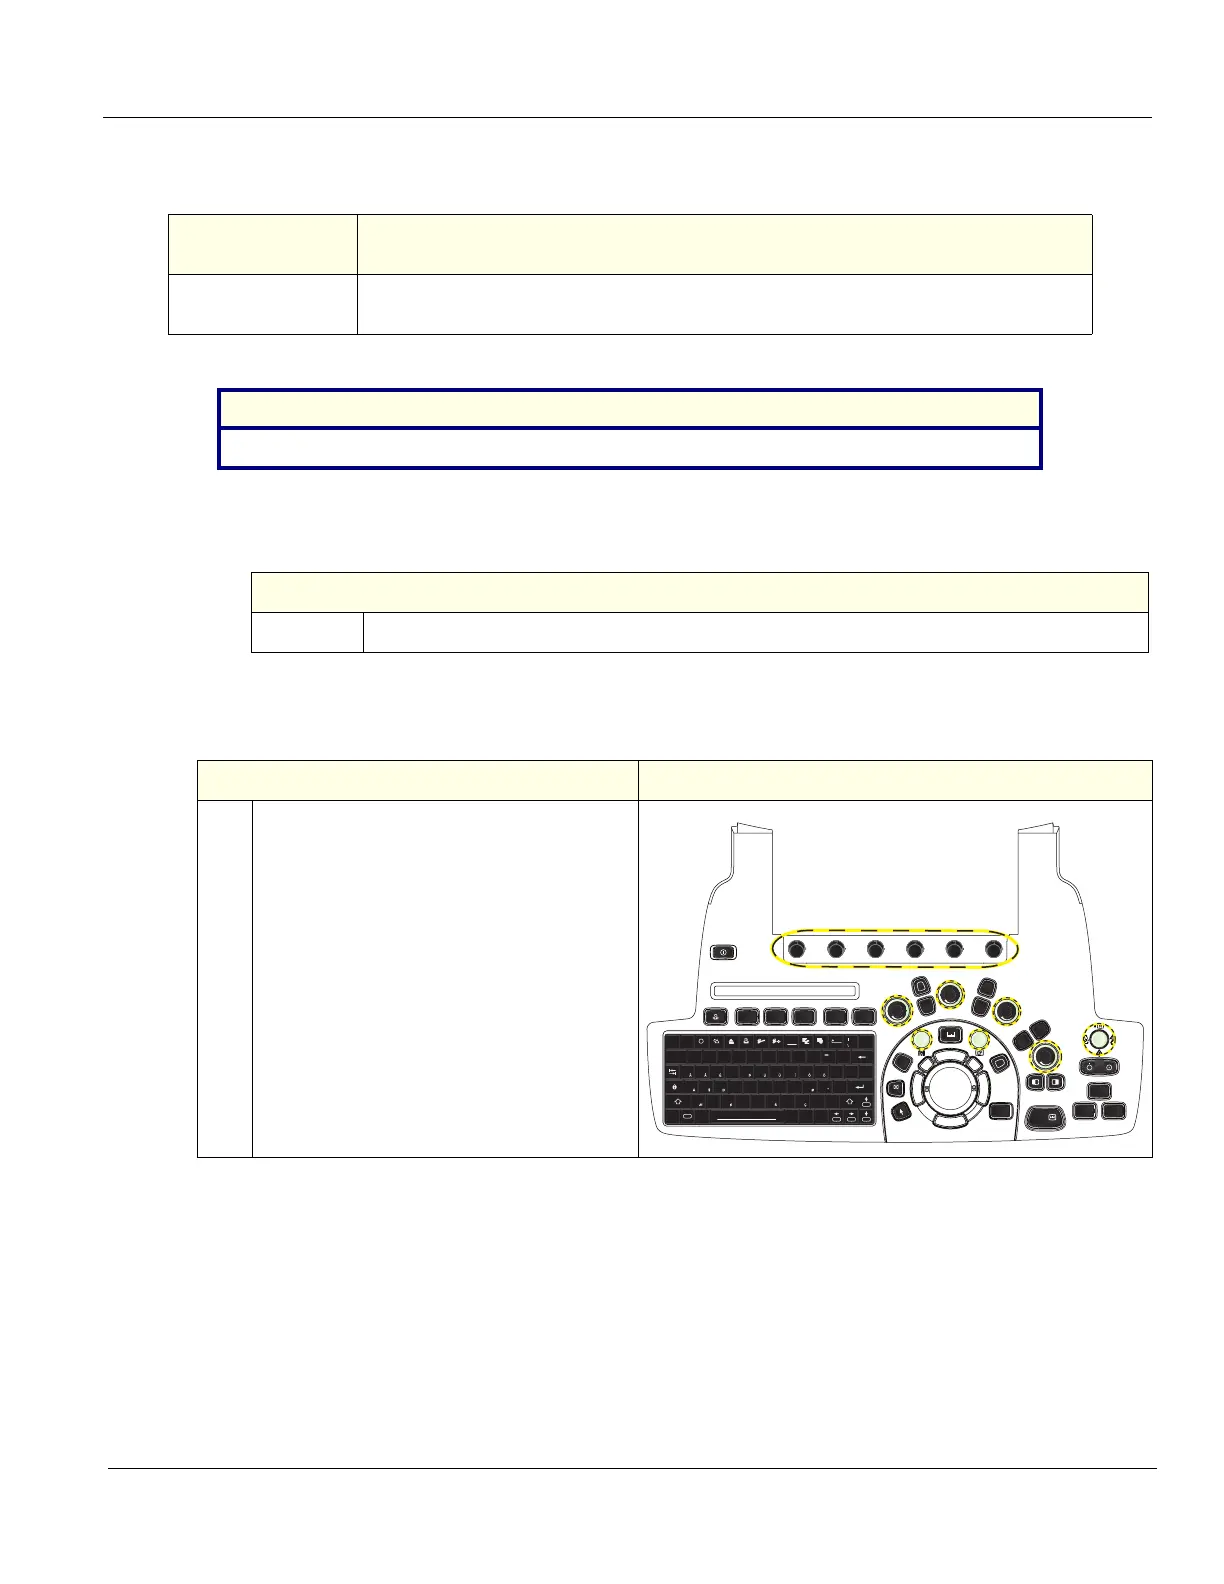
8-7-6 OP (Operator Panel) Knobs replacement
OP Knobs removal
OP Knobs installation
Table 8-121 Manpower / Time and Tools
Manpower /
Time
Tools / PPE
One person /
15 minutes
No tools are required.
Table 8-122 Preparations
Preparations
No preparations needed for this procedure.
Table 8-123 OP Knobs removal
Step
1. Carefully pull the knobs, one by one, to remove them.
Table 8-124 OP Knobs installation
Steps Corresponding Graphic
1. NOTE: The OP knobs are concentric
knobs, the center shaft has a D shape.
Replace the outer knobs first then the inner
ones.
Install the knobs, one by one in their
respective positions.
Ctrl Alt Alt Gr Ins Del
Fn
Home
End
Pg Up
Prt Sc
Word
Delete
Pg Dn
@
F1
Esc
F2 F3 F4 F5 F6 F7
Set Home
F8 F9 F10
#$%^&*()
1
2
_
!
1
Q
AS DF GHJ K L
:
"
WE R T Y UI O P
{
}
|
[]
\
;
'
23456789
Home
0
-
~
`
ZXC V B NM
<>
?
,
.
/
+
=
?
Help Arrow Eject Spooler MacroMacro Copy Move
P3
P4
P2P1
Clear
Auto
Freeze
Abc
L R
ContrastV Nav
Elasto3D/4D
LOGIQ
View
Flow
B
CHI
TVI
PDI
CW
Y
PW
X
M
Z
CF
B