DIRECTION 5750007-1EN, REV. 1 LOGIQ E10 BASIC SERVICE MANUAL
Chapter 8 Replacement Procedures 8 - 181
XYZ Buttons replacement
Table 8-214 XYZ Buttons removal
Steps Corresponding Graphic
1. Remove the six OP Knobs.
NOTICE
Failure to remove the six OP Knobs first, could cause damage to the knob shafts.
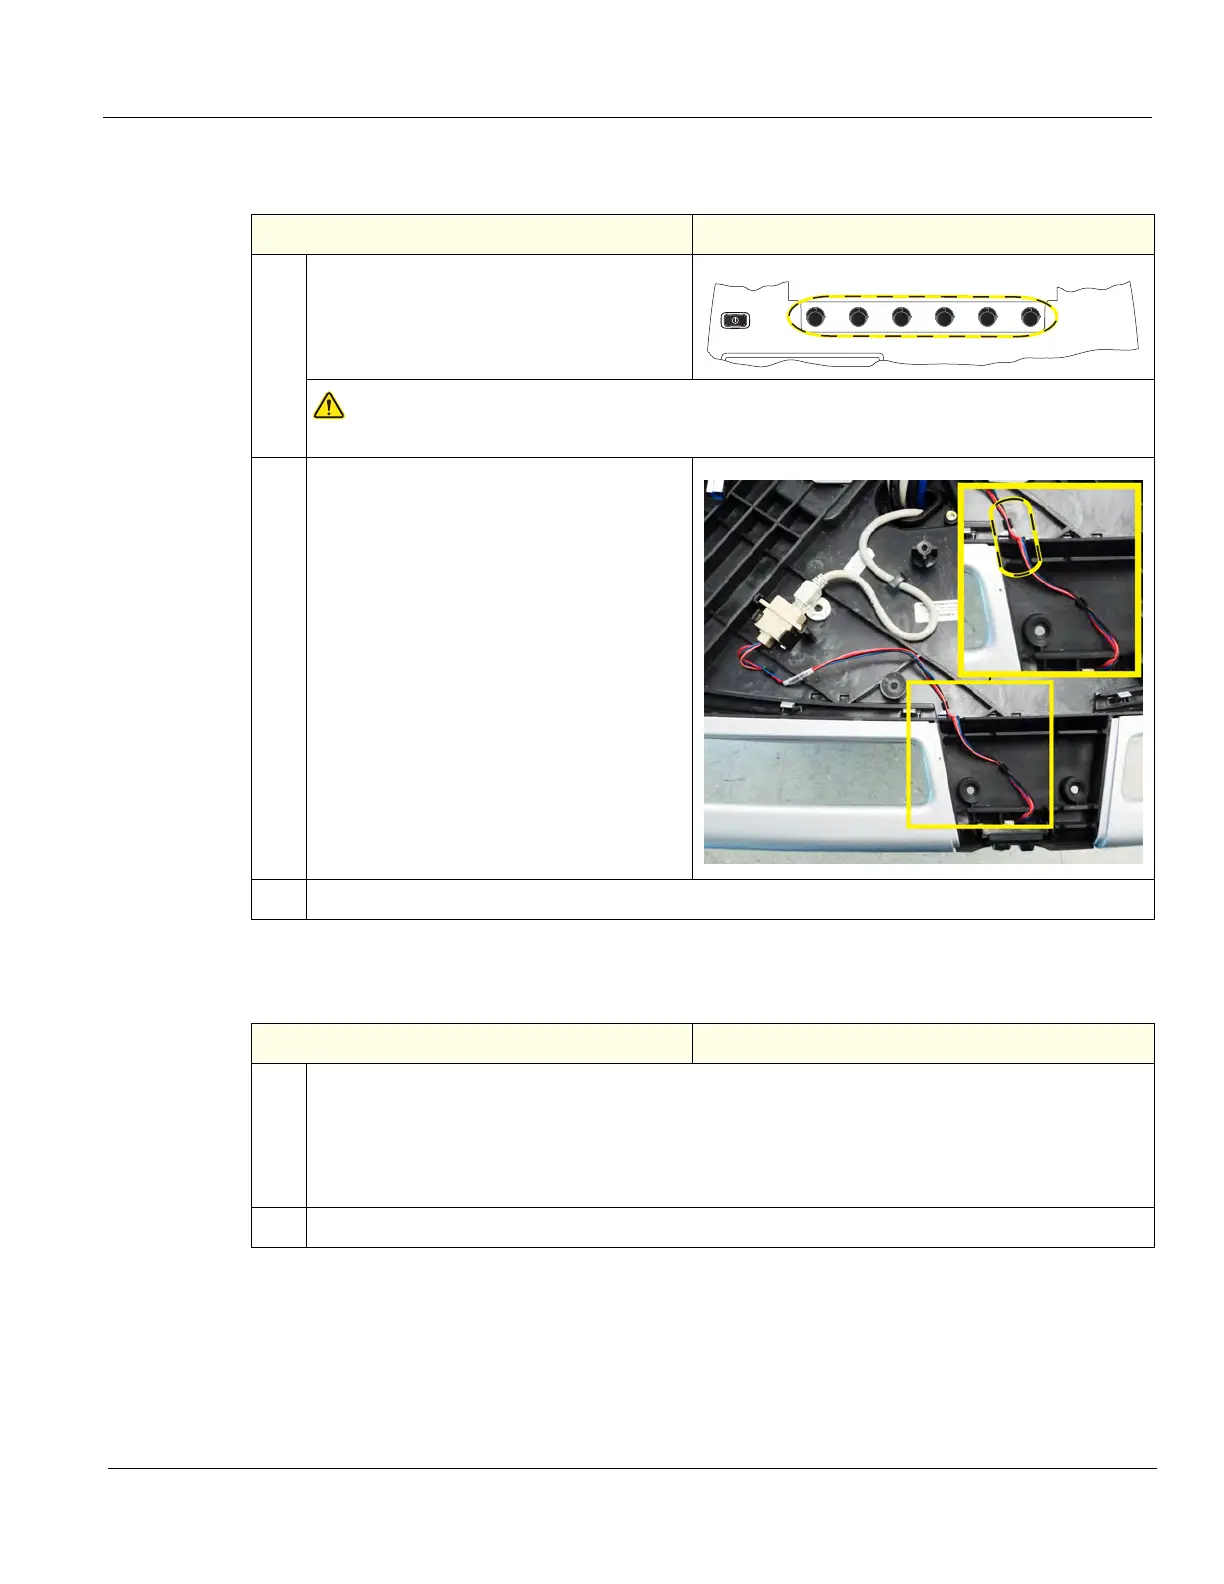
2. Note the location of the cable for the XYZ
Buttons cable, in the Lower Op Frame
cable channels so the cable does not get
pinched when the Palm Rest is replaced.
Note that there are three “clips“ as part of
the Lower OP Frame to retain the cable as
it is routed to the USB connector. MAKE
SURE the cable is retained in these “clips.“
Disconnect the cable, connected to the
back of the XYZ Buttons (2).
The lower OP.does not have to be
completely removed, only three screws
secure the palm rest.
3. Gently pop the XYZ Buttons out of the Palm Rest section of the Lower OP Frame handle.
Table 8-215 XYZ Buttons installation
Steps Corresponding Graphic
1. Connect the cable to the XYZ Buttons.
Insert the XYZ Buttons into the Palm Rest section of the Lower OP Frame handle.
Make sure the XYZ Buttons cable runs along the Lower OP cable channel and is retained in the
“clips“ to retain the cable, as removed so the cable is not pinched when the Palm Rest is
replaced.
2. Re-install the Palm Rest, Lower OP, Upper OP and all Covers removed.