DIRECTION 5750007-1EN, REV. 1 LOGIQ E10 BASIC SERVICE MANUAL
8 - 234 Section 8-10 - Casters and Brakes replacement
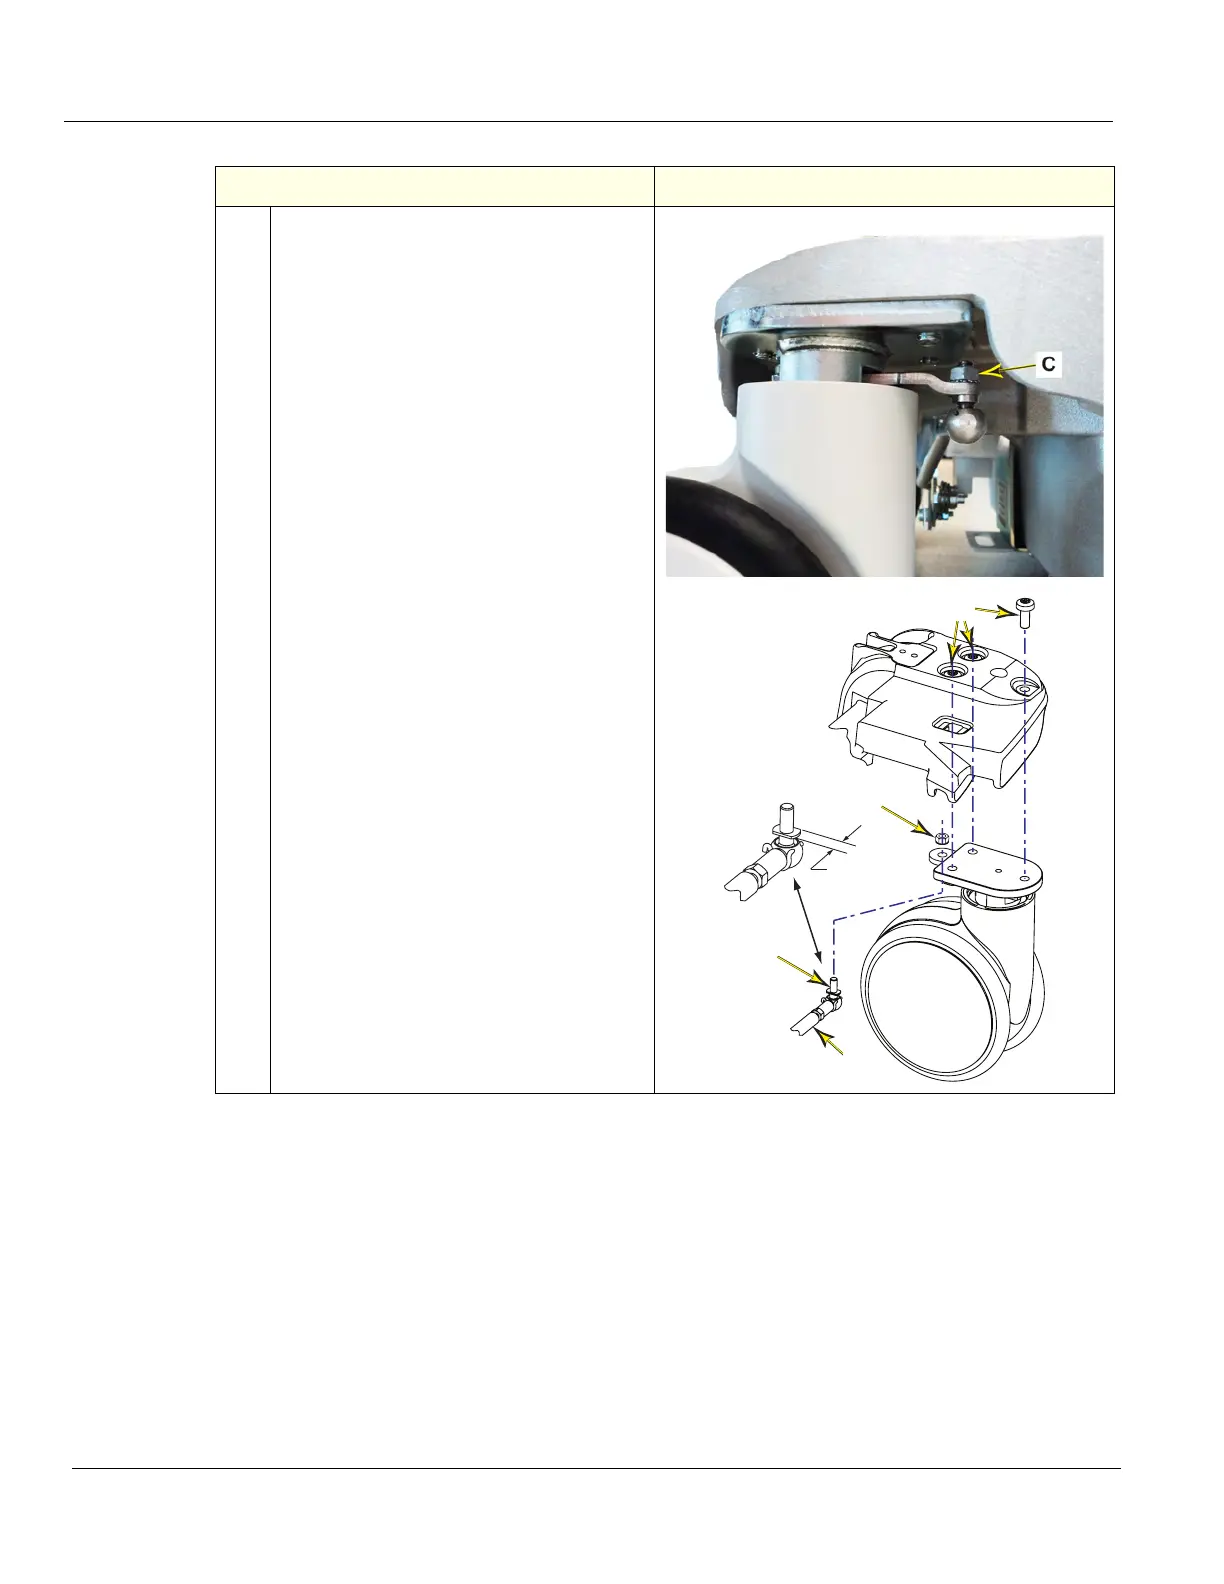
6.
Remove the 10 mm nuts (C) securing the
Brake Lock-release Rod Assembly (D) to
the Caster. DO NOT discard the nuts.
NOTE: DO NOT change the distance of the
the ball joint studs (E), they MUST BE
returned at the same distance they were
removed. Changing the distance, will affect
the brakes.
If the ball joint stud rotates when removing
the 10 mm nuts, apply slight pressure to
the Brake Rod Assembly or the ball joint
stud has an 8 mm flat that can be held with
an 8 mm wrench.
Unscrew and remove the three screws (F),
using a 6 mm hex wrench for the Front
Caster that is free from the floor. DO NOT
discard the screws.
Remove the Caster.
Table 8-255 Front Caster(s) removal
Steps Corresponding Graphic
F
C
D
E
8 mm