Administrator Mode
31
5
6 Move
Select a camera and click Move to move the camera to
another channel.
7 Max Camera Number
Use the drop-down list to select the maximum number of
camera to be displayed in a page.
8 Information
Shows the number of GV-IP Camera and third-party camera
supported by the USB dongle inserted.
9 Working Camera List
Shows the cameras to be connected and recorded when the
GV-Recording Server is enabled.
10 Export Exports the camera connection information to an .hlt file.
11 Import
Locate a previously exported .hlt file and import the camera
connection information.
12 Save Saves the current settings.
13 Reload Reloads the page.
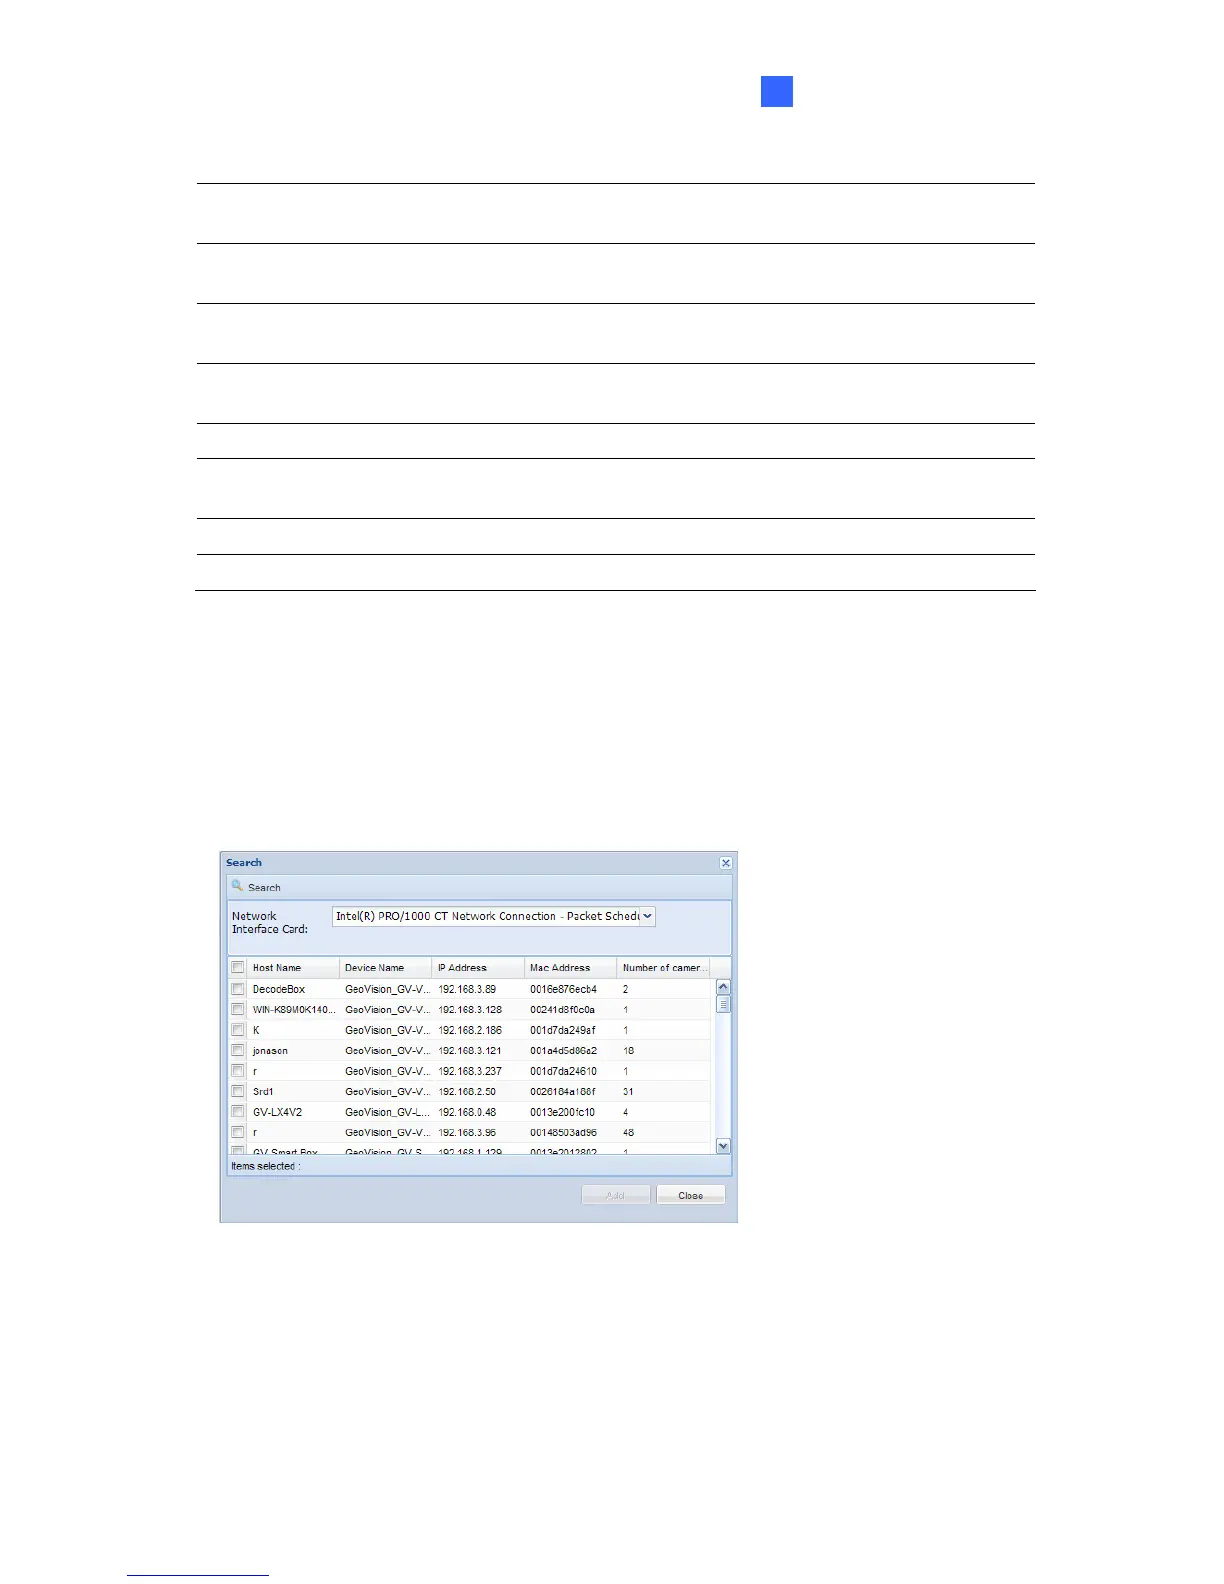
There are three ways to add cameras to the Working Camera List:
To add cameras using the Search function:
1. Click the Search button.
2. In the dialog box, select a network interface card if you have more than one and click the
Search button again. IP devices in the LAN will be detected.
Figure 5-9
3. Select IP devices and click Add to add the cameras to the Working Camera List.
 Loading...