86
3. Type the IP address or domain name of the GV-Recording Server. Keep default HTTP
port as 80 or change to match the HTTP port configured in GV-Recording Server. Type
the client’s username and password created on the GV-Recording Server. Select GV-
Video Gateway / GV-Recording Server from the Device drop-down list. This dialog box
appears.
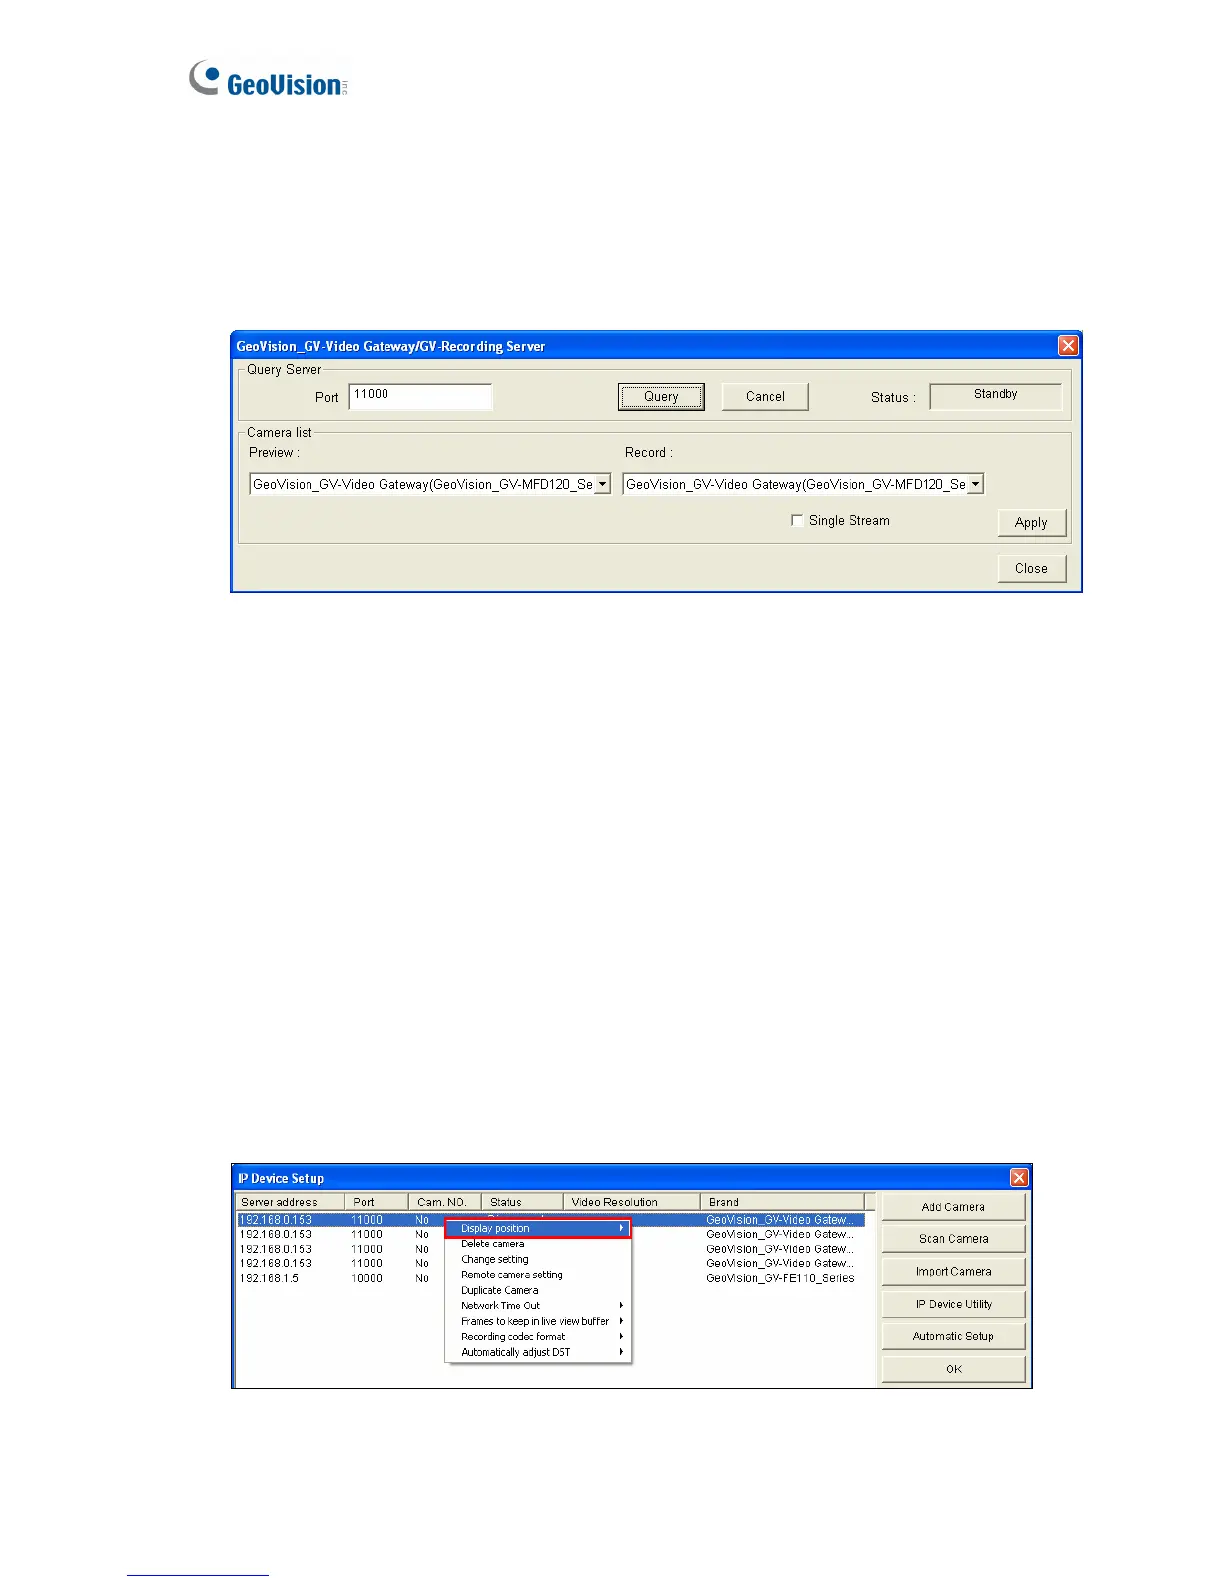
Figure 7-3
4. Keep the default communication port of GV-Recording Server as 11000, or modify the
value to match the TCP/IP port on the GV-Recording Server (Figure 5-21). Click the
Query button to attempt connection to the GV-Recording Server. When the connection
is established, the camera options will be displayed in the Preview and Record drop-
down lists.
5. Select one camera to be connected. The selections in the Preview and Record drop-
down lists will be the same.
6. Click Apply. The IP camera is added to the list.
7. To add another IP camera from the GV-Recording Server, click the Add button and
follow steps 2 to 6. The number of IP cameras you can add is depended on your GV-
System’s capacity.
8. Click the listed camera, and select Display Position to map the IP camera to any
channel on the GV-System. After the mapping is completed, the Status column will
display “Connected”.
Figure 7-4
 Loading...