Do you have a question about the GMP PROTOPIC AUTO-540 HS and is the answer not in the manual?
Defines safety symbols like Warning and Caution, emphasizing user safety and property prevention.
Safety guidelines related to electrical connections, including wet hands, overloading, and voltage.
Highlights the importance of grounding and risks associated with static electricity and improper plug handling.
Covers safety during installation, like avoiding flames, sealed areas, and keeping body parts away from moving parts.
Addresses safety during operation, moving, and handling, including sharp blades and hot rollers.
Explains the purpose, location, and operation of the Emergency Stop Switch.
Describes the safety cover for the laminating roller to prevent burns.
Details the switch that protects the feeding device from table damage.
Details various warning stickers attached to the machine for user safety during operation.
Lists all components and accessories included in the product package.
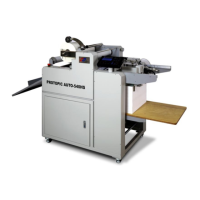
Identifies and illustrates major components like the Perforator, Film Shaft Holder, and Control Panel.
Illustrates and names components of the feeder and rewinder systems, including shafts and adjustment knobs.
Identifies additional key components such as the Bursting Roller and Power Switch.
Step-by-step instructions for safely unpacking the machine from its packaging.
Provides instructions and conditions for moving the machine, including forklift usage.
Details the procedure and precautions for moving the machine using its caster wheels.
Explains the function and adjustment of the leveling feet for machine stability.
Specifies ideal installation conditions, including flatness, ventilation, and avoiding flammable substances.
Provides a diagram and dimensions for the necessary installation and working space.
Details the required power voltage, frequency, and current for the machine.
Illustrates and identifies the power plug and socket connections, including wiring.
Shows the wiring diagram for connecting the power cable to the switchboard.
Provides critical safety warnings regarding electricity consumption, grounding, and connection practices.
Explains the procedure for connecting the air compressor for essential machine functions.
Details the purpose and connection steps for the vacuum pump used in substrate feeding.
Introduces the Main Screen, Sub Screens, and their respective display contents like JOB and temperature.
Provides detailed explanations for each item displayed on the control panel screen.
Explains the status displays for motors, switches, and sensors shown on Sub-Screen 1 and 2.
Details the functions of various buttons on the control panel, including RUN, STOP, REVERSE, and INCHING.
Explains the functions of the SCREEN converter, FEEDER controls (RUN, HOME), and BURST position adjustment.
Details how to adjust speed, operate the upper roller (ON/OFF), and set temperature (CONTROL section).
Explains the JOB mode selection, substrate length setting, table movement, and LCD display.
Lists and explains error messages appearing on the main screen, such as COM1, COM2, and LAMI DRIVE ALARM.
Details drive-related alarms and errors for limits, emergency stops, and open covers.
Lists error statuses and normal status as displayed on the sub-screens.
Explains the messages and conditions for stand-by and power off modes.
Describes the function and installation of the separator, blower, and blast foot in the feeding area.
Explains the purpose of the rear guide and pick up cup for substrate handling.
Details how to adjust the feeder's position using the fixing knob and height adjustment knob.
Explains the misfeeding sensor and the function of the feeding wheel and brush.
Describes the substrate stopper for alignment and the substrate alignment process.
Details the function of the substrate guide and the feeding table for substrate placement.
Explains how to adjust the pressure on the laminating roller using the pressure controller.
Details how to adjust the decurling device to prevent curling on laminated results.
Explains how to adjust the perforator for easy cutting of laminated results.
Describes the function of the skewing wheel to improve cutting quality.
Illustrates the structure of the film shaft, including its components.
Provides step-by-step instructions for loading the laminating film roll onto the shaft.
Specifies the correct positioning of the film relative to the substrate for optimal results.
Explains the operation of the side slitter and rewinder for adjusting film width.
Describes the main power switch operation and the utility of the tray table.
Details the installation method for the sleeking idle bar for various sleeking operations.
Outlines the initial steps for preparing the machine and substrates for lamination.
Explains how to properly stack substrates on the feeding table to prevent errors.
Details feeder setup, including height adjustment and positioning for optimal feeding.
Guides on setting paper length and roller temperature via the control panel.
Step-by-step instructions for loading the film roll onto the laminator shaft.
Covers the test lamination process, checking feeding, and setting up perforators.
Details setting the perforator position and activating the bursting function.
Provides checks for overlap, curling, adhesion, cutting, and speed adjustment after testing.
Instructions for cleaning the laminating rollers using isopropyl alcohol after use.
Guidelines for cleaning the exterior of the machine using a smooth, dry cloth.
Addresses problems with the feeding table not moving and substrates not feeding correctly.
Covers issues like feeding multiple sheets, feeding crookedly, and operation stopping due to errors.
Troubleshoots problems related to the laminating roller, temperature, adhesion, and film cutting.
Addresses common issues with laminated results like wrinkles, curling, shrinkage, and irregular speed.
Troubleshoots problems with the bursting roller, cutting quality, and general machine operation.
Lists the overall dimensions and substrate size limitations of the Protopic Auto-540 HS.
Details key performance specs like speed, thickness range, films used, and component specifications.
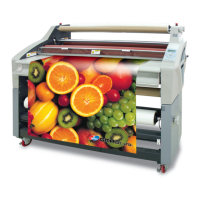
Introduces the capabilities of digital sleeking for adding value to prints.
Categorizes different types of sleeking foils available for various finishes.
Details the process and required conditions for applying gloss and matt finishes using specific foils.
Explains the process for applying a gloss or matt finish to the entire page.
Describes the process for applying gloss or matt finishes to specific areas of a print.
Details the procedure for applying spot gloss/matt finishes combined with lamination.
Explains the process and conditions for applying hologram finishes using specific foils.
Details the process for applying a hologram finish to the entire page.
Describes the process for applying hologram finishes to specific areas of a print.
Explains the procedure for applying spot hologram finishes combined with lamination.
Details the process and conditions for applying spot metallic finishes using specific foils.
Describes the process for applying spot gold or silver metallic finishes to prints.
Lists various types of sleeking films, including metallic, single color, multi color, and hologram foils.
Details specific hologram sleeking foils, including PET and UV types with their core sizes.