Programming Tekna Plus monitors from a general entrance door panel (SW1-1 ON):SE
AUDIO AND VIDEO DOOR ENTRY SYSTEM - CODED DOOR PANEL
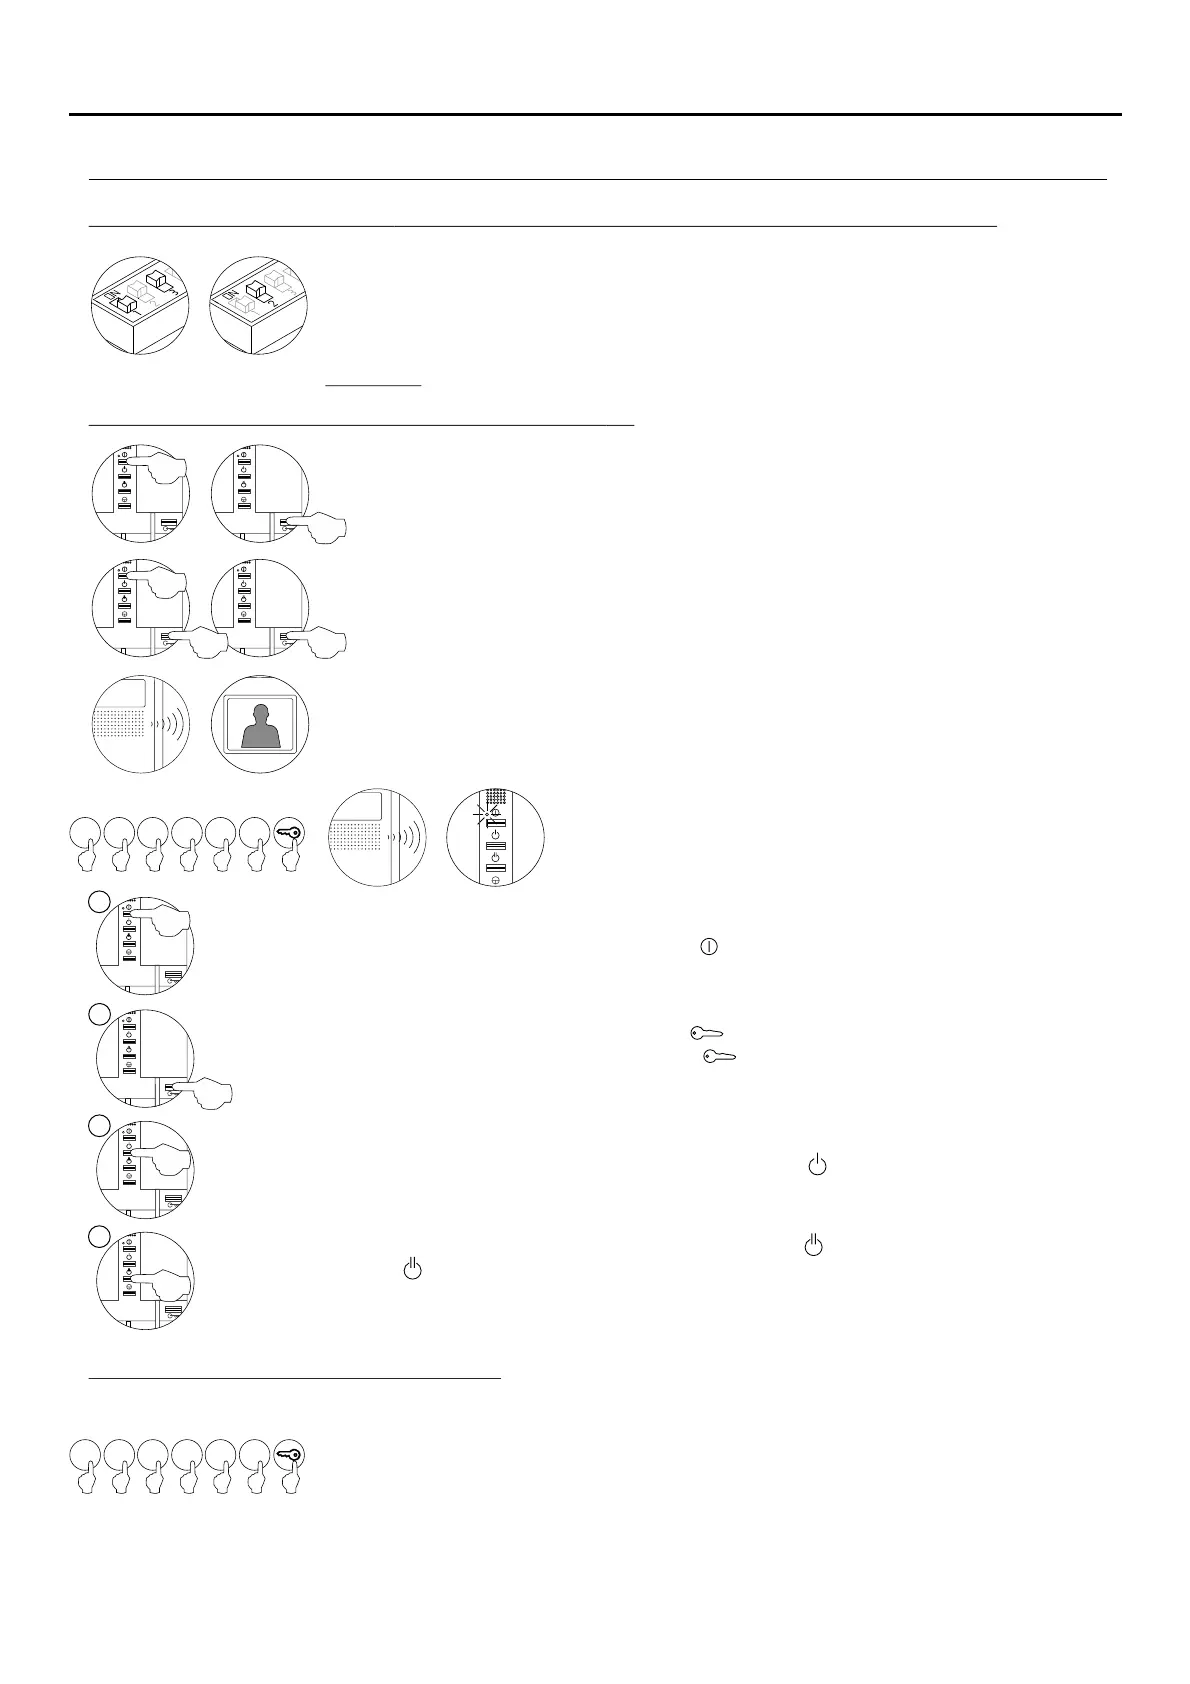
PROGRAMMING THE MONITORS - GENERAL ENTRANCE DOOR PANEL ONLY
Switch off the monitor to be programmed.
Once the telephone is off, press the door release push button.
With the door release push button pressed, switch on the monitor.
To show that the system is ready for programming, the door panel will reproduce a sound
and the picture will appears on the monitor. At this moment, the door release push button
can be released. Lift the handset to establish audio communication with the door panel.
Enter the code of the monitor to be programmed, followed by
the key button.
At this moment the door panel will reproduce a sound and
the monitor led will blink.
Each apartment must only have one master unit; if there are parallel units, whether monitors or telephones, they must be
configured as slaves.
Make a call to check that the monitor has been successfully programmed. Programme the
other telephones in the same way.
Once the programming has finished, set the programming switch to OFF. If this is not done,
the door panel will emit tones to indicate that the system is still in programming mode.
To programme the monitor from a inner door panel, see p. .85
52
86
Locate the SW2 DIP switch on the general entrance door panel situated on the top left-hand
side of the back of the sound module. With switch 1 OFF and switch 3 ON, set switch 2 to ON:
the general entrance door panel will emit a tone indicating that it has entered programming
mode.
In systems with more thanone door panel, only carry outthis procedure on the main door panel.
Important: .To perform this programming, the monitor's SW2 DIPswitches should be set to OFF
Note: The call code from a general entrance door panel consists of the or building code + the code of thebackbone
apartment to be programmed:
: 1 - 254Backbone
Apartment:0 - 999
1100
521100
M
S
SI
SV
To programme the monitor as , press button for 3 secondsMaster .
To programme the monitor as , press button once, and the status LED will blink green once.Slave 1
Continue successively to , pressing button four times, with the status LED blinking greenSlave 4
four times.
To programme the monitor as , press button and the status LED will blink greenSlave with intercom
once.
To programme the monitor as , press button and the status LED will blink greenSlave without video
once. If button is pressed again, the monitor will return to being programmed as ,Slave with video
and the status LED will blink green twice. The door panel video will be displayed during a call depending
on whether the monitor has been programmed as: Slave with video or Slave without video.

 Loading...