GSI Audera Pro User Manual
D-0129360 Rev A Page 188 of 231
Attaching Eartips
The Audera Pro instrument comes with a box of disposable, single use eartips that fit a
variety of ear canal sizes. The Audera Pro probe must have a probe tube applied and an
eartip attached before inserting it into an ear canal. The determination of the
appropriate eartip size should be made by persons with proper training and experience.
The eartip must seal the ear canal. The best test results are obtained when the eartip is
inserted deeply into the ear canal instead of flush with the ear canal opening. Caution
must be taken, however, to ensure that the eartip does not extend too deeply into the
ear canal. Use only the eartips approved for use with the instrument. The eartips are
disposable and must be replaced after each patient.
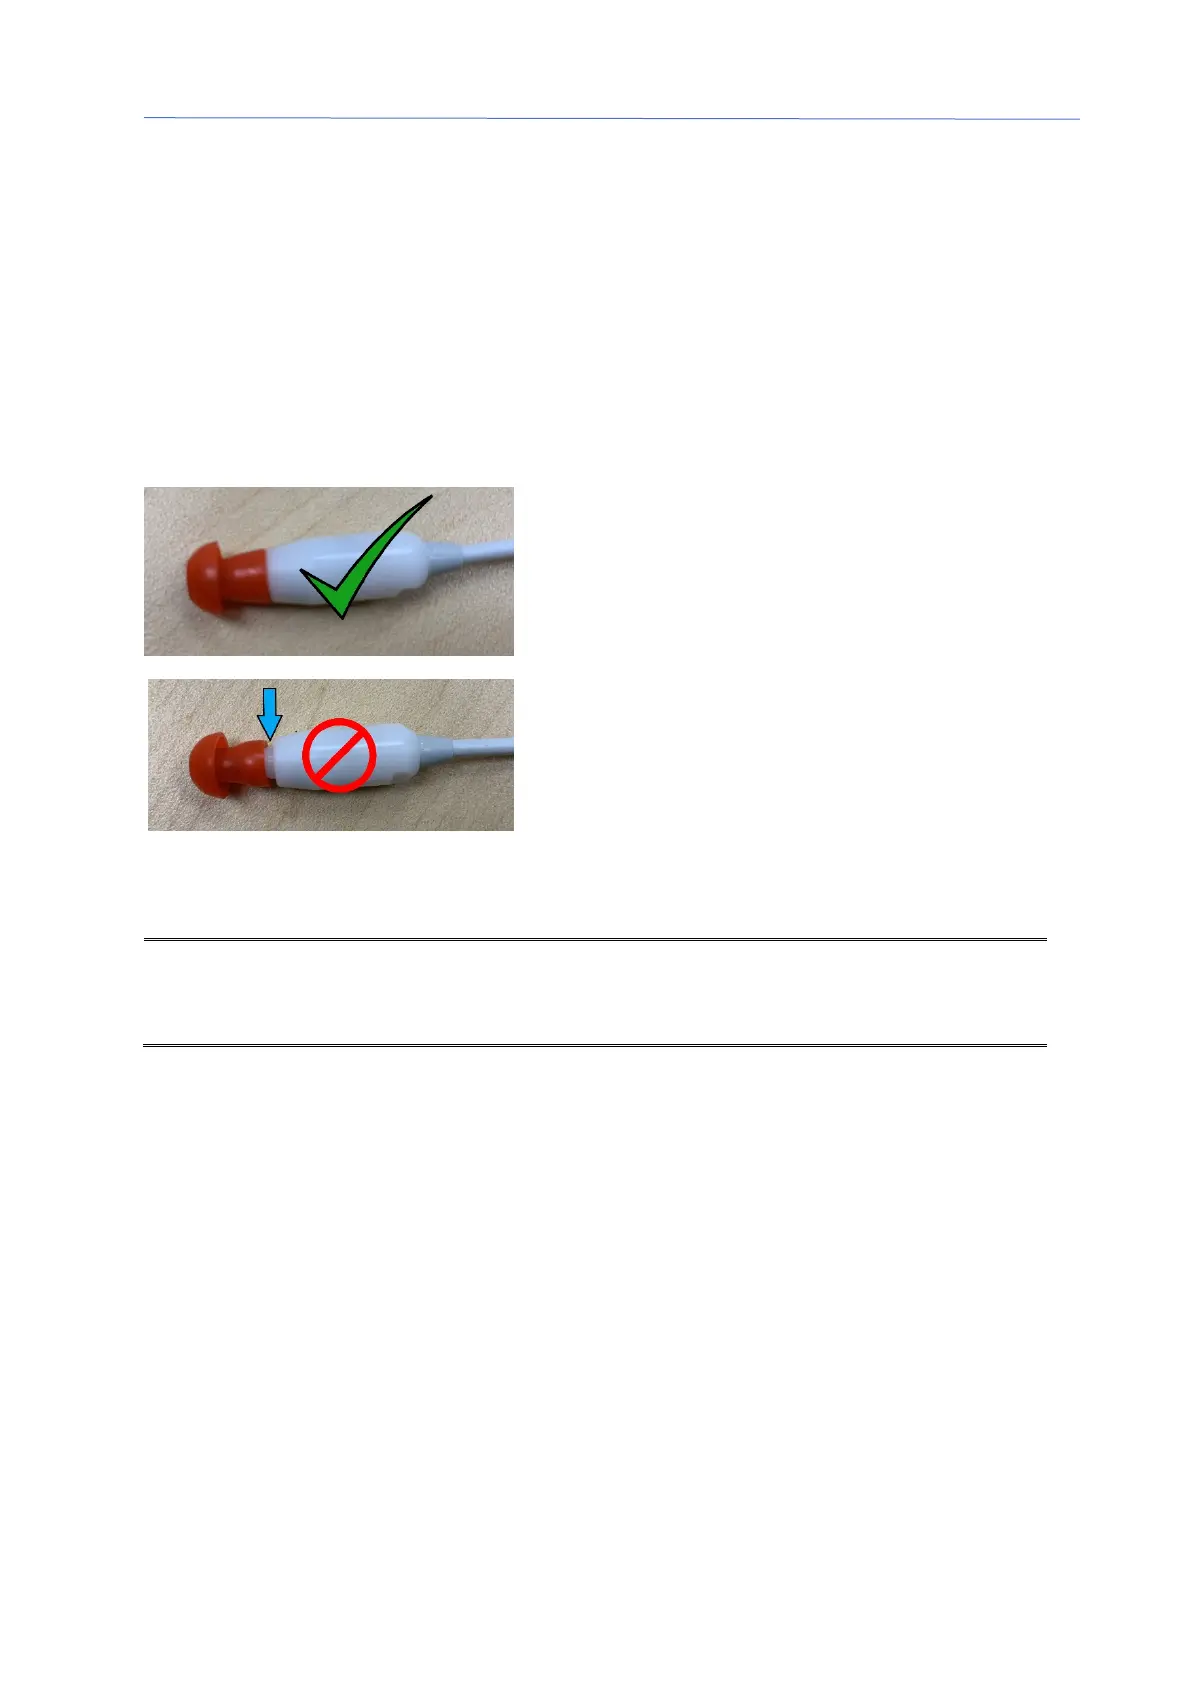
After selecting an eartip, push it onto the probe
tube until it is flush against the base of the probe
tube. Twisting the eartip slightly while pushing it
onto the probe tube is recommended. Be sure
the eartip is fully seated on the probe.
There should be no gaps between the eartip and
the collar of the probe head.
To remove the eartip, grasp the eartip gently at
the base and twist it while pulling it straight off the
end of the probe tube.
If the probe tube becomes dirty or clogged, it must be replaced. See the section Probe
Tube Replacement for further information.
: Grasping the base of the eartip will prevent the probe tube from being
inadvertently pulled out of the probe head along with the eartip.
Changing Insert Earphone sound tubes
Follow the instructions provided in the sound tube package.