GSI Audera Pro User Manual
D-0129360 Rev A Page 89 of 231
on the Page control. To select multiple waveforms, hold the Ctrl key and click on the
waveforms you want to select.
Labeling Peaks
The current labels that are used to mark the peaks of a waveform are displayed as
buttons on the Toolbar. The set of labels is determined by the auditory modality
currently active (Protocol, Modality) when the data was collected and saved. You may
mark the peaks with labels using the Toolbar or from the Waveform Options menu.
To mark a peak, select the waveform making it the active waveform. Using the Toolbar,
click the label button that you wish to use. Then click above or below the peak on the
active waveform where you want the label placed. Using the Waveform Option menu,
right click above the peak on the active waveform where you want the label placed.
From the pop-up menu select Mark Peak and then the label you wish to use.
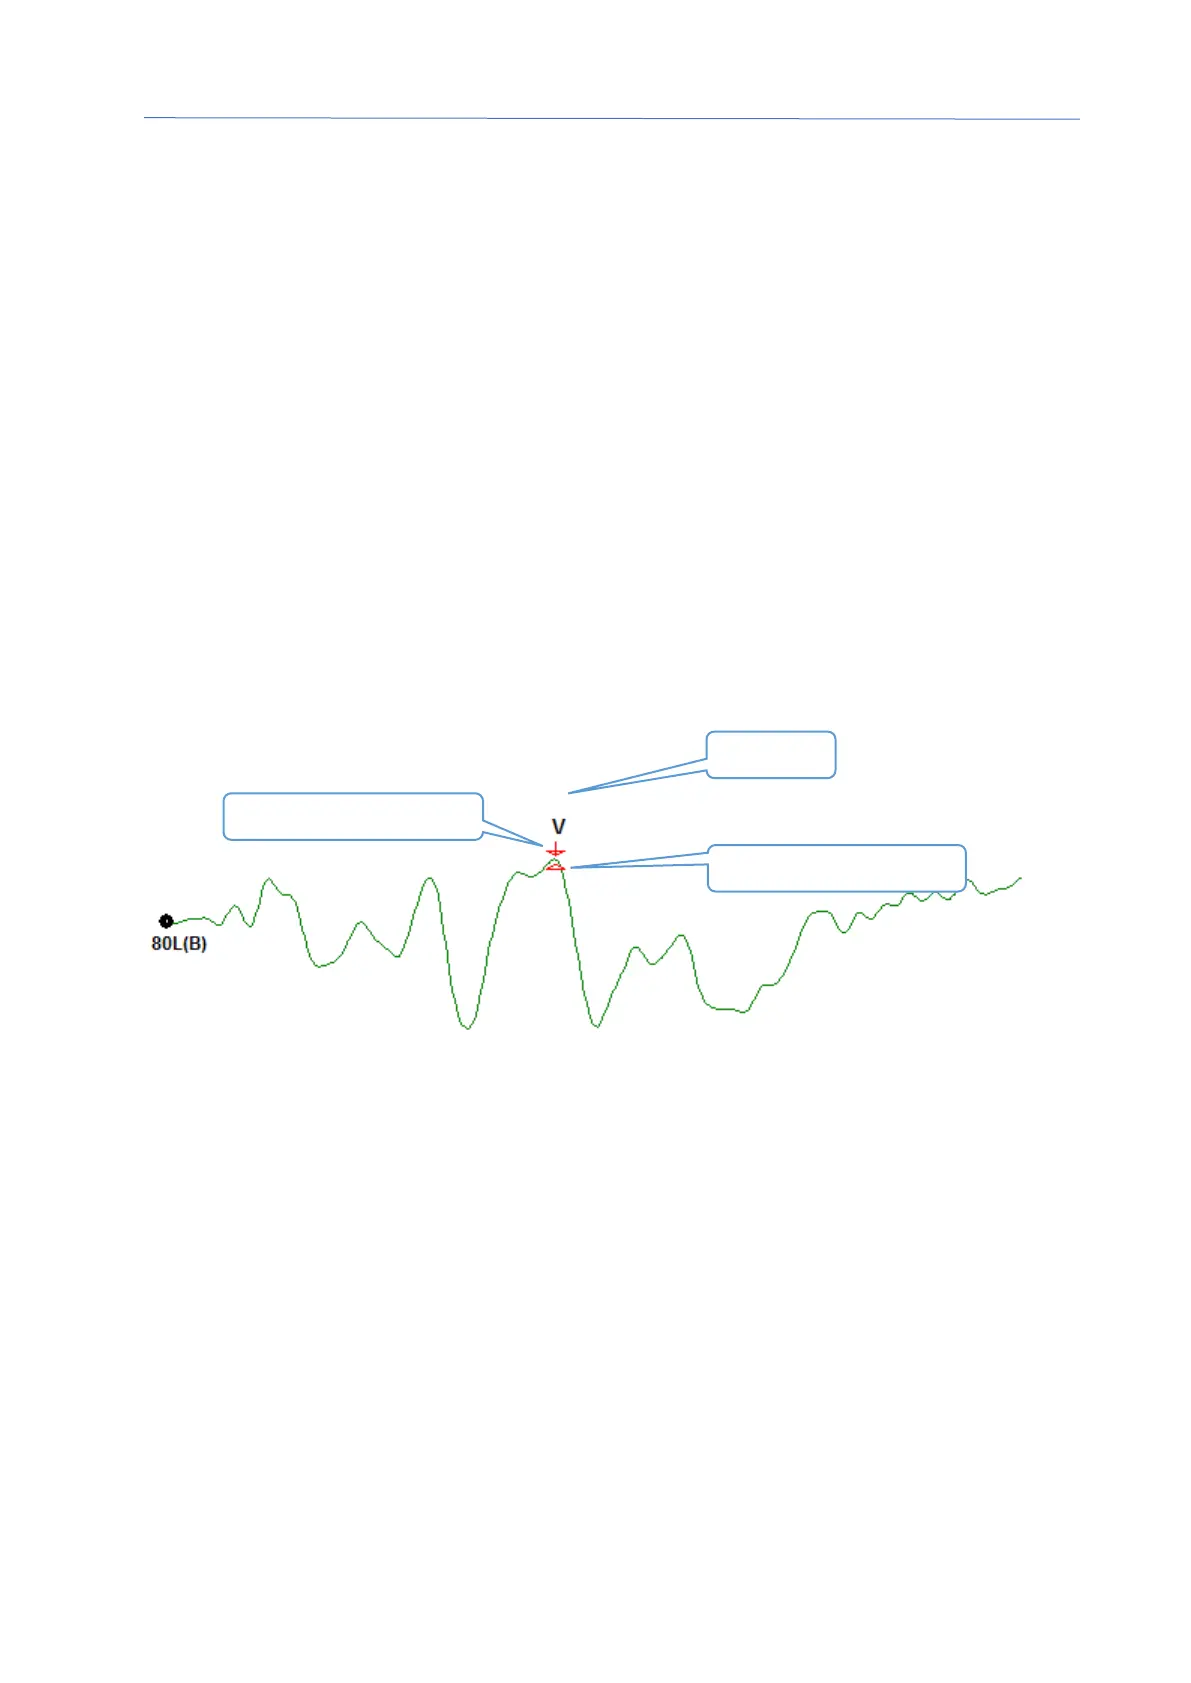
A marked point consists of three parts. The label and two peak indicators. The label is
the text above the peak and the peak indicators are displayed as a down arrow and
triangle. The top mark is used for the latency measurement. The bottom mark is used
to calculate the amplitude of the peak based on the difference between the top and
bottom marks.
When the peak is initially marked, the peak indicators are placed at the same point on
the waveform. When a mark is active, the arrow and triangle will be colored red. When
a mark is not active you can click on mark to make the label active. To move the mark,
you can left click and hold the marker and drag to the appropriate location or you may
use the keyboard (see table).


 To Next Page