49
Operation
96-8000 rev R June 2007
Offsets can also be entered manually by choosing one of the offsets pages, moving the cursor to the desired
column, typing a number and pressing Write or F1. Pressing F1 will enter the number in the selected column.
Entering a value and pressing Write will add the amount entered to the number in the selected column.
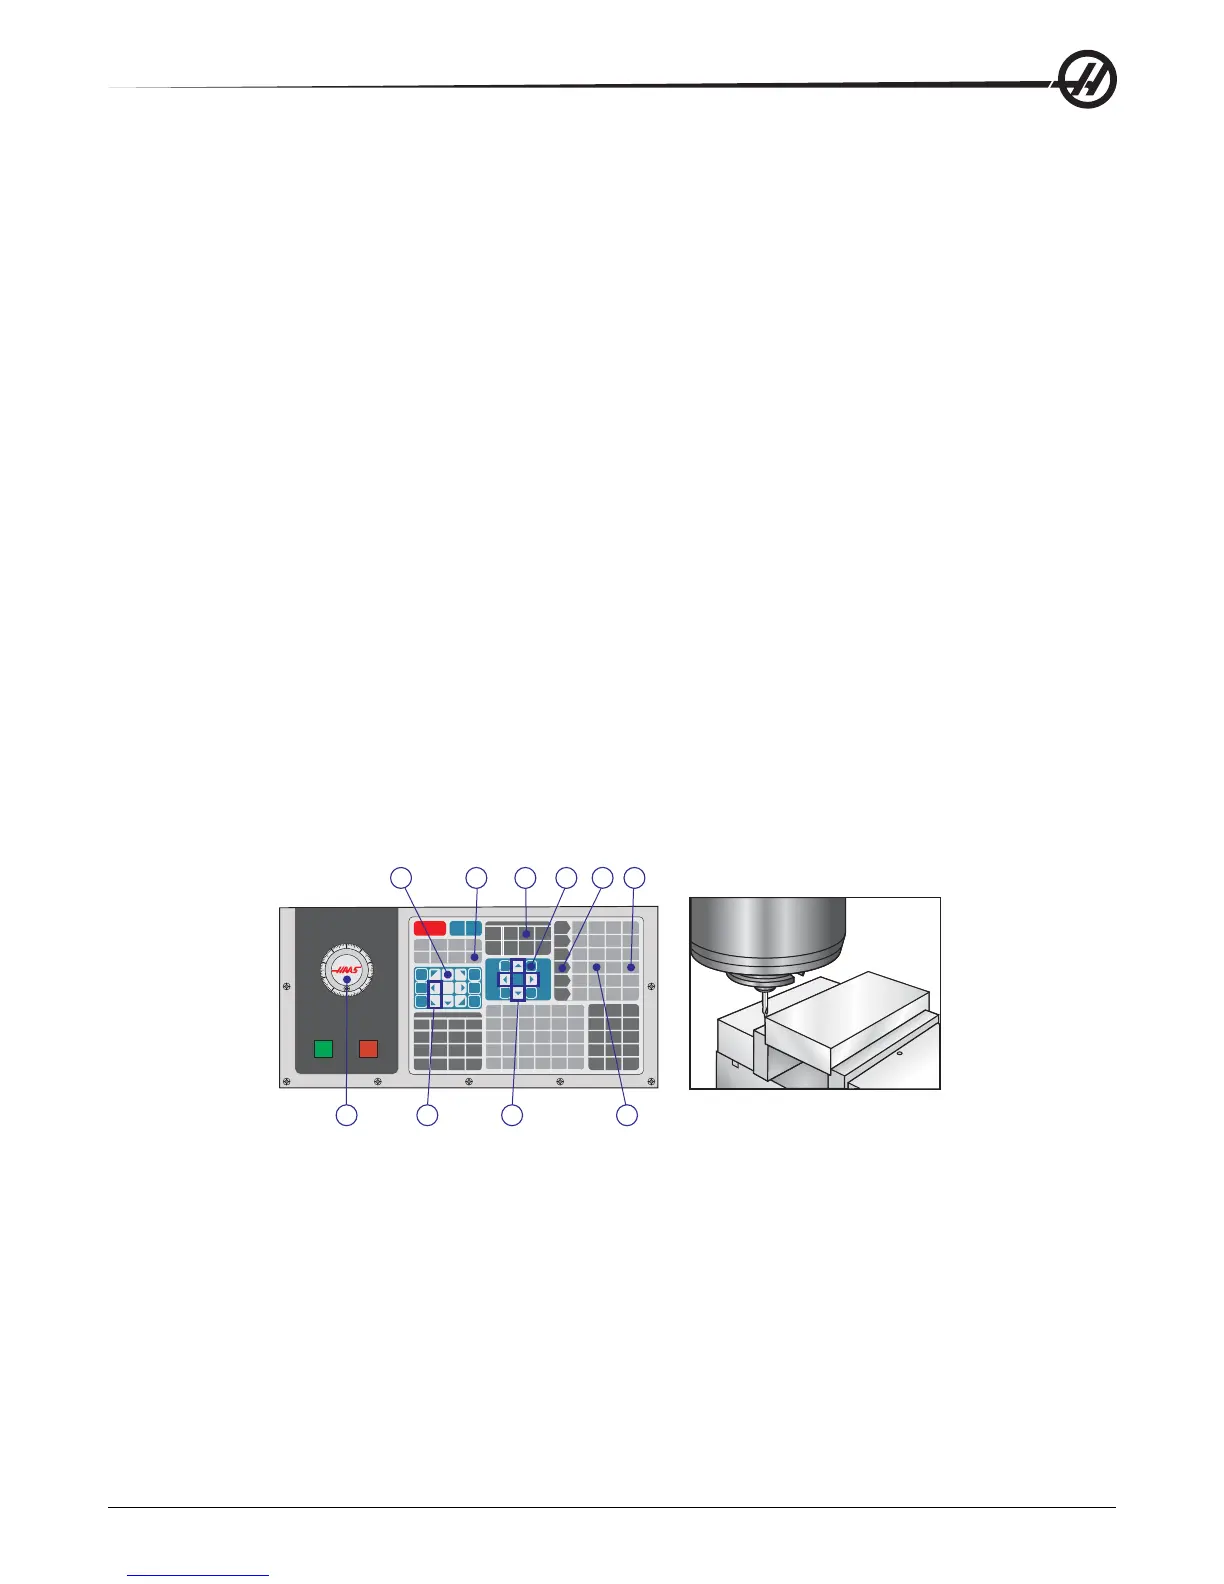
Typical Work Offset Set-up
1. Place the material in the vise and tighten.
2. Load a pointer tool in the spindle .
3. Press Handle Jog (A).
4. Press .1/100. (B) (The mill will move at a fast speed when the handle is turned).
5. Press +Z (C).
6. Handle jog (D) the Z-axis approximately. 1" above the part.
7. Press .001/1. (E) (The mill will move at a slow speed when the handle is turned).
8. Handle jog (D) the Z-axis approximately. 0.2" above the part.
9. Select between the X and Y axes (F) and handle jog (D) the tool to the upper left corner of the part (See the
following illustration).
10. Press Ofset (G).
11. Press Page Up (H) repeatedly until the Work Zero Offset Page displays.
12. Cursor (I) to G54 Column X.
13. Press Part Zero Set (J) to load the value into the X-axis column. The second press of Part Zero Set (J) will load
the value into the Y-axis column.
CAUTION! Do Not Press Part Zero Set a third time; doing so will load a value into the Z-axis. This will cause a
crash or Z-axis alarm when the program is run.
Spindle at top left of the front
A
D
F
H
B
EI
C G
J
Setting the Tool Offset
The next step is to touch off the tools. This defines the distance from the tip of the tool to the top of the part.
Another name for this is Tool Length Offset, which is designated as H in a line of machine code; the distance for
each tool is entered into the Tool Offset Table.
1. Load the tool in the spindle.
2. Press Handle Jog (A).
3. Press .1/100. (B) (The mill will move at a fast rate when the handle is turned).
4. Select between the X and Y axes (C) and handle jog (D) the tool near the center of the part.
5. Press +Z (E).
6. Handle jog (D) the Z axis approximately 1" above the part.