51
Operation
96-8000 rev R June 2007
Advanced Tool Management
Introduction
Advanced Tool Management (ATM) allows the programmer to setup and access duplicate tools for the same
or a series of jobs. The ATM page is located in the Current Commands mode (Press Current Commands button and
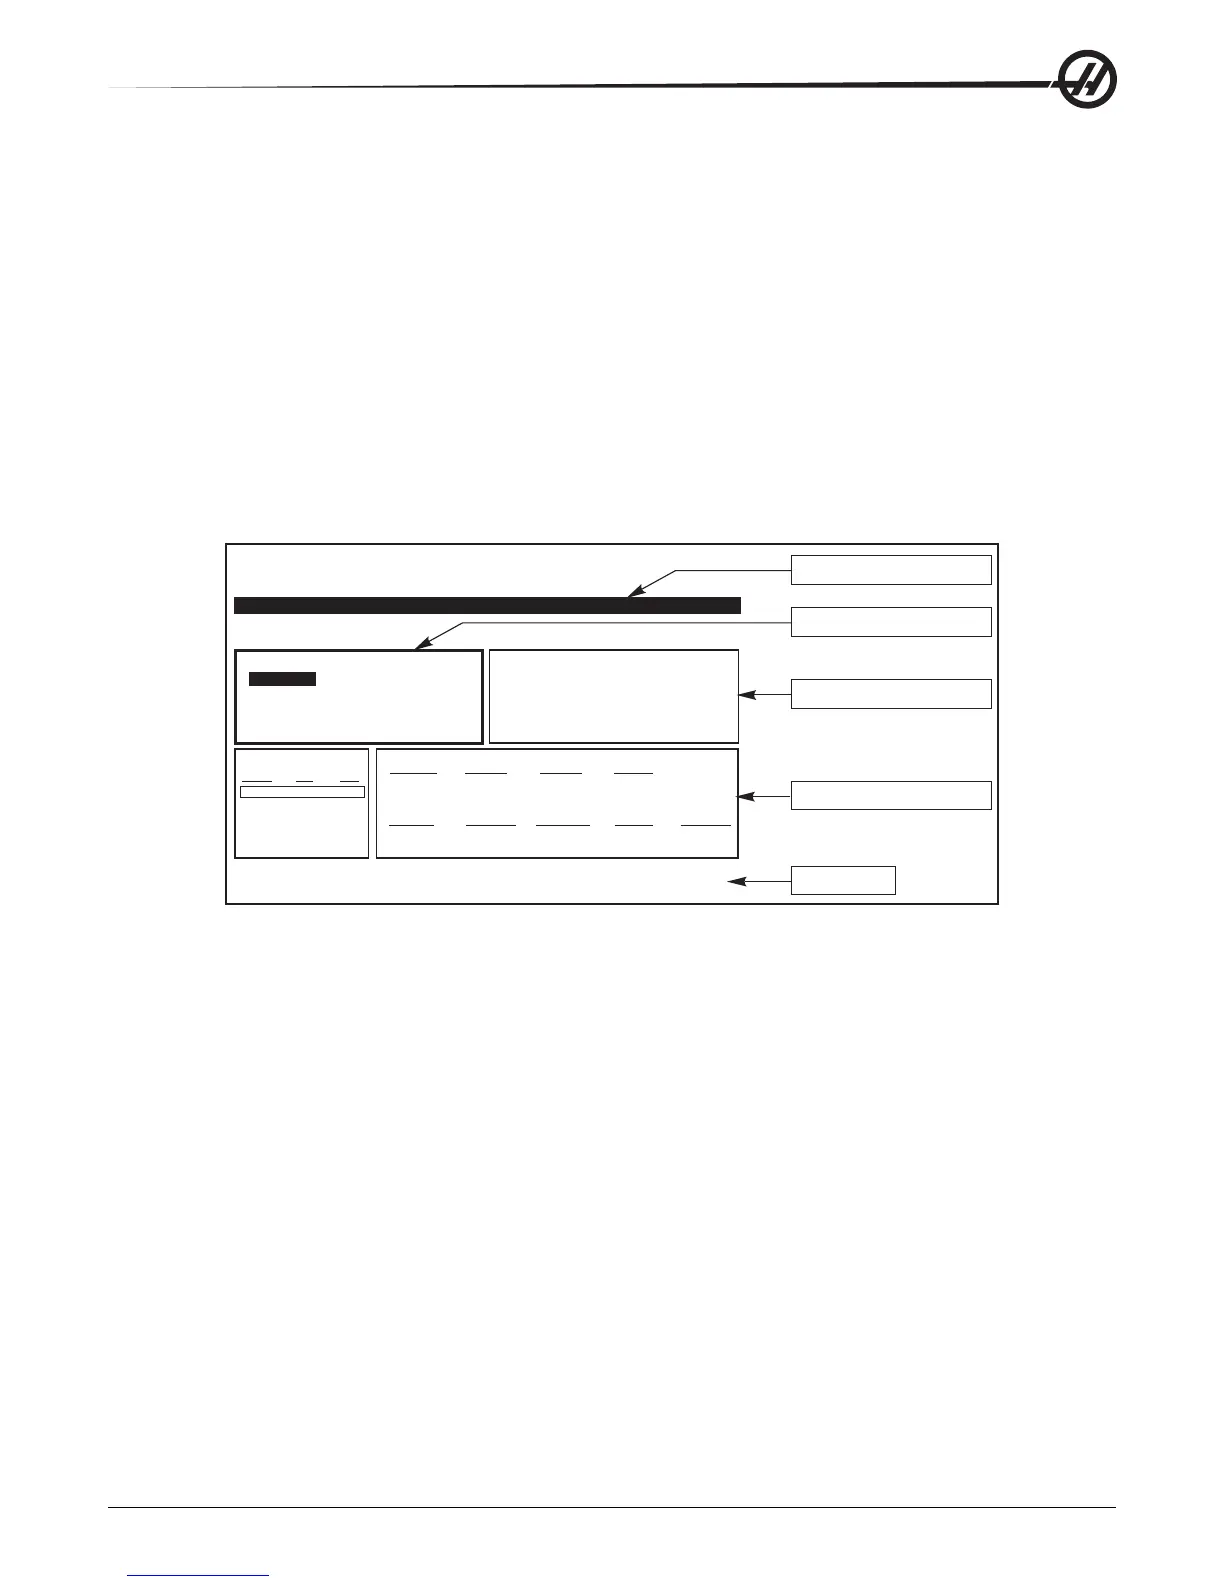
page up once). A sample of the ATM screen follows; the screen has “TOOL GROUP” in the title.
Duplicate or backup tools are classified into specific groups. The programmer specifies a group of tools instead of a
single tool in the G-code program. ATM will track the usage of individual tools in each tool group and compare it to
user defined limits. Once a limit (e.g. number of times used, or tool load) has been reached the mill will automati-
cally choose one of the other tools in the group the next time that tool is needed.
To activate ATM, make sure that Setting 7 (Parameter lock) is off and press E-stop. Under Parameter 315, bit 28,
change the value from “0” to “1” and press F4 to switch between windows. Use the cursor keys (left, right, up,
down) to move to different items inside the active window. Pressing the Enter key will select, modify or clear values
in each item depending on the selection.
The bottom right corner displays simple help information for selected items.
<NEXT> <ADD> <DELETE>
DESCRIPTION:
IN ORDER
FEED TIME:
HOLES:
TL IN SPINDLE 1
TOOLS EXP LIFE
0
0
0
0
0
0
CRNT PKT
COMMAND
(
MEM
)
O00000 N00000000
(
TOOL GROUP
)
PRESS F4 TO CHANGE ACTIVE WINDOW
Allowed Limits Window
Tool Data Window
Help Text
Tool Group Window
Active Window Label
Press WRITE/ENTER to display
the previous tool groups data
<PREVIOUS>
GROUP ID:
GROUP USAGE:
<RENAME>
1000
<SEARCH>
TL ACTION: ALARM
TOTALTIME:
TOOL LOAD:
USAGE:
0
0
0
0
0
HOLES
0
FEED TIME
TOTAL TIME
H-CODE D-CODE
FLUTES
USAGE
LOAD
Operation
Tool Group
In the Tool Group Window the operator defines the tool groups used in the programs.
PREVIOUS – Highlighting <PREVIOUS> and pressing Enter changes the display to the previous group.
NEXT – Highlighting <NEXT> and pressing Enter changes the display to next group.
ADD – Highlight <ADD>, enter a number between 1000 and 2999, and press Enter to add a tool group.
DELETE – Use <PREVIOUS> or <NEXT> to scroll to the group to delete. Highlight <DELETE> and press Enter.
You will be asked to confirm the deletion; answering ‘Y’ will complete the deletion; answering ‘N’ will cancel the
deletion.
RENAME - Highlight <RENAME>, enter a number 1000 and 2999 and press enter to renumber the group ID.
SEARCH - To search for a group, highlight <SEARCH>, enter a group number and press enter.
GROUP ID – Displays the group ID number.
GROUP USAGE – Enter the order in which the tools in the group are called. Use the left and right cursor keys to
select how the tools are used.
DESCRIPTION – Enter a descriptive name of the tool group.