Iss. a – Translation of the original version
Doc. Ref. : SOUND2.940.001
8.5. CORRECTIVE MAINTENANCE PROCEDURES
8.5.1. Changing the electronic unit
If possible, recover the configuration of the unit before removal, see section 5.8 page 35.
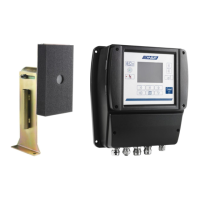
Equipment/consumables
− Unit
Prerequisites/Preliminary operations
− Stop the mill.
− Switch off the SOUND2.
Disassembly if installed in an electrical cabinet
1. Open the cabinet.
2. Disconnect the power connector.
3. Unscrew the 2 screws that hold the bottom cover in place.
4. Remove the 2 screws and the bottom cover.
5. Unscrew the cable gland.
6. Disconnect the 2 wires on connector J1.
7. Remove the microphone cable from the unit by passing it through the cable gland.
8. Remove the unit mounted on the DIN rail.
Disassembly if installed near the mill
1. Disconnect the power connector.
2. Unscrew the 2 screws that hold the bottom cover in place.
3. Remove the 2 screws and the bottom cover.
4. Unscrew the cable gland.
5. Disconnect the 2 wires on connector J1.
6. Remove the microphone cable from the unit by passing it through the cable gland.
7. Remove the 4 mounting screws.
8. Remove the unit.
9. Refit the bottom cover
Installation
1. Take the new unit out of its packaging.
2. Install the new box in accordance with the configuration (cabinet or near the mill), see section
5.2.1 page
25.
3. Connect the power cable to the unit.
4. Unscrew the 2 screws that hold the bottom cover in place.
5. Remove the 2 screws and the bottom cover.
6. Plug the microphone cable into the unit (see section
5.3.2.2 page 28).
7. Power up the SOUND2 (see section
6.4.1 page 38).
8. Insert the SD card into the slot.
9. Press the “Menu” key , then select the “System” menu and press “Enter”.
10. Select the “Parameters” menu and press Enter.
11. Select “Import config from card” and press “Enter”.
 Loading...