60
3. Screw the door frame (1) with the attached lid brace (2) onto the
left hand technical component (3) using the M5 screws and wing
nuts.
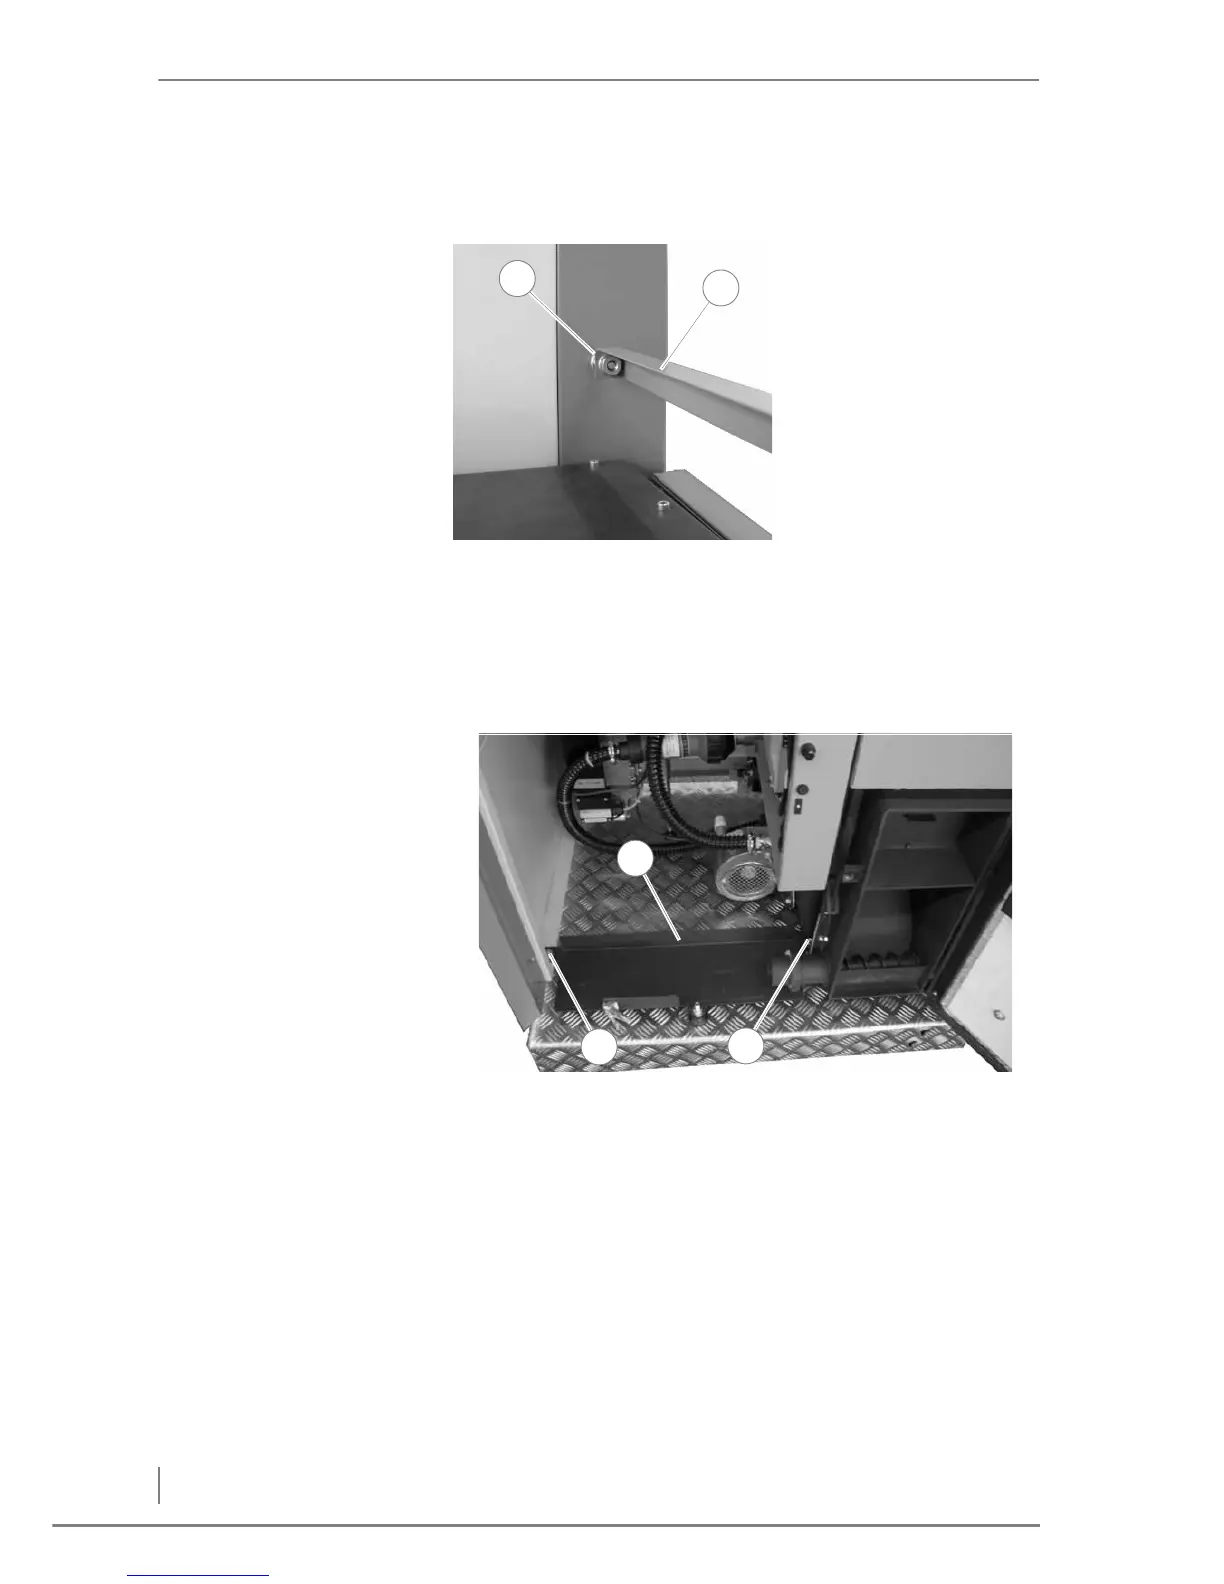
4. Release the first 17 mm nut from the stud bolt (1) on the front part
of the boiler cladding.
5. Attach the lid brace (2) to the stud bolt (1) on the front part of the
boiler cladding and refit the nut.
6. Unscrew the 17 mm nut of the plastic foot (2), front left on the
boiler.
7. Place the bracing and support plate (1) on the stud bolts of the
plastic feet (2 + 3).
Figure 4/41 - Attaching the lid brace