51
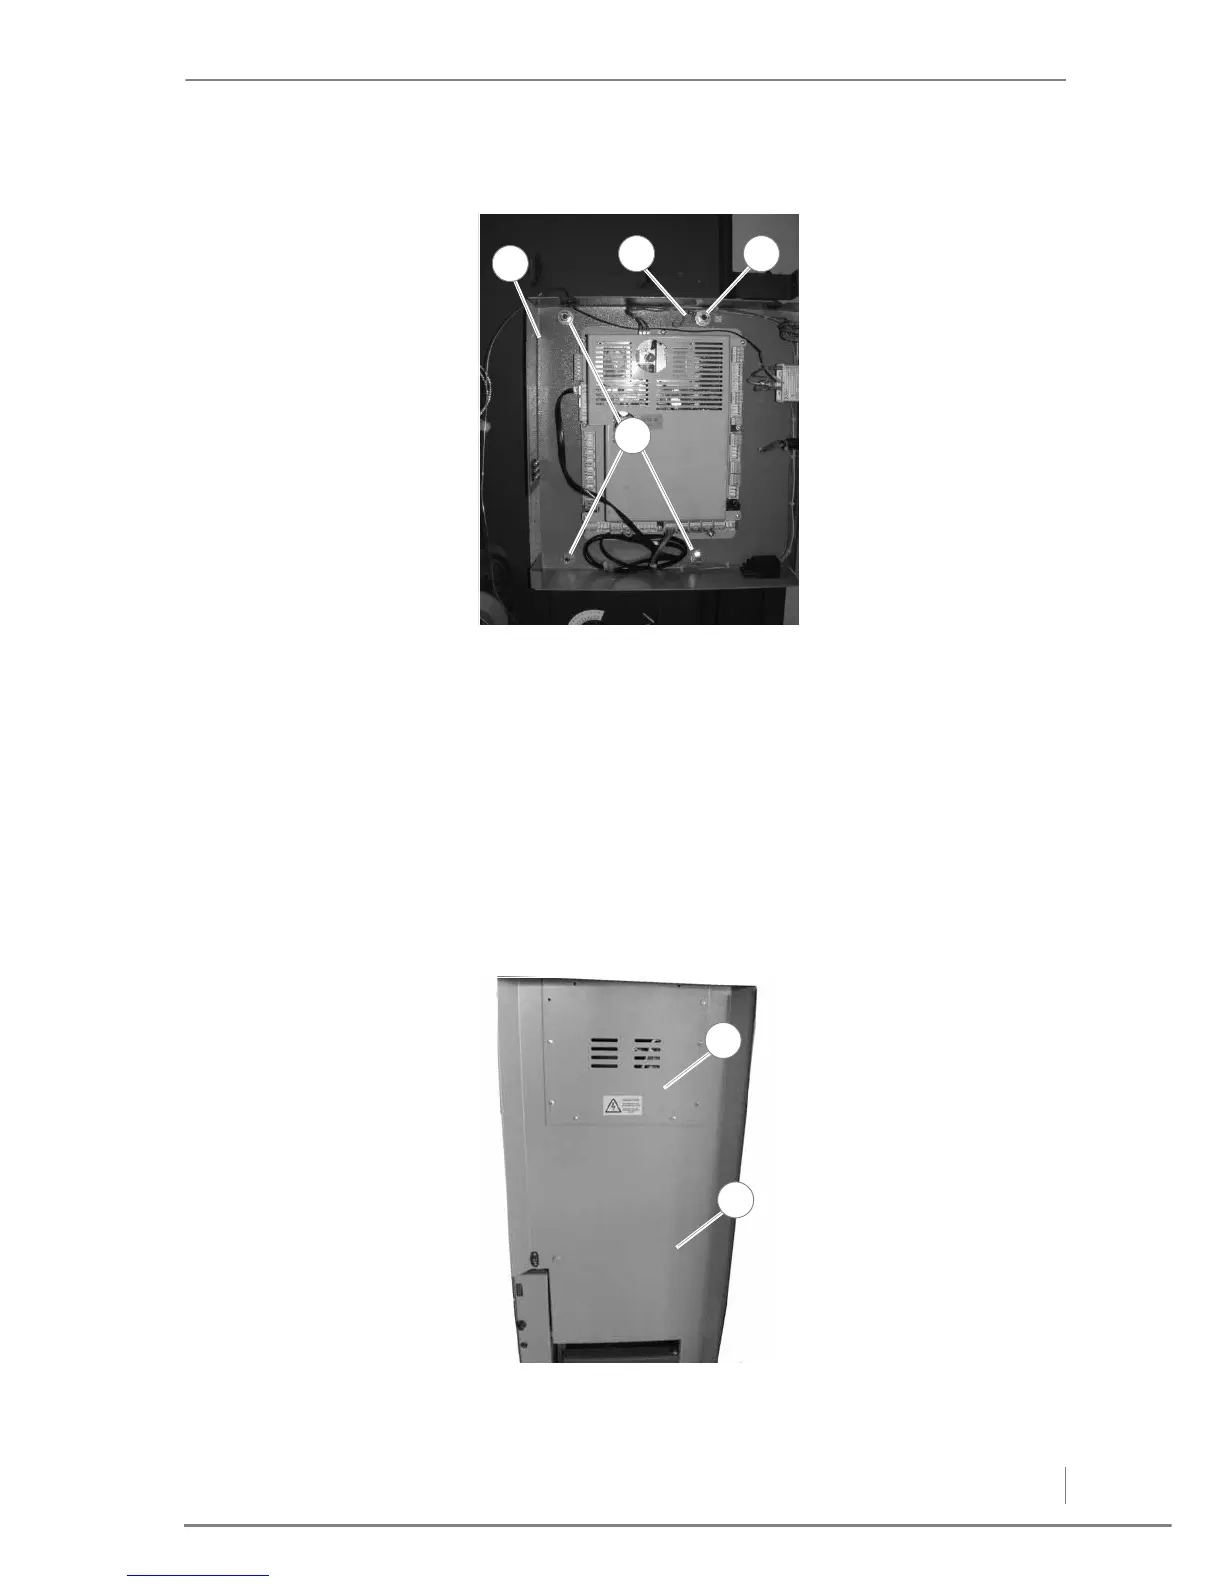
INSTALLING THE CONTROL CABINET
1. Remove the cover plate of the control cabinet.
2. Bolt the control cabinet (1) firmly to the stud bolt (4) on the boiler
using a 13 mm spanner.
3. Insert the green and yellow earth cable (2) against the upper right
stud bolt (3) and screw it tight.
✓ The control cabinet has been installed.
ATTACHING THE BOILER CLADDING
FRONT BOILER CLADDING
1. Remove the pre-mounted flat-headed screws of the front
cladding (2) from the boiler body.
Figure 4/23 - Installing the control cabinet
 Loading...