162
7.3 Delete Stored Data
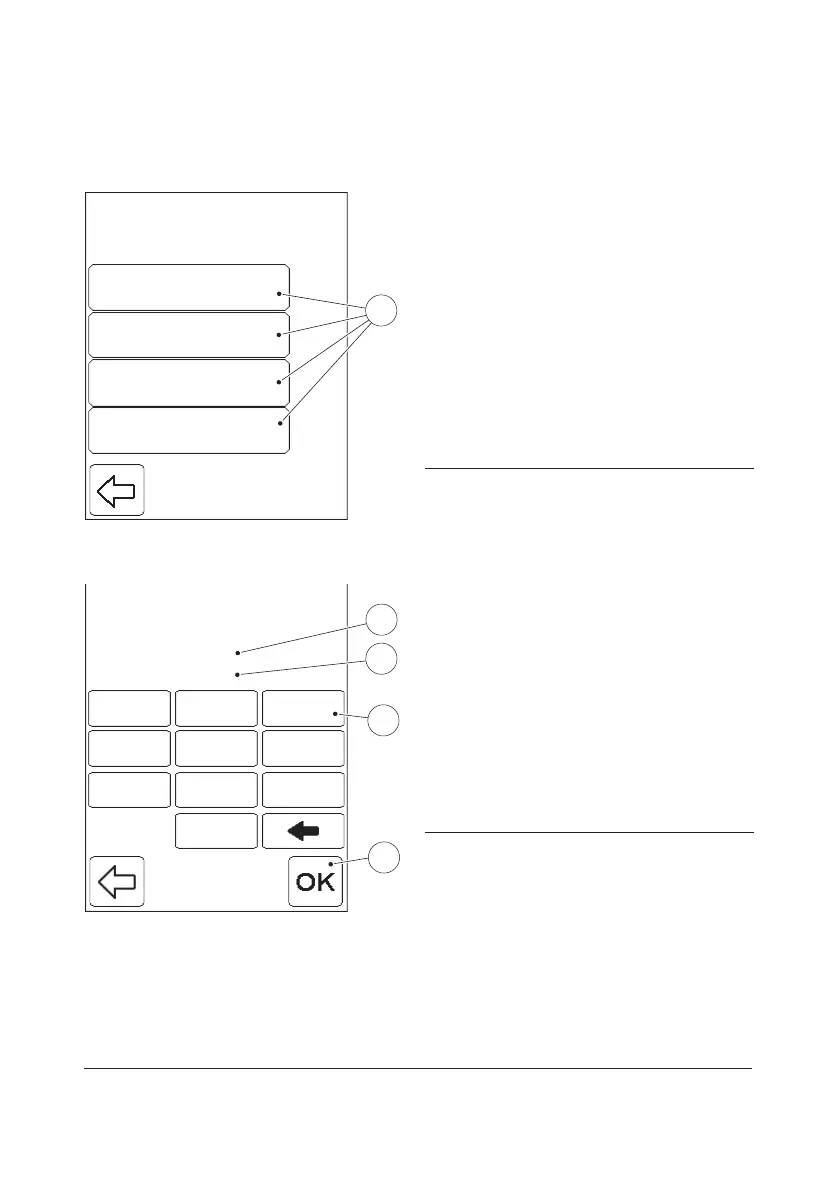
FIGURE 7-20
When the Delete button is pressed in the
Stored Data menu (see FIGURE 7-4), the
following options for deleting data are
displayed:
• All Data
• PAT/STAT
• QC Test
• Analyzer Log
a) Select an option by pressing it.
FIGURE 7-21 will be displayed.
1 Delete options
FIGURE 7-21
The From date(2) and To date(3) displayed
represent the earliest and latest stored
records of the selected type. It is possible to
alter the To date but not the From date. If no
change is required, press Confirm(5).
FIGURE 7-22 will be displayed.
b) If required, enter a new To date(3) via the
Digit buttons(4). When finished press
Confirm(5). FIGURE 7-22 will be
displayed.
2 From date
3 To date
4 Digit button
5 Confirm button
PAT/STATPAT/STAT
QC TestQC Test
Analyser LogAnalyzer Log
All DataAll Data
1
From 01/09/03
To 01/11/03
1
5
2
87
4 6
9
3
0
11
55
22
8877
44 66
99
33
00
5
2
3
4
 Loading...