3. To schedule an all-day recording, click the checkbox of the All Day item.
4. Select the recording type for the selected day to Continuous, Motion Detection, Alarm, Motion / Alarm or
Motion & Alarm.
5. Configure the period for each day and select the recording type for the selected period.
Up to 8 periods can be configured for each day.
6. Click Save to save the current settings and Cancel to return to the previous interface.
7. On the Record Settings interface, you can view the configured recording schedule.
8. If you want to configure the other cameras with the same settings, choose the camera and click Copy. You can
also select All to copy the current settings to all cameras.
9. Click Apply to save the current settings and Cancel to return to the previous interface.
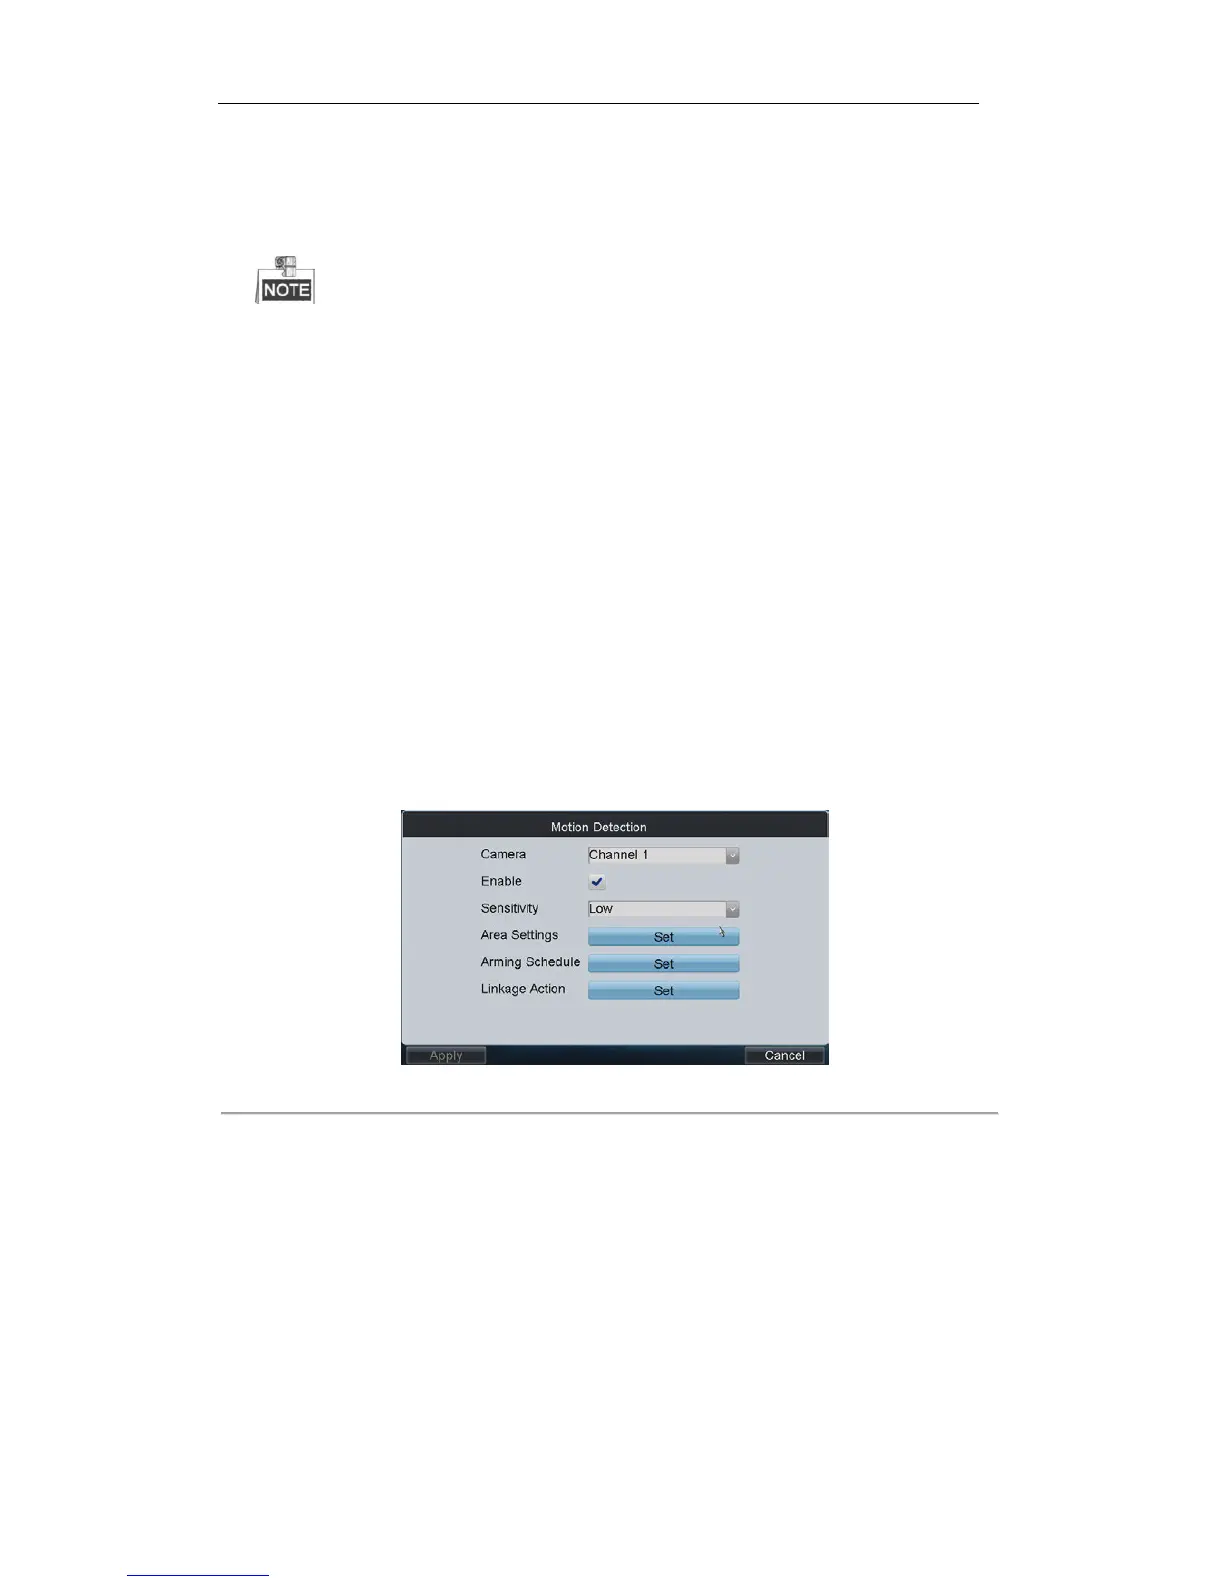
Configuring Motion Detection
Follow the steps to set the motion detection parameters for the Encoder device. In the live view mode, once a
motion detection event takes place, the device can analyze it and do many actions to handle it. Enabling motion
detection function can trigger certain channels to start recording, or trigger full screen monitoring, audio warning,
notify the surveillance center and so on. In this chapter, you can follow the steps to schedule a record which
triggered by the detected motion.
Steps:
1. On the Camera Settings interface, click Set beside Motion Detection to enter the Motion Detection Settings
interface.
Figure 4. 13 Motion Detection
2. Select the camera for configuring motion detection.
3. Click the checkbox of Enable item to enable motion detection.
4. Set the sensitivity level. Up to 6 levels and OFF are selectable.
5. Click the Set button beside Area Settings to set motion detection area.
 Loading...