6 REFRIGERANT AND WATER PIPING
6.1 GENERAL NOTES BEFORE PERFORMING PIPING WORK
• Prepare locally-supplied copper pipes.
• Select the piping size with the correct thickness and correct material able to withstand sufcient pressure.
• Select clean copper pipes. Make sure that there is no dust or moisture inside the pipes. Blow the inside of the pipes with oxygen
free nitrogen to remove any dust and foreign materials before connecting them.
? NOTE
A system with no moisture or oil contamination will give maximum performance and lifecycle compared to that of a poorly prepared system. Take
particular care to ensure that all copper piping is clean and dry internally.
• Cap the end of the pipe when pipe is to be inserted through a wall hole.
• Do not put pipes on the ground directly without a cap or vinyl tape at the end of the pipe.
• If piping installation is not completed until next day or over a longer period of time, braze off the ends of the piping and charge
with oxygen free nitrogen through a Schrader valve type access tting to prevent moisture and particle contamination.
• It is advisable to insulate the water pipes, joints and connections in order to avoid heat loss and dew condensation on the surface
of the pipes or accidental injures due to excessive heat on piping surfaces.
• Do not use insulation material that contains NH3, as it can damage copper pipe material and become a source of future leakage.
• It is recommended to use exible joints for the water piping inlet and outlet in order to avoid vibration transmission.
• Refrigerant circuit and Water circuit must be performed and inspected by a licensed technician and must comply with all relevant
European and national regulations.
• Proper water pipe inspection should be performed after piping work to assure there is no water leakage in the space heating
circuit.
6.2 PIPING CONNECTION FOR OUTDOOR UNIT
? NOTE
For RAS-(8/10)WHNPE, the gas pipe accessory with a are nut (factory-supplied silencer) shall be brazed to the eld supplied gas
line, and connected to the gas valve.
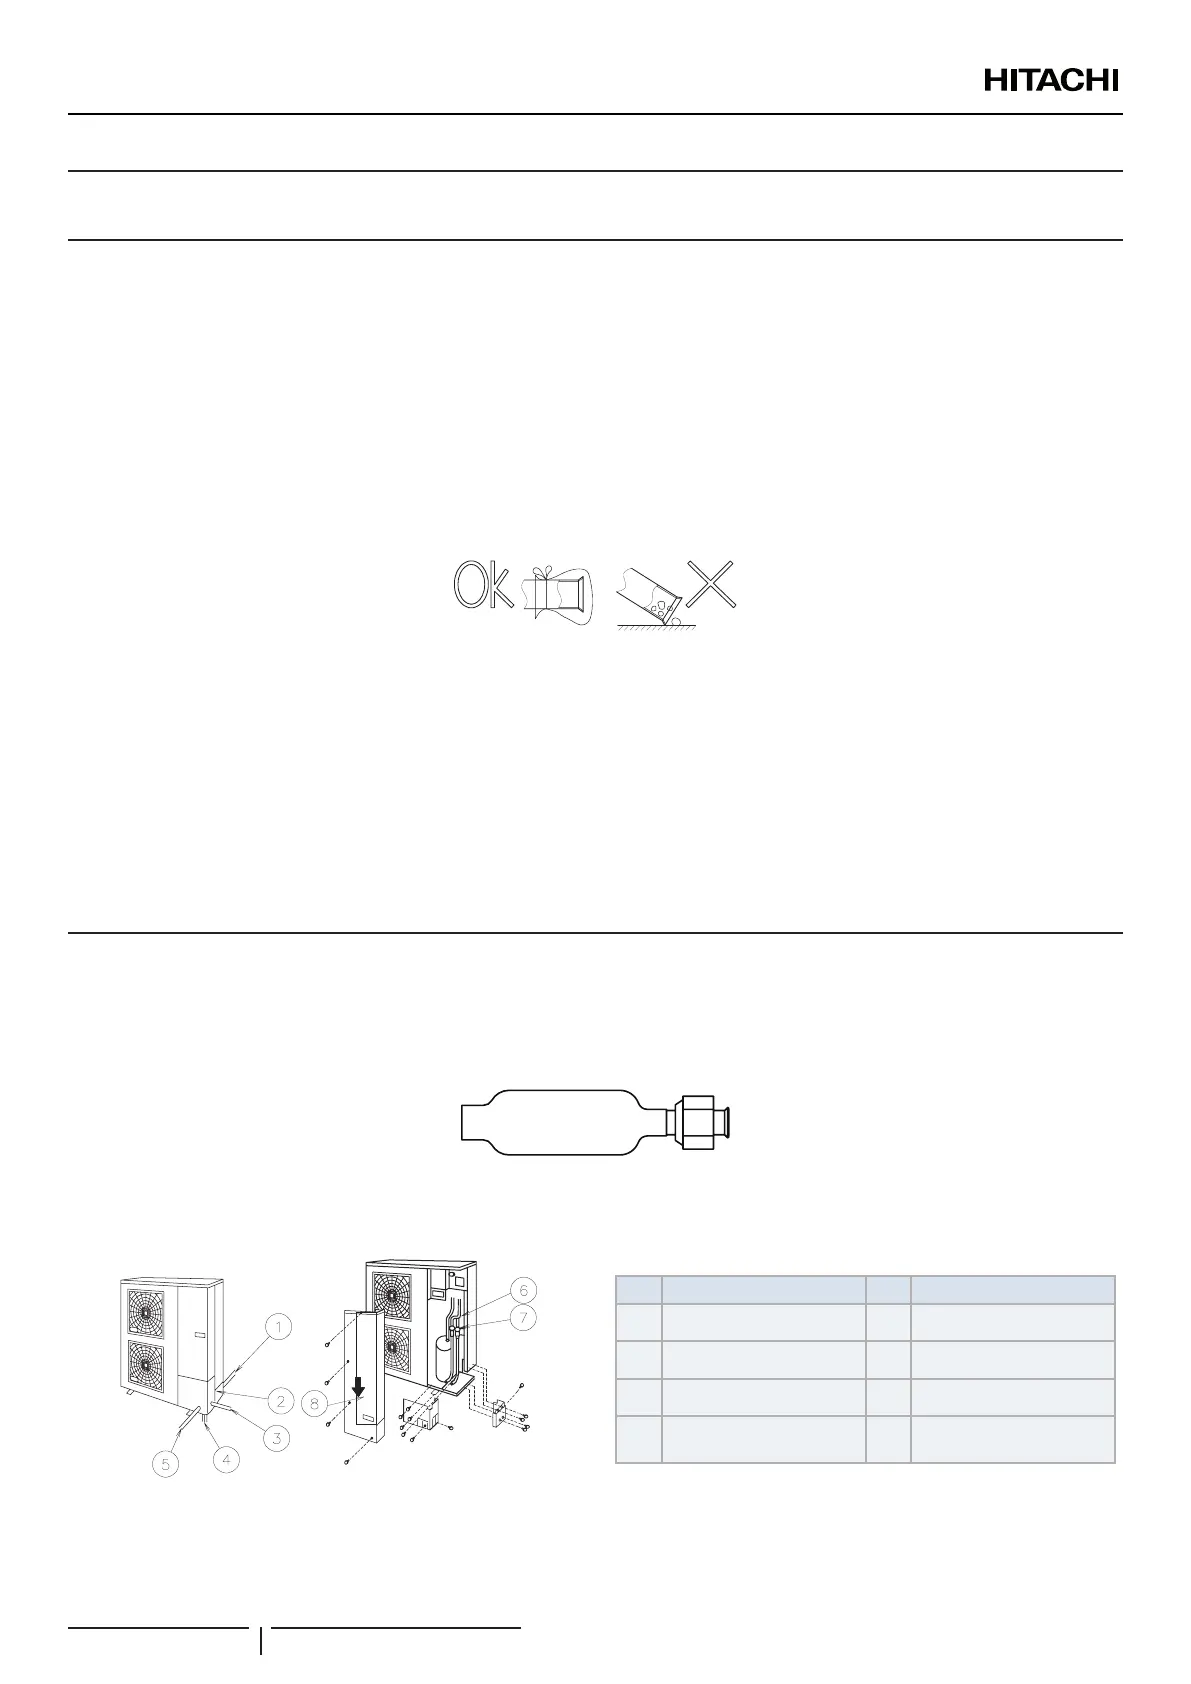
1 The pipes can be connected from 4 directions. Make holes in the piping cover or cabinet for taking out pipes. Take the piping
cover away from the unit, and make holes by cutting along the guideline at the rear of the cover or punching with a driver.
Remove the burr with a cutter, and place a insulation (eld supplied) to protect cables and pipes.
(picture as example)
Nº Description Nº Description
Rear side piping work
Front side piping work
Pipe Cover
Piping work
Right side piping work
Stop Valve
Bottom side piping work
(Knock out hole)
Removing Direction for
Service Cover
REFRIGERANT AND WATER PIPING
PMML0575 rev.2 - 03/2022
46
 Loading...