9-30
1
2
3
4
5
6
7
8
9
10
11
12
13
14
15
16
17
18
19
20
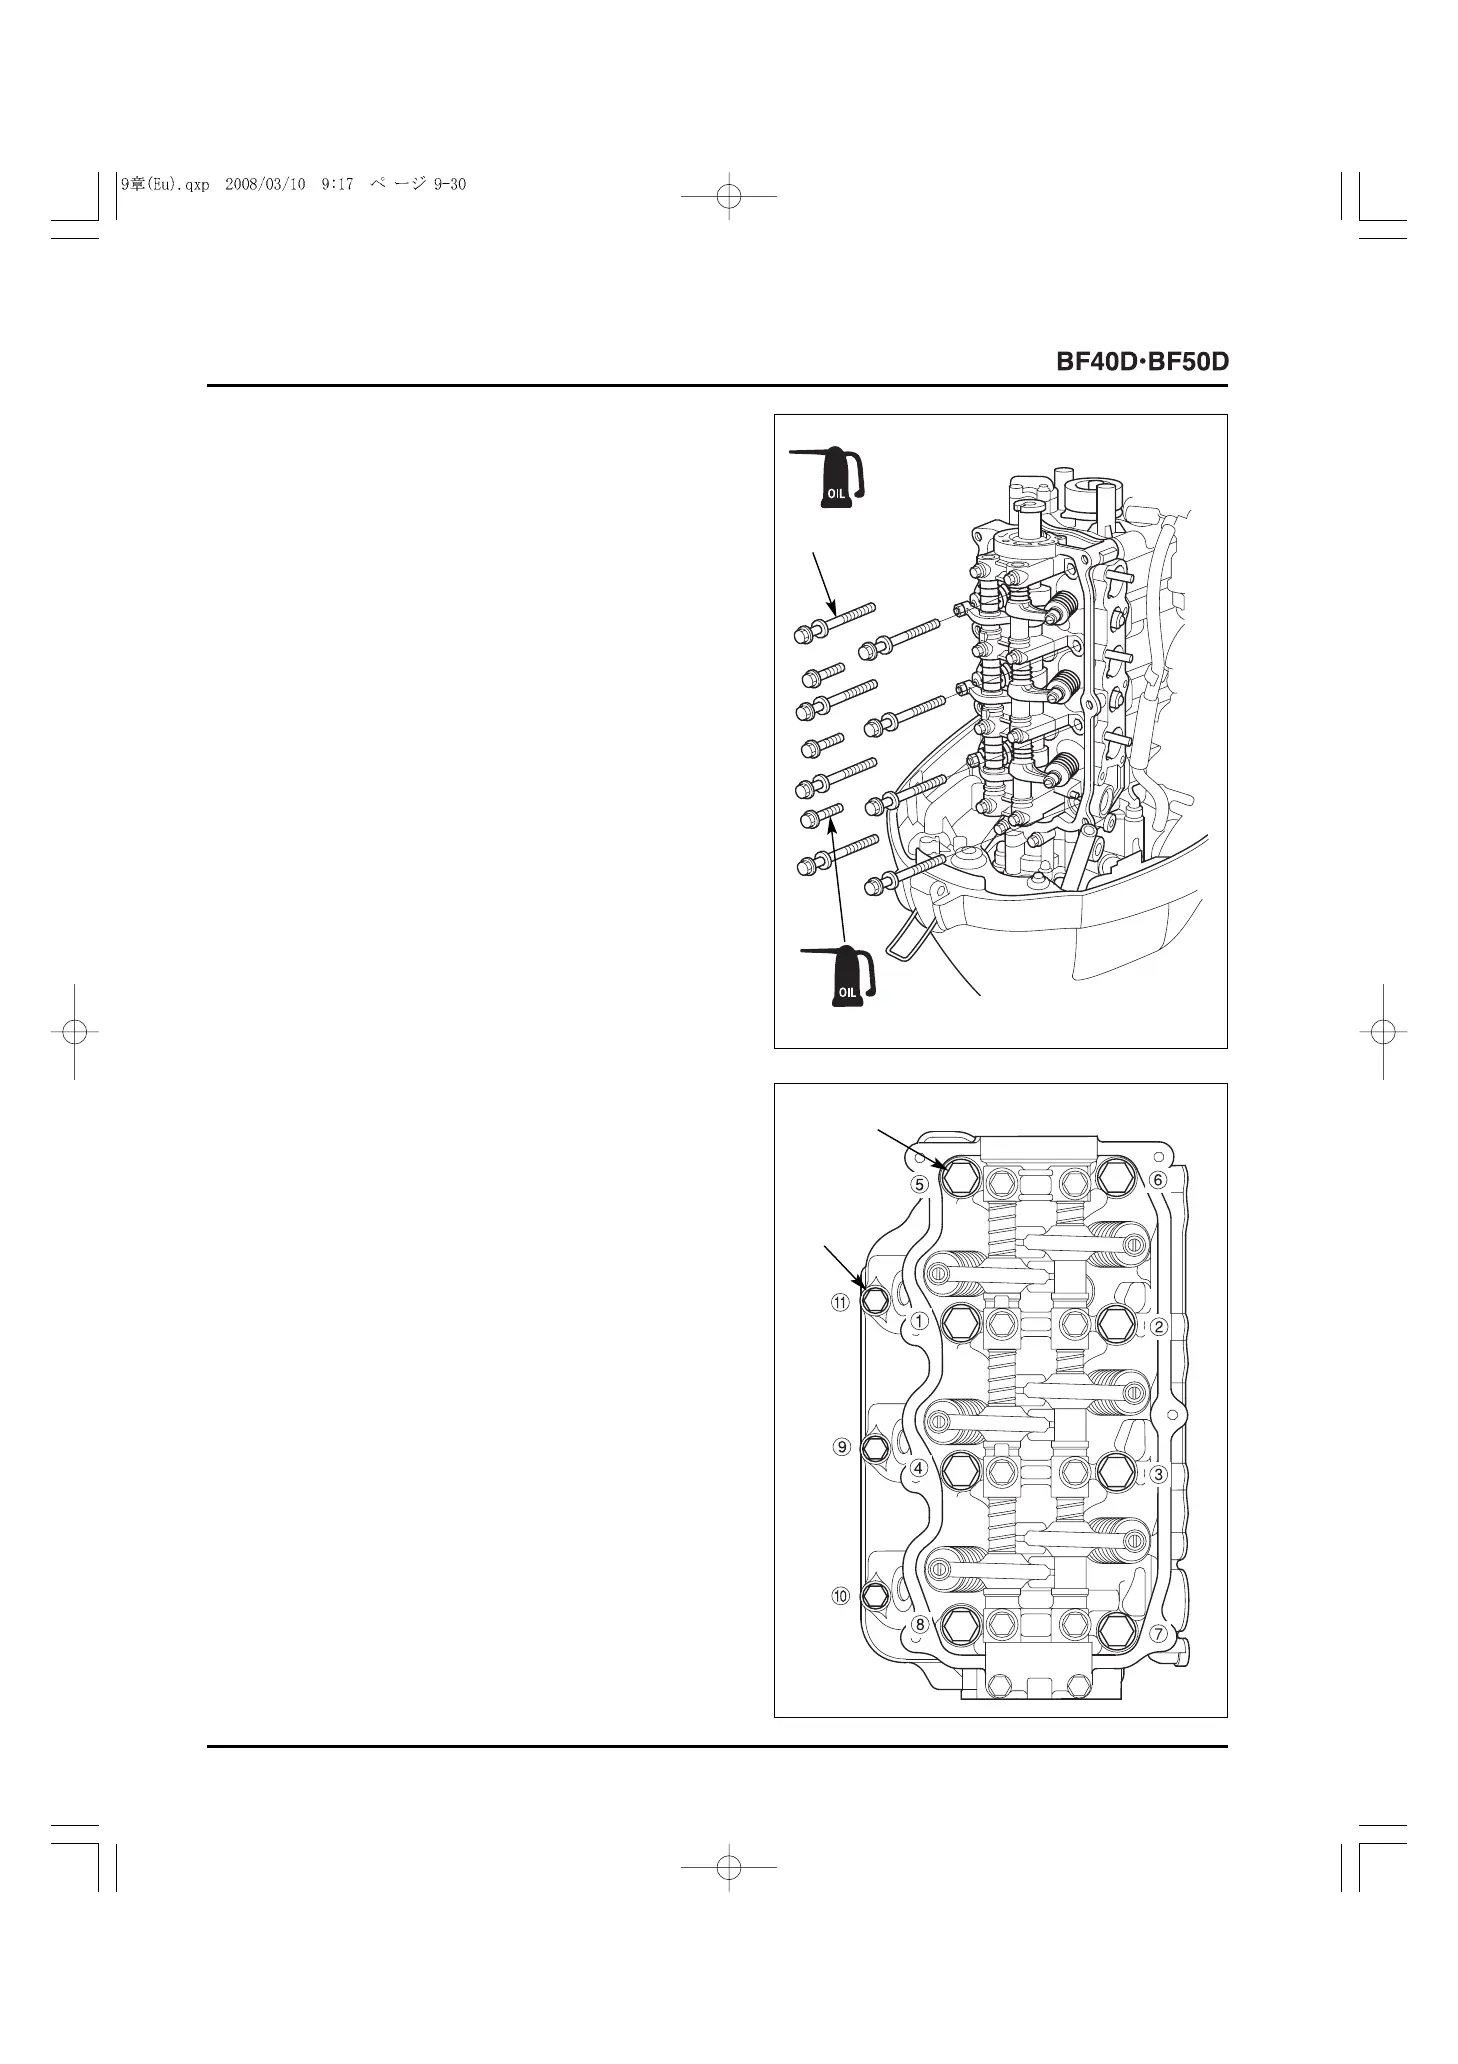
5) Apply engine oil to the threads and seat of the 10 x 85 mm
bolt-washer and 8 x 40 mm flange bolt. Loosely tighten the
eight 10 x 85 mm bolt-washers and the three 8 x 40 mm
flange bolts on the cylinder head assembly.
6) Tighten the eight 10 x 85 mm bolt-washers and the three 8
x 40 mm flange bolts in two or three steps in the numbered
sequence shown. Tighten to the specified torque.
After tightening the 10 x 85 mm bolt-washers to the
specified torque, mark the bolts and the cylinder head, then
tighten the bolts further to 90
o
-
120
o
in the numbered
sequence shown.
TORQUE:
10 x 85 mm bolt-washer: 40 N
.
m (4.1 kgf
.
m, 30 lbf
.
ft) + 90
o
-
120
o
8 x 40 mm flange bolt: 27 N
.
m (2.8 kgf
.
m, 20 lbf
.
ft)
7) Install the following parts.
- Silencer/throttle body/intake manifold (P. 5-94)
- Pulser rotor/pulser coil (P. 7-26)
- Fuel strainer (low pressure side)/fuel pump (low pressure
side)/fuel tube (P. 5-112)
- Alternator cover (P. 7-2)
- Engine cover (P. 4-2)
8) Adjust the valve clearance after assembly (P. 3-10).
Install the cylinder head cover (P. 9-31).
9) When the engine is started after adjustment, follow the
starting procedure after assembly (P. 2-4).
[1]
10 x 85 mm BOLT-
WASHER (8)
8 x 40 (3)
[1]
10 x 85 mm
BOLT-
WASHER (8)
8 x 40 (3)