Honeywell® FS24XPlus™ | User Manual
40
Configure the Detector (Safe Area)
1. Connect to the detector by using either a USB cable or through a twisted pair of wires via RS-
485 converter to the PC or Laptop.
2. Run the Honeywell FlameManager Application.
3. In the Communication Parameters window, check the Connect port is USB if you are using a
USB cable, or select a port from the Port Name list if connected with a twisted pair of wires
RS-485 to the PC or laptop.
4. Click Connect.
5. From the Main window, select the Configure tab.
6. From the Configure window, you can perform any of the following operations:
Operation Description
Flame
Sensitivity
Select from four sensor’s sensitivity values from low to very high. Be sure to comply
with the site required Agency approvals.
Alarm
Verification
Time
The time the detector should wait before sending an alarm sign after detecting a
possible flame source. This waiting time is to prevent false alarms.
Read Read the detector flame sensitivity and alarm verification time current values.
Write Apply new values selected for the flame sensitivity and the alarm verification time.
Latch Alarms
Holds the info when the detector is alarmed. To unlatch it, turn the detector off. Be
sure to comply with NFPA 72 if required.
Relay Options 1 = Fault; 2 = Alarm; 3 = Auxiliary
4-20mA
Output
options
Set current levels for the faults, warning, Inhibit, alarm, and verified alarm notifications.
Commissioning the Detector
After set-up and installation, test the flame detector with the test lamp. Confirm coverage area is
correct.
States & Outputs
The FS24XPlus™ Flame detector communicates status using a variety of output methods, including
the LED, 4-20 mA current loop, Relays, RS-485 Modbus, and HART® EDD over 4-20mA current loop.
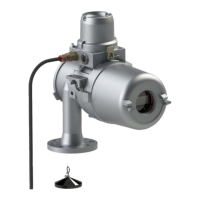
Test Lamps
The Honeywell® TL-1055 and TL-2055 test lamps are compatible with the FS24XPlus™ flame
detectors. Note that the test lamps will alarm the detector, so we recommend inhibiting the safety
system before testing.
 Loading...