Settings
31
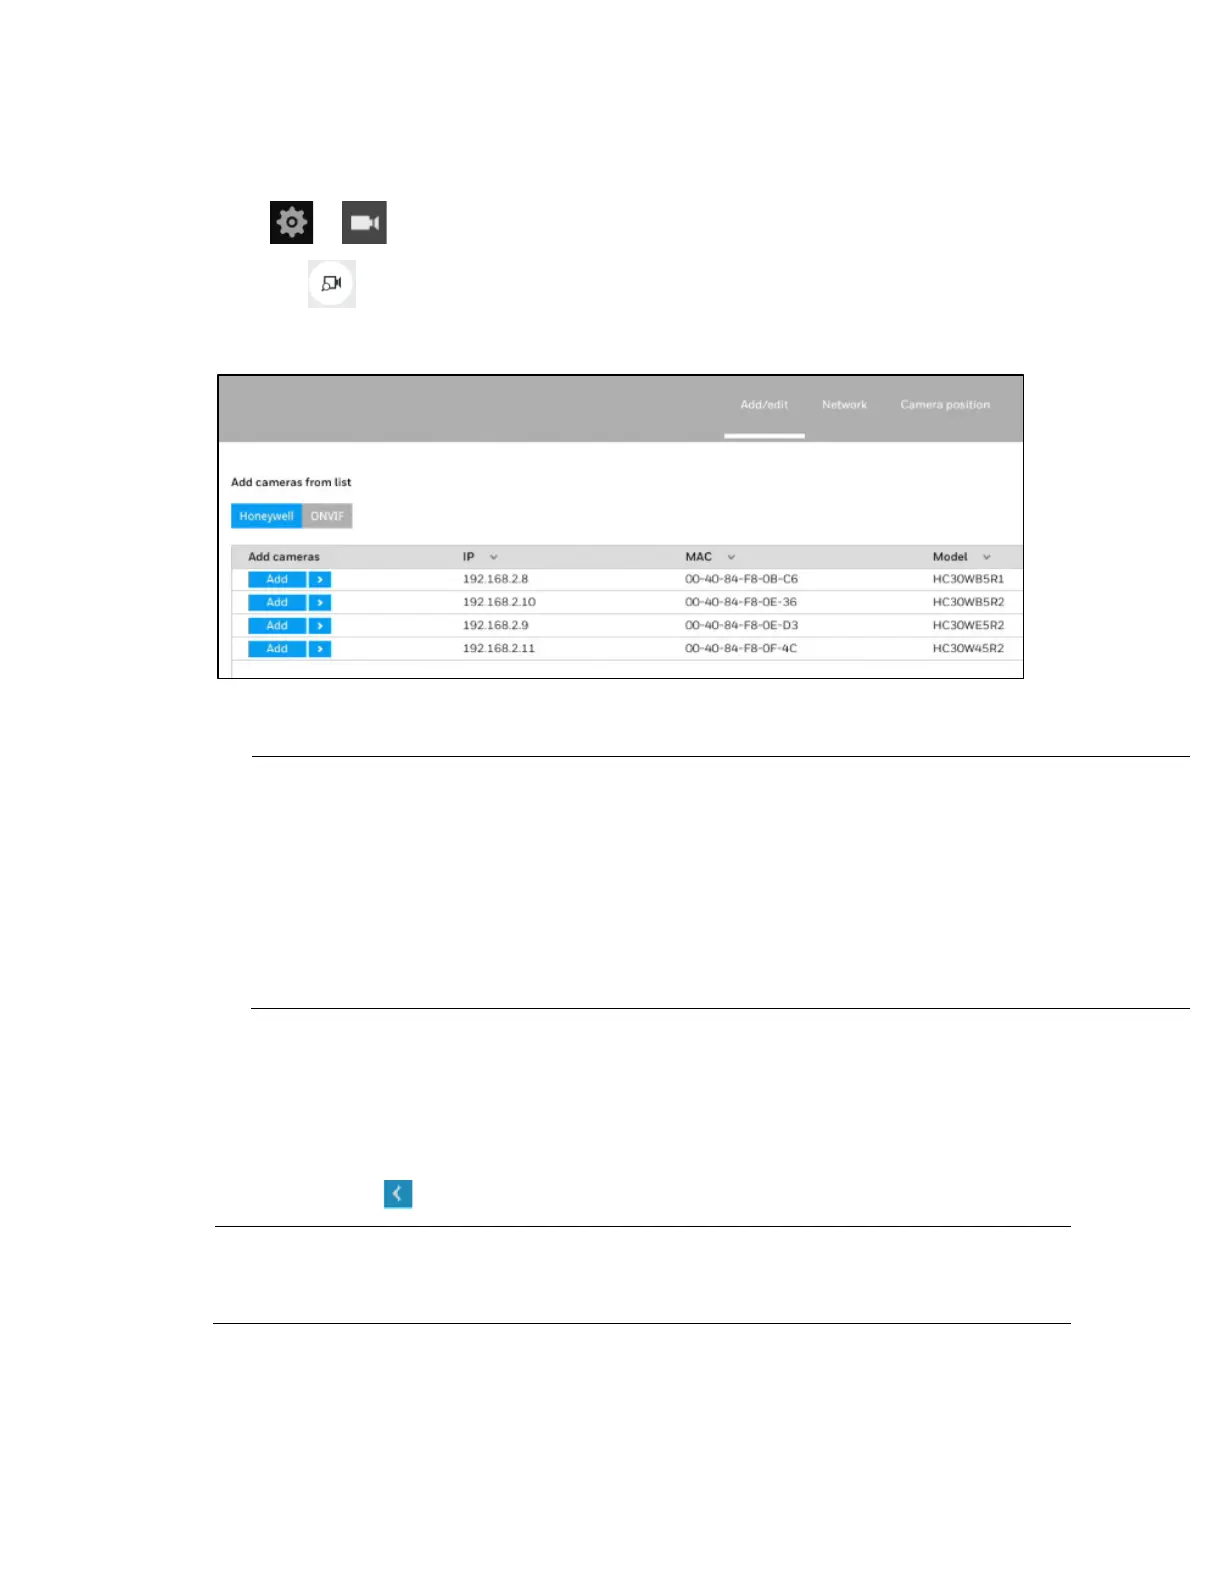
Adding a Camera
Go to ManagementAdd/edit.
1. Click and a list of cameras in the same subnet will appear:
Figure 6-3 Adding a Camera
2. Click Honeywell or ONVIF to select the camera protocol.
Note
30/60 series cameras that support the Honeywell protocol:
HC30W42R3
HC30W45R3
HC30WB5R1
HC30W45R2
HC30WF5R1
HC60W35R2
HC60W45R4
HC60WB5R5
HC60WZ2E30
HC60W34R2L
HC60W44R2L
HC60WB4R2
HC60WZ2R36
HC60WZ5I30
3. Click Add and the camera will be placed at an unoccupied position. You may also expand
the menu on the side of the Add button to select a position number.
When a camera is added, it should appear on the graphical placement below.
4. Click Apply after you added cameras.
5. You can click to return to the previous window.
Note
When a camera is connected to an NVR, the camera's system time will be
modified the same as the NVR’s system time without change for the time
zone.
You can manually add a camera by using RTSP connection:
 Loading...