DRAFT - HP Confidential - DRAFT
Removal and replacement procedures 21
Extend the front drive cages
WARNING: To reduce the risk of personal injury or equipment damage, be sure that the rack is
adequately stabilized before extending a component from the rack.
CAUTION: Do not operate the server for long periods with the front drive cages extended. When
the front drive cage is extended while the server is powered on, do one of the following:
If the front drive health/thermal LED is functional, monitor the status of this LED.
When this LED starts flashing amber, immediately slide the drive cage back into
the chassis and keep it there until the LED turns green.
If the front drive health/thermal LED is not functional, do not keep the drive cage
out of the chassis for more than 140 sec. After 140 sec, slide the drive cage inside
the chassis and keep it there for at least 300 sec before extending it out again.
Failure to observe this caution will result in improper airflow and insufficient cooling that can lead
to thermal damage.
1. If installed, remove the security bezel (on page 24).
2. The front drive cages are secured to the chassis by shipping screws. The location and number of these
shipping screws depends on whether the server was part of a BTO or a rack CTO shipment. Do one of
the following:
o For a server that was shipped as a rack CTO model, there are two screws located on the chassis
ears. Proceed to step 3.
o For a server that was shipped as a BTO model, there are two screws each on the sides of the front
drive cages. Proceed to step 4.
3. For a server that was shipped as a rack CTO model, remove the shipping screws on the chassis ears.
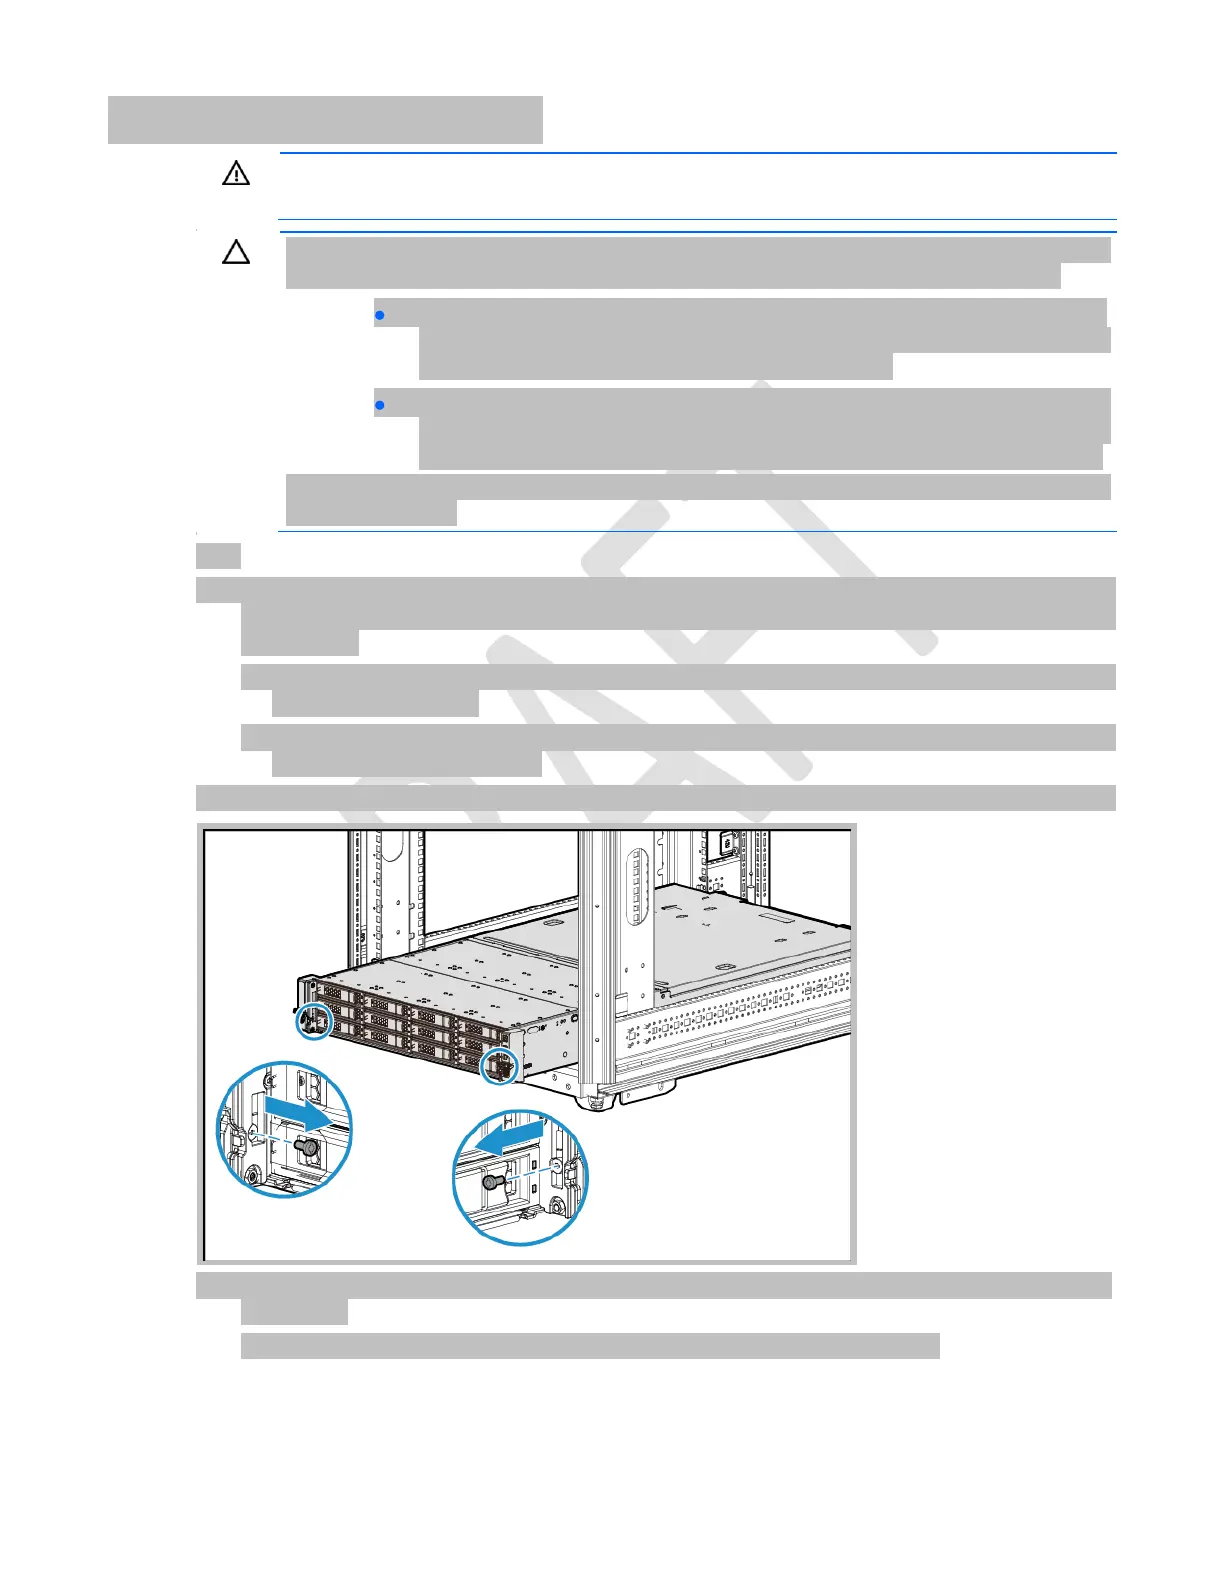
4. For a server that was shipped as a BTO model, remove the shipping screws on the sides of the front
drive cages:
a. Loosen the thumbscrews on the chassis ears till the screws are protruding out.

 Loading...


