DRAFT - HP Confidential - DRAFT
Removal and replacement procedures 62
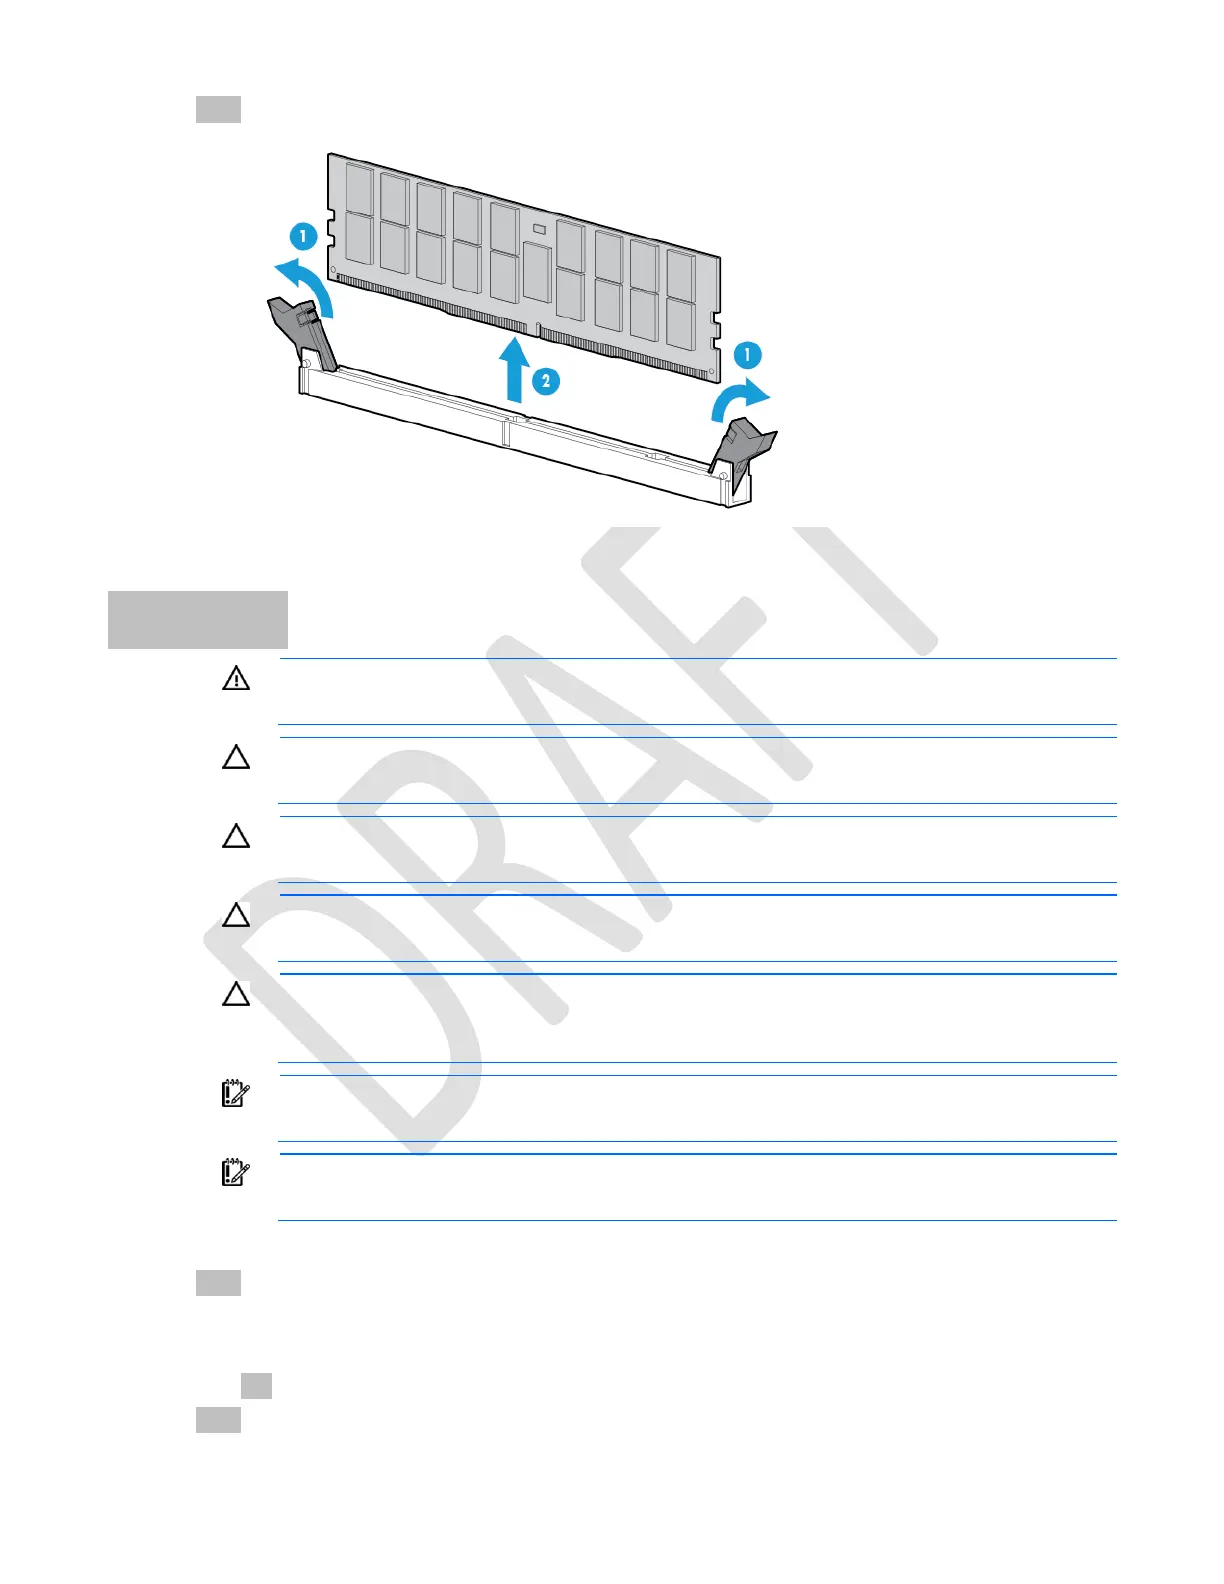
6. Remove the DIMM.
To replace the component, reverse the removal procedure.
Processor
WARNING: To reduce the risk of personal injury from hot surfaces, allow the drives and the
internal system components to cool before touching them.
CAUTION: To avoid damage to the processor and system board, only authorized personnel
should attempt to replace or install the processor in this server.
CAUTION: To prevent possible server malfunction and damage to the equipment, multiprocessor
configurations must contain processors with the same part number.
CAUTION: To prevent possible server overheating, always populate each processor socket with
a processor socket cover or a processor and a heatsink.
CAUTION: To prevent damage to electrical components, take the appropriate anti-static
precautions before beginning any installation, removal, or replacement procedure. Improper
grounding can cause electrostatic discharge.
IMPORTANT: If installing a processor with a faster speed, update the system ROM before
installing the processor.
IMPORTANT: Processor socket 1 must be populated at all times or the server does not function.
To remove the component:
1. Power down the server (on page 17).
2. Remove all power:
a. Disconnect each power cord from the power source.
b. Disconnect each power cord from the server.
3. Remove the server from the rack (on page 27).

 Loading...


