● Cutter
● Cable tie
● ESD wrist strap or ESD glove
● Cable tester
● Crimper
Procedure
1. Check the location and cabling of the network cable to be replaced.
2. Prepare a new network cable. The type of the new network cable must be
consistent with that of the old network cable. When a network cable is made,
test its connectivity with a cable tester.
3. Wear the ESD gloves or wrist strap and connect the grounding terminal to the
ESD jack on the rack.
4. Lay out the new network cable according to the original cabling mode.
If you need to replace more than one network cable at a time, you should
attach temporary labels to the new network cables to identify the cables. The
new network cables must be numbered consistently with the network cables
to be replaced.
5. Remove the old network cable and record the location where the old network
cable is installed.
a. Remove the connectors of the network cable.
b. Cut the cable tie with a cutter and remove the network cable.
6. Insert the new network cable connector into the network interface of which
the location is recorded. If a click is heard, it indicates that the insertion is
successful. The indicator of the network interface being steady on and green
indicates that the link is Up.
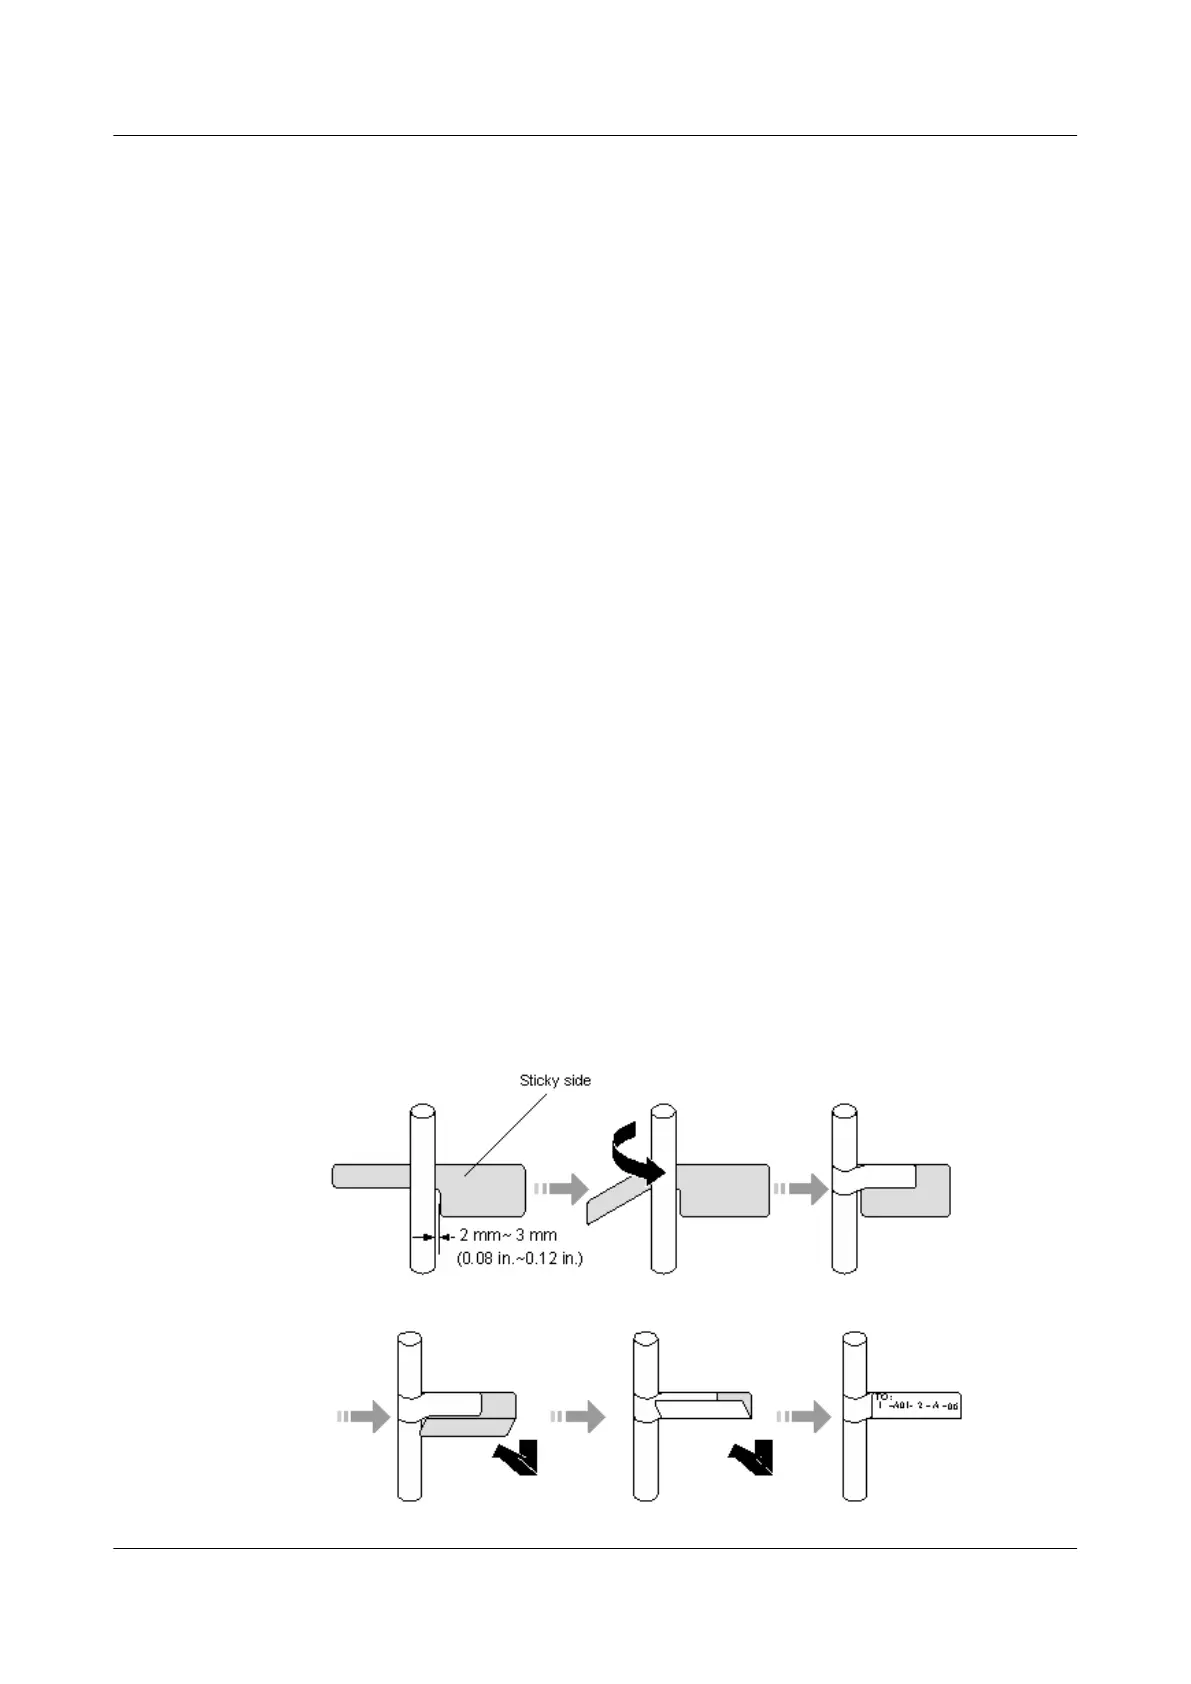
7. Attach a label to the new network cable, as shown in Figure 4-283.
Figure 4-283 Attaching a label to a new network cable
HUAWEI NetEngine 8000 F
Hardware Guide 4 Hardware Installation and Parts Replacement
Issue 05 (2023-03-31) Copyright © Huawei Technologies Co., Ltd. 639
 Loading...