Configure Macro
145
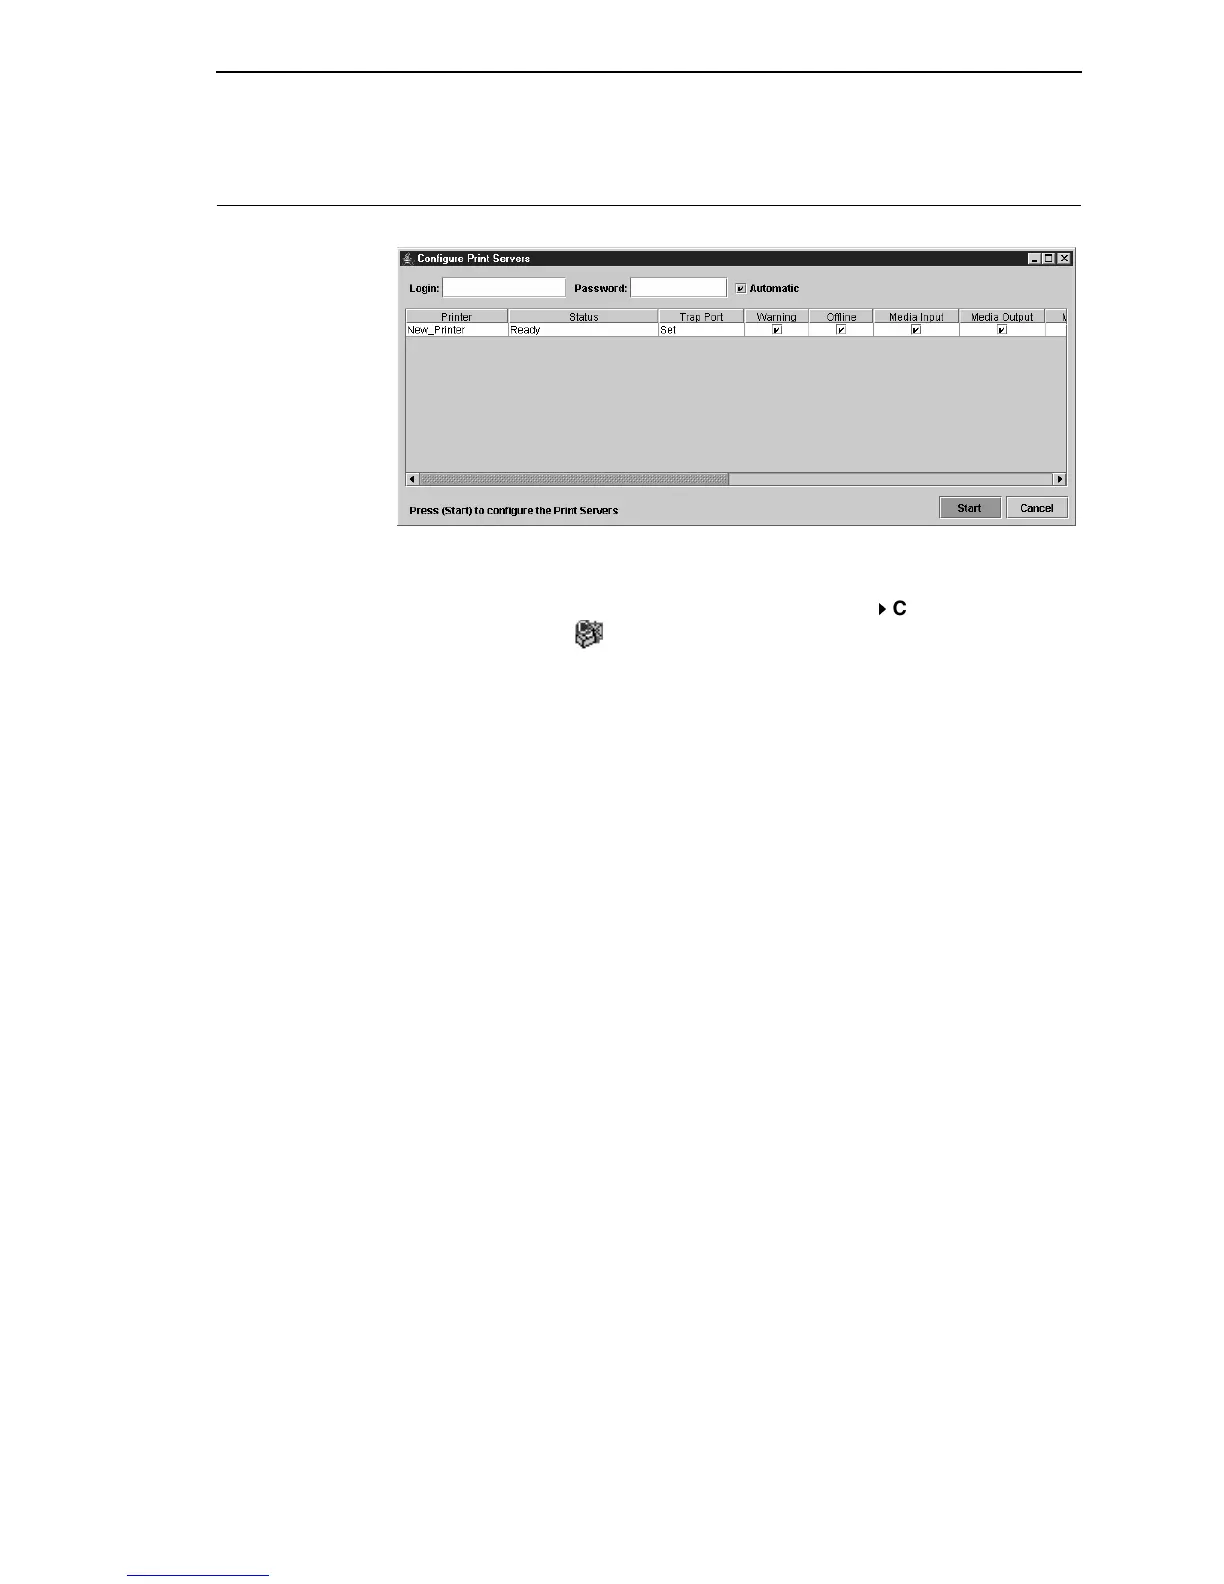
Configure Print Servers
Figure 127. Configure Print Servers Window
To access the Configure Print Servers application, select one or several
printers from the printer database then select Utilities
Configure Print
Servers or click the Configure Print Servers button. The Configure Print
Servers window appears (see Figure 127).
The Configure Print Servers application allows you to set the trap port
according to the SNMP Trap Server setting (see page 28).
The Configure Print Servers application also allows you to select or deselect
alert groups. To deselect an alert group, uncheck the check box(es) of the
corresponding option(s). (By default all check boxes are checked.) The alert
group options include:
Click Start to configure the print servers.
NOTE: Check the Automatic check box to have the PMU connect directly
with the printer.
Uncheck the check box to have the PMU make a Telnet connection
with the printer. Enter root in the Login field and the password for the
user root in the Password field.
When your printer encounters a problem that falls within the parameters of the
selected alert options, the corresponding alert message appears. Refer to the
Alert Groups Table in chapter three of the
Ethernet Interface User’s Manual
for descriptions of the alert message options.
NOTE: To check the print servers configuration, go to the Ethernet Interface
web page as discussed in chapter three of the
Ethernet Interface
User’s Manual
.
• Warning
• Offline
• Media Input
• Media Output
• Media Path
• Marker
• Cutter
• Barcode
• RFID
• Scanner
• Intervention
• Consumable
• Label
• Power Cart

 Loading...


