Installation, Support, and Maintenance Guide 43
Evolution X1 Satellite Router
Connecting the Ethernet LAN Cable
Table 6-1. RJ 45 LAN Ethernet Cable Installation Steps
Step Instructions Diagram
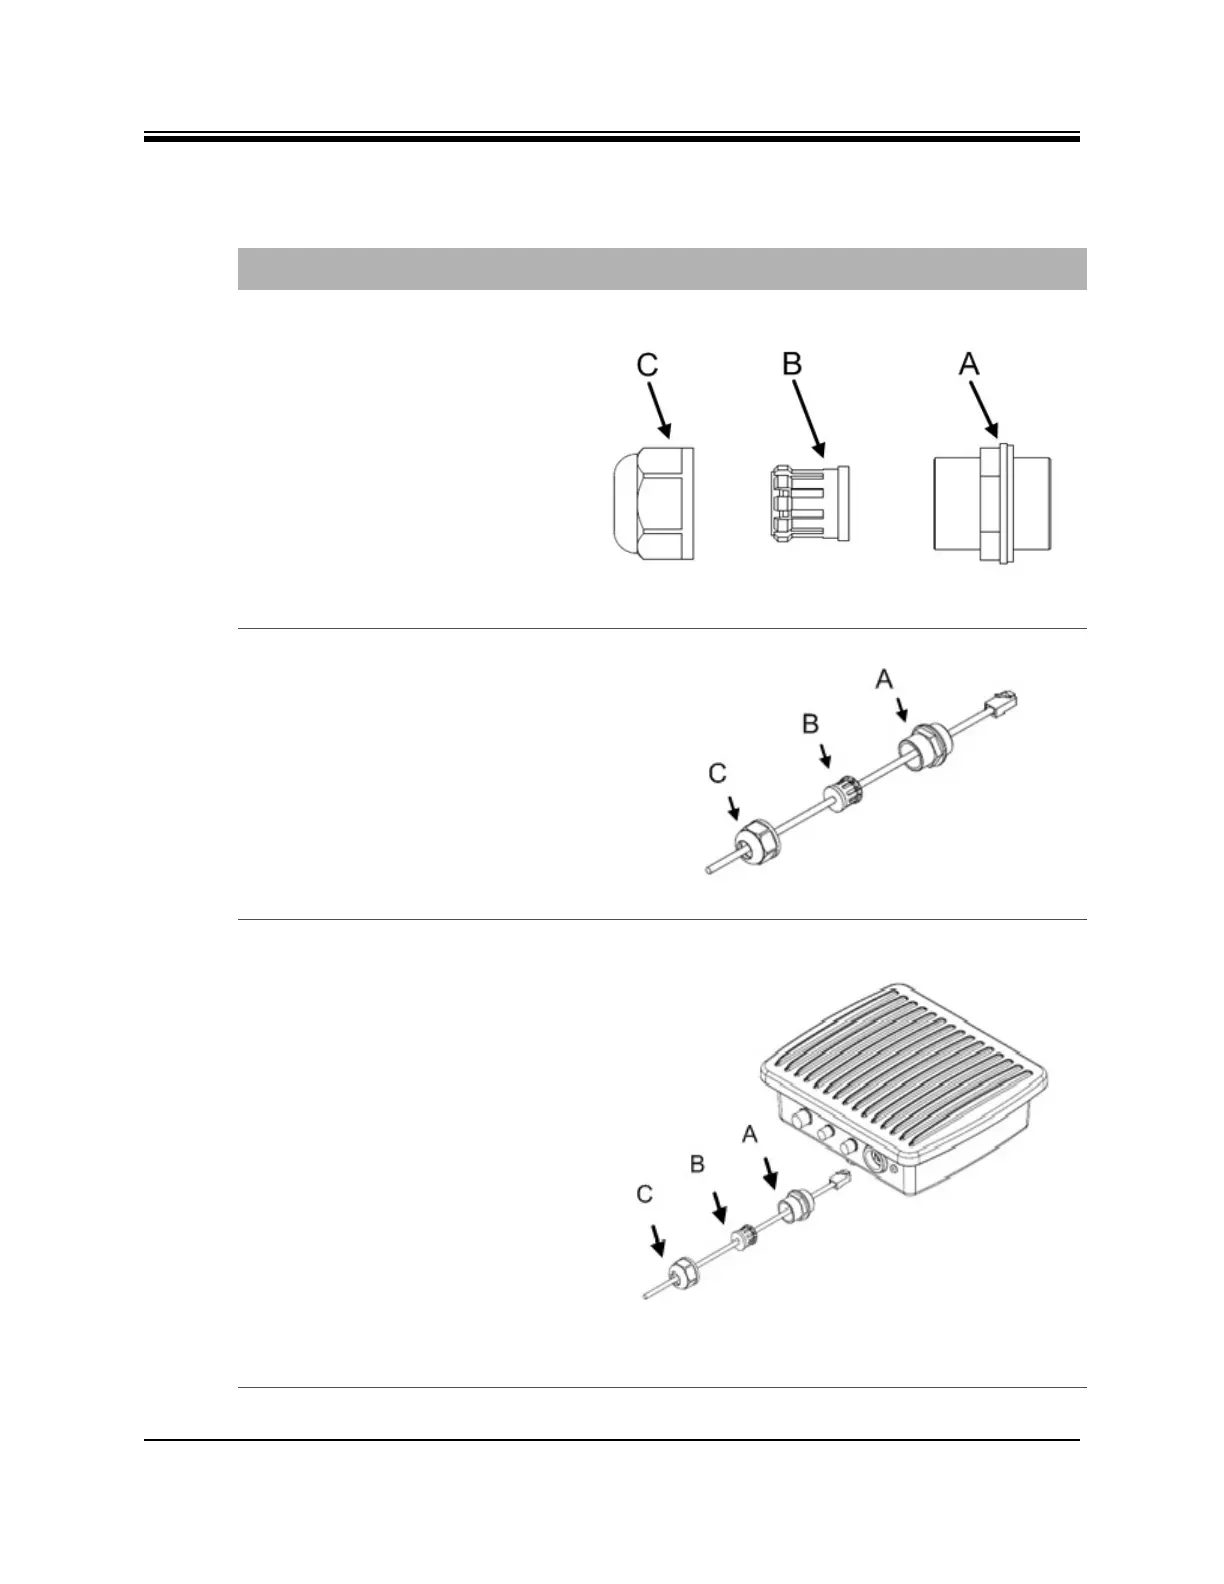
1. Take the gland out of the
package and disassemble. Parts
are labeled on the right.
A - Sealing nut
B - “Compression nut” -
Clamping claw (black, plastic)
and sealing/compression ring
(gray, rubber) - part B of the
gland is split, so that, if the
RJ45 clip is already on the
cable, the gasket can be easily
opened and placed around the
cable.
C - Lock nut body
2. 1. Place C, the lock nut body,
onto the cable.
2. Place A, the Sealing nut onto
the cable with the threads
facing the RJ45 end of the
cable, towards the router.
3. The compression nut B, has a
slit, so it can be placed on the
cable.
3. 1. Clip the RJ45 connector and
cable into the RJ45
receptacle.
2. Screw the sealing nut (A) into
the X1 Outdoor Unit.
3. Push the compression ring (B)
into the sealing nut (A).
4. Pass the lock nut body (C) over
the compression ring (B).
5. Twist the lock nut body (C)
into the sealing nut (A) until
tightly compressing the entire
gland around the Ethernet
cable forming a weather tight
seal. It is not necessary to
fasten too tightly, just so the
compression fits securely. A
wrench may be used to secure
the assembly to the router.
6. Wrap with weatherproofing
(self-amalgamate tape) over
the connector and cable
junctions according to
manufacturer’s guidelines.