Chapter 2 SETUP MODE
IP-EMZ Service Manual 2-15
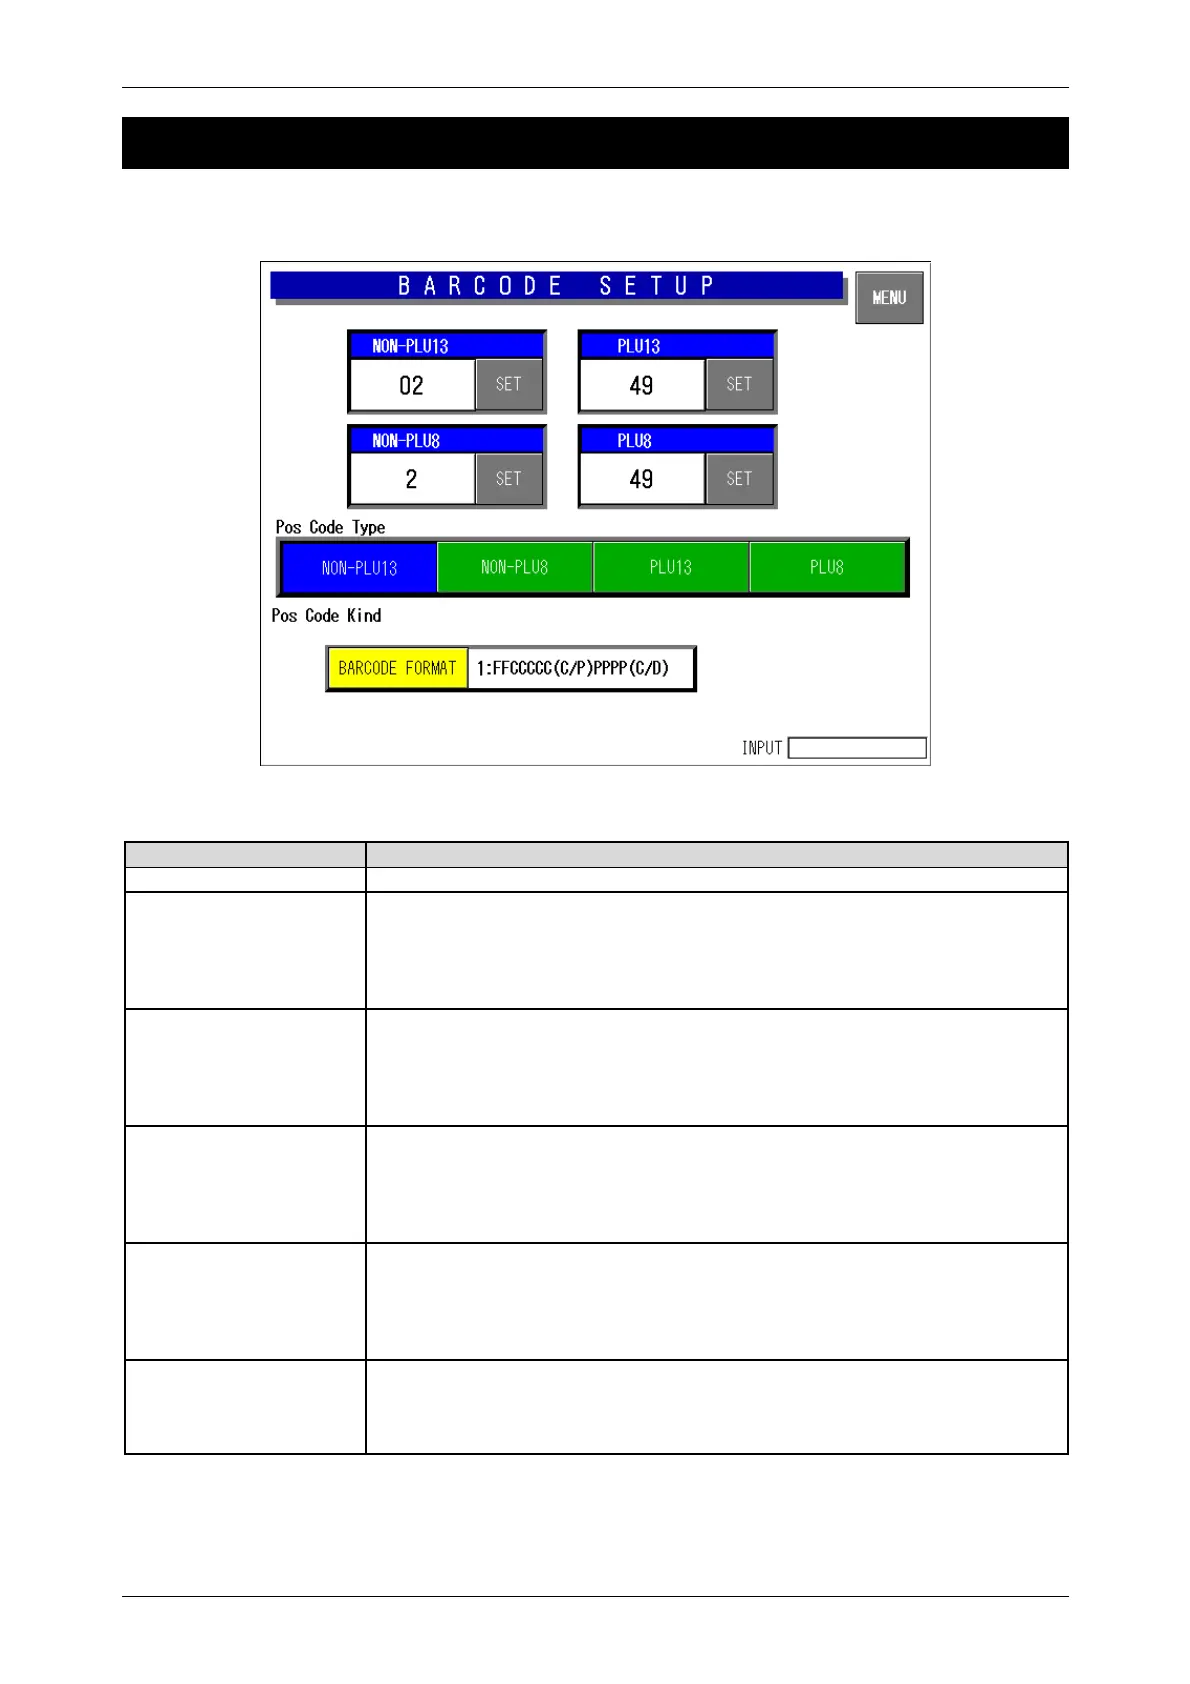
2.9 BARCODE SETUP
After this, it is SETUP MENU 2/2.
[9][9][9] > [PAGE]
Barcode Setup Screen
Buttons/Display Fields Function
MENU Determines the settings and returns to the first screen of the Setup Menu.
Non PLU 13 This is referred when “System” is set in the flag reference of the PLU
registration and the code type is set as “Non PLU 13”.
The set flag data is displayed.
Enter a numeric value (max. 2 digits) and press the [SET] button to set the
entered data as a flag data.
Non PLU 8 This is referred when “System” is set in the flag reference of the PLU
registration and the code type is set as “Non PLU 8”.
The set flag data is displayed.
Enter a numeric value (max. 2 digits) and press the [SET] button to set the
entered data as a flag data.
PLU 13 This is referred when “System” is set in the flag reference of the PLU
registration and the code type is set as “PLU 13”.
The set flag data is displayed.
Enter a numeric value (max. 2 digits) and press the [SET] button to set the
entered data as a flag data.
PLU 8 This is referred when “System” is set in the flag reference of the PLU
registration and the code type is set as “PLU 8”.
The set flag data is displayed.
Enter a numeric value (max. 2 digits) and press the [SET] button to set the
entered data as a flag data.
POS Code Type Select the code type to be referred to when the code type is set as “Refer” in
the PLU master file.
Press the desired button to select among Non PLU 13, Non PLU 8, PLU 13,
and PLU 8.
 Loading...