Chapter 3 TEST MODE
3-6 IP-EMZ Service Manual
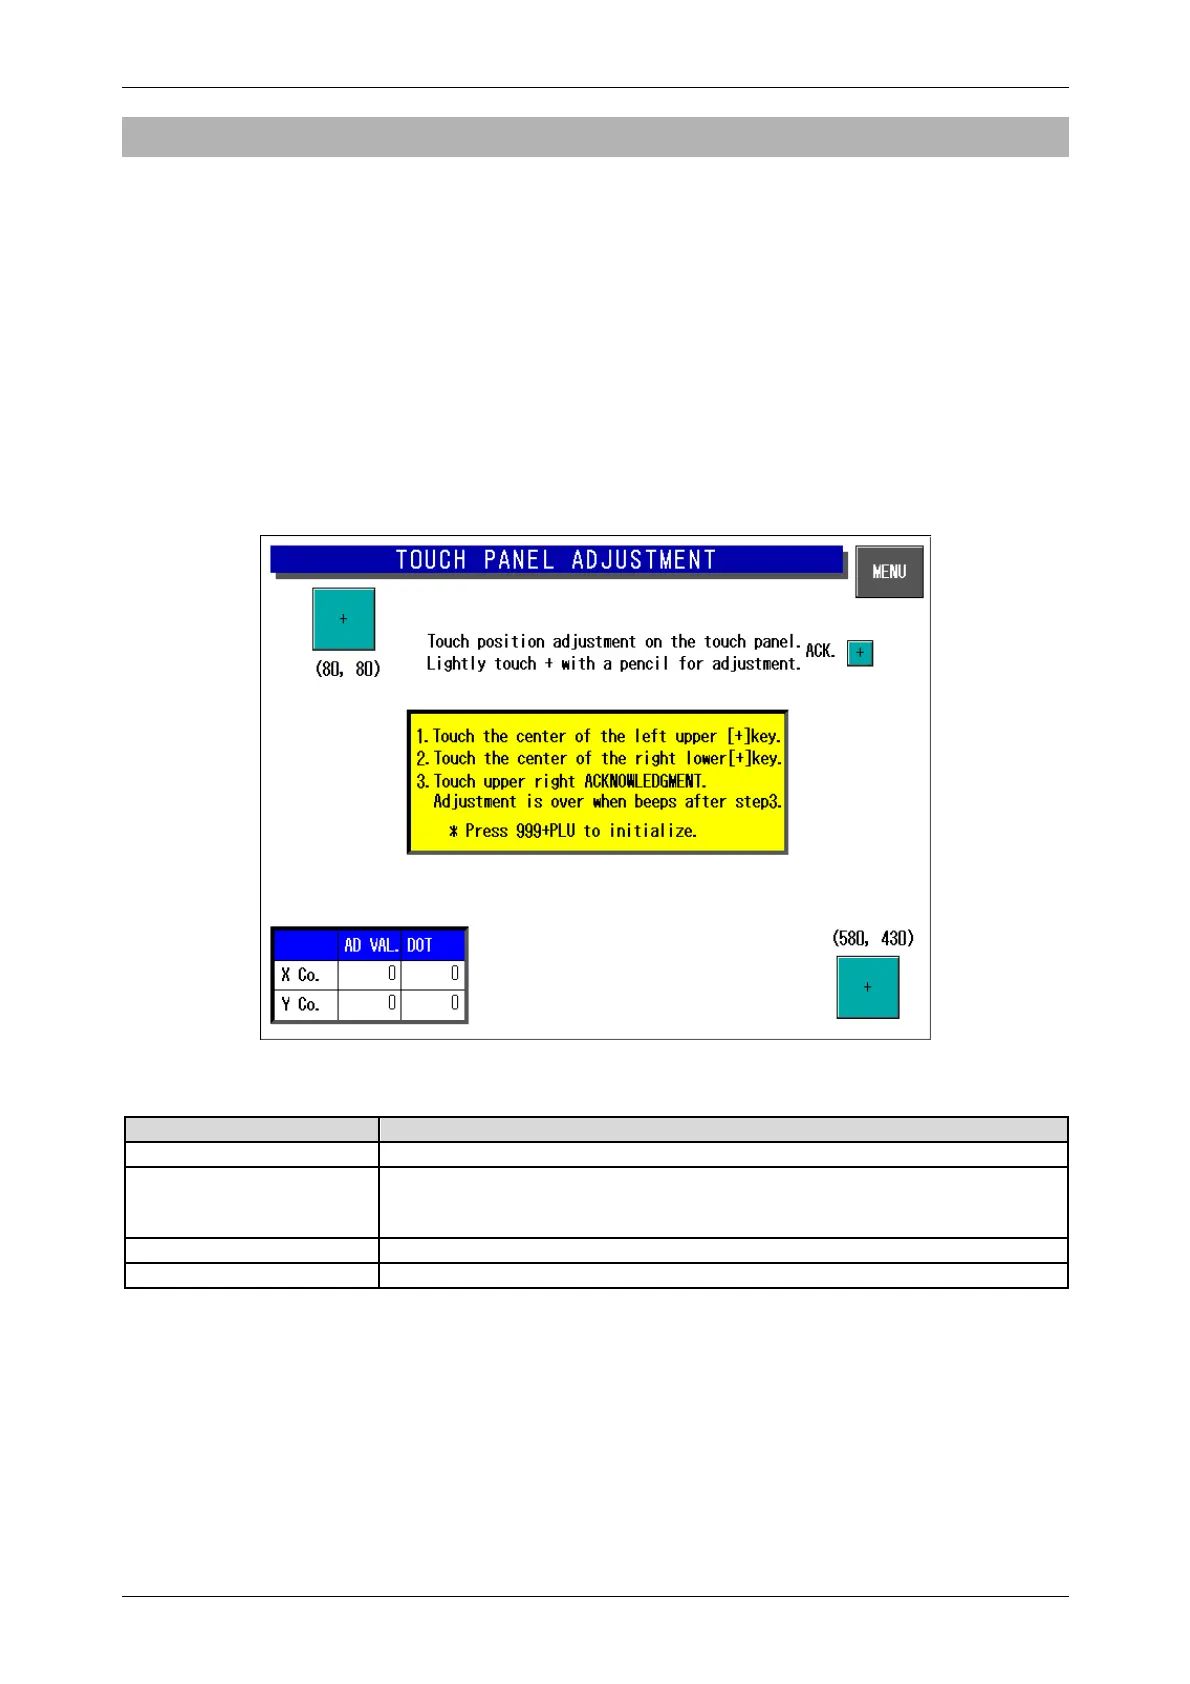
3.3.2 TOUCH PANEL ADJUSTMENT
Press the [Touch Panel Adjustment] button on the Key Check Menu screen. Then, the Touch Panel
Adjustment screen appears. Screen and touch panel positions on the LCD screen can be adjusted on
this screen.
Press the two center marks on each button located at the top left and the bottom right of the screen
using a pointed object. The pressed button will change its color to black, and the coordinates
positional data of the pressed point is displayed.
In the same way, press the center mark on the Acknowledge button to complete the position
adjustment.
Press the MENU button to return to the Key Check Menu screen.
Note 1: Be sure to adjust the touch panel after system data has been initialized.
2: If the adjustment cannot be properly completed, enter “999” and press the [PLU] key to return to
the default data, then, tray to perform adjustment again.
Touch Panel Adjustment Screen
Buttons/Display Fields Function
MENU Changes to the Key Check Menu screen.
Position Adjustment [+] Press only the “+” mark on the buttons located at the top left and the bottom
right of the screen.
Pressing these buttons will change the button color to black.
Acknowledge [+] Completes position adjustment.
Coordinate Display Field Displays coordinate information.