Chapter 4 SYSTEM MODE
4-20 IP-EMZ Service Manual
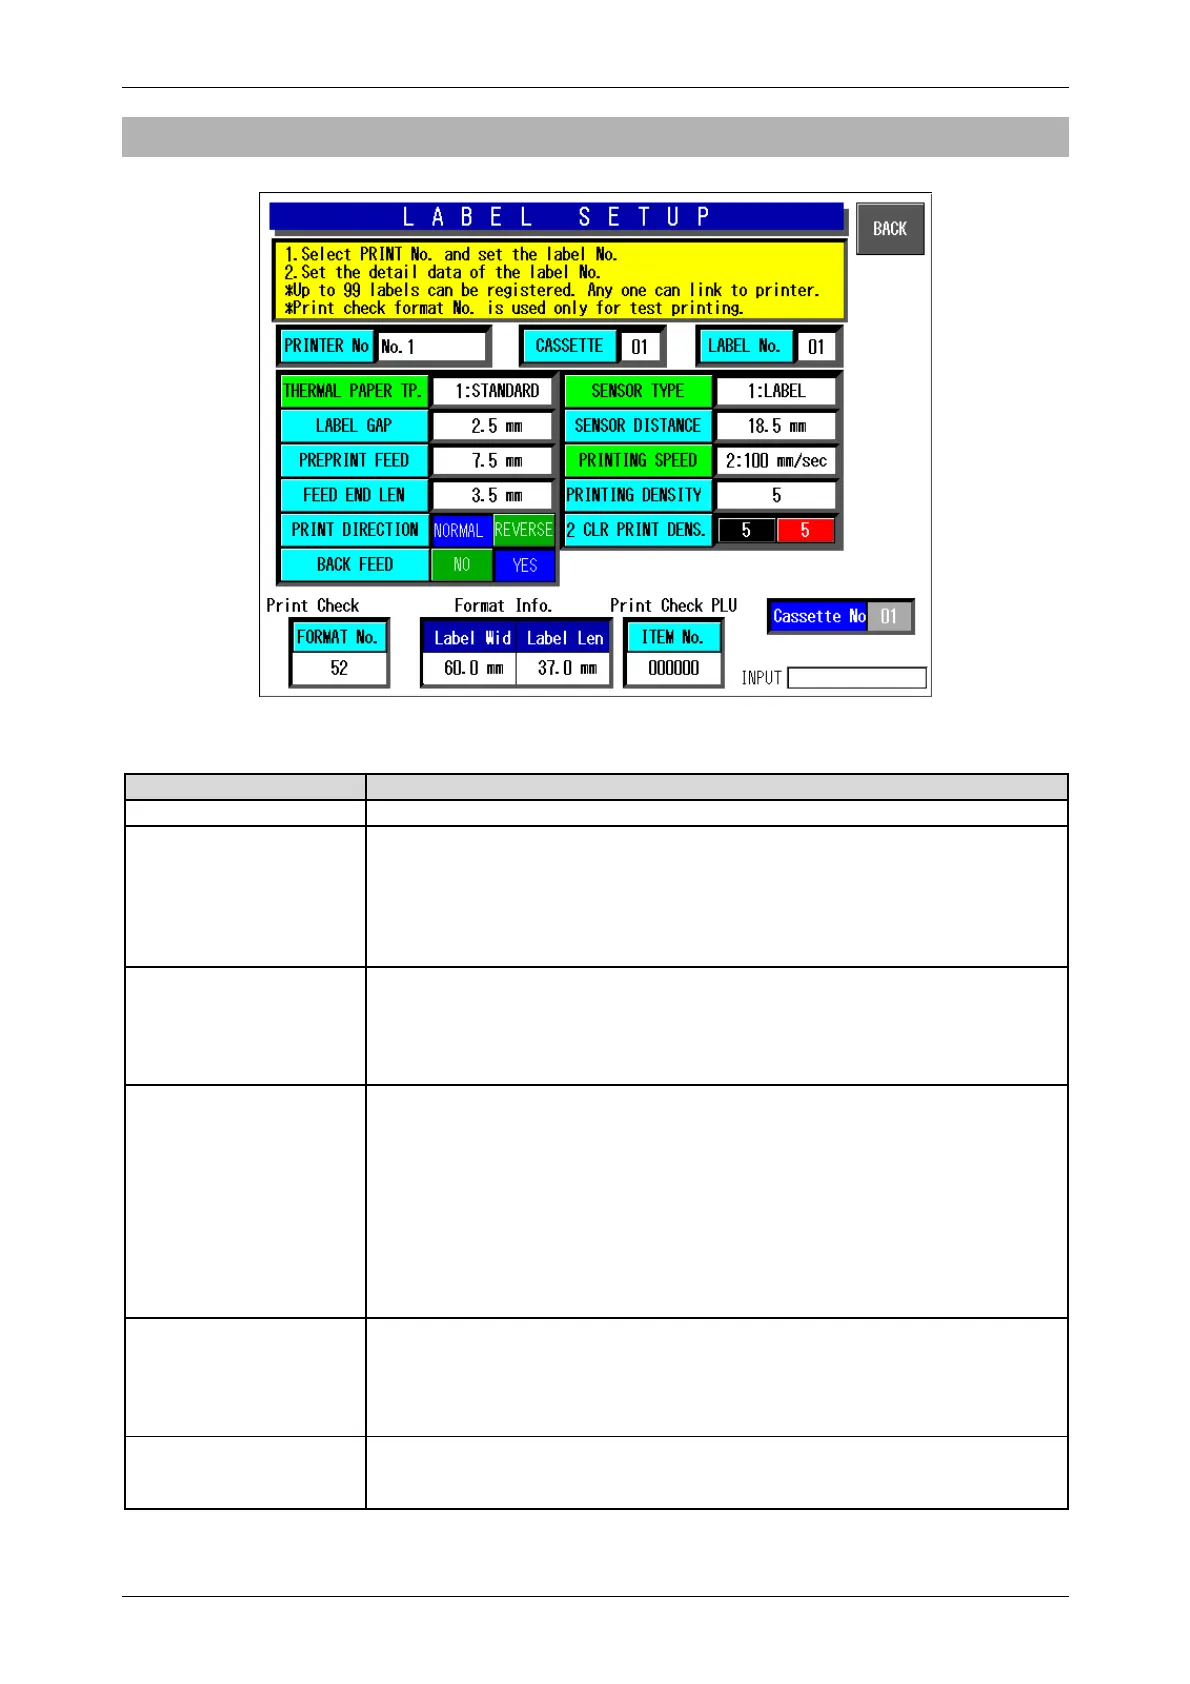
4.6.2 LABEL DETAIL SETUP
Label Print Pattern (Label Details) Setup Screen
Buttons/Display Fields Function
BACK Save data changes and return to the label print pattern detail setup screen.
Printer No. Press after numeric entry to display the label information of the entered
printer and enable label information change and confirmation (test print).
Printer numbers are defined as follows:
Printer #1: Main printer 1
Printer #2: Main printer 2
Printer #3: PP printer (and Sub printer)
Cassette No. Press after numeric entry to display the label information of the entered
cassette and enable label information change and confirmation (test print).
The data range is 1-7. An error screen is displayed if the corresponding
cassette is not inserted.
The cassette number becomes “1” when a non-applicable printer is called.
Label No. This is used when label print information is different for each printer and
cassette.
Press after numeric entry to call the label print information.
The data range is 1-99.
The same default number is set for each printer and cassette.
This data is not usually changed.
The label sensor distance is associated with the label number.
For example, if the same number is set for printers #1 and #3, the label
sensor distance will be the same for both printers and will result in a
misalignment.
Thermal Paper Type Set label type. Press one of these buttons after numeric entry to set the paper
type.
Press one of these buttons without numeric entry to display the pop-up
screen.
Next, press the desired button to set the paper type.
Label Gap Set label gap. Press after numeric entry to set the gap length.
The data range is 0-999 (0.0 mm – 99.9 mm on the screen).
Default data: 2.0 mm