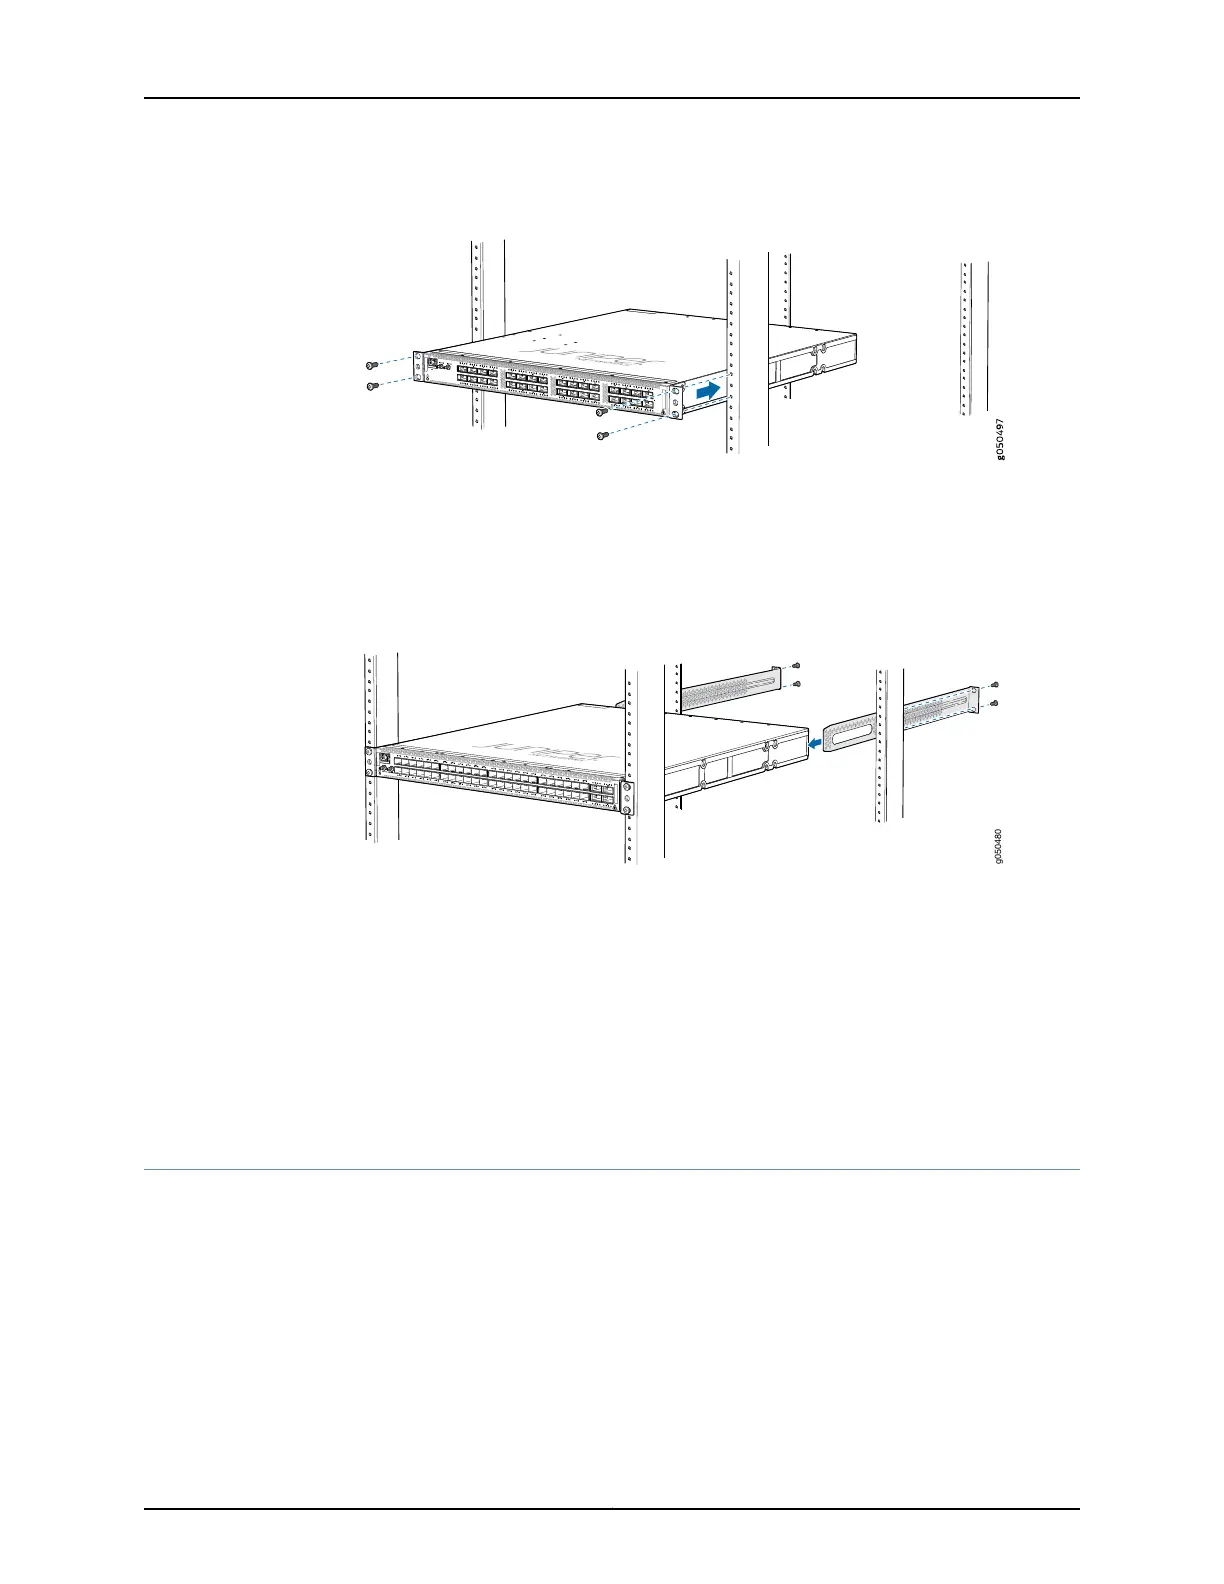
Figure 25: Attaching a QFX5110-32Q to a Rack
8. Continue to support the switch while sliding the rear mounting blades into the channel
of the side mounting rails and securing the blades to the rack. Use the four mounting
screws (and cage nuts and washers if your rack requires them) to attach each blade
to the rack. Tighten the screws. See Figure 26 on page 80.
Figure 26: Sliding the Mounting Blade into a Mounting Rail
9. Ensure that the switch chassis is level by verifying that all the screws on the front of
the rack are aligned with the screws at the back of the rack.
Related
Documentation
Rack-Mounting and Cabinet-Mounting Warnings on page 164•
• Connecting Earth Ground to a QFX5110 on page 84
• Connecting AC Power to a QFX5110 on page 85
Virtual Chassis Fabric Installation Overview
For best results, ensure you review and understand the Virtual Chassis Fabric (VCF)
configuration options. These configuration options are explained in “Virtual Chassis Fabric
Hardware Overview” on page 47 and Understanding Virtual Chassis Fabric Configuration.
Do not interconnect the switches with cables until directed in the procedure.
Copyright © 2017, Juniper Networks, Inc.80
QFX5110 Switch Hardware Guide