EasyManuals Logo

Juniper QFX5110 User Manual

Juniper QFX5110
222 pages
To Next Page IconTo Next Page
To Previous Page IconTo Previous Page
Page #130 background imageLoading...
Page #130 background image
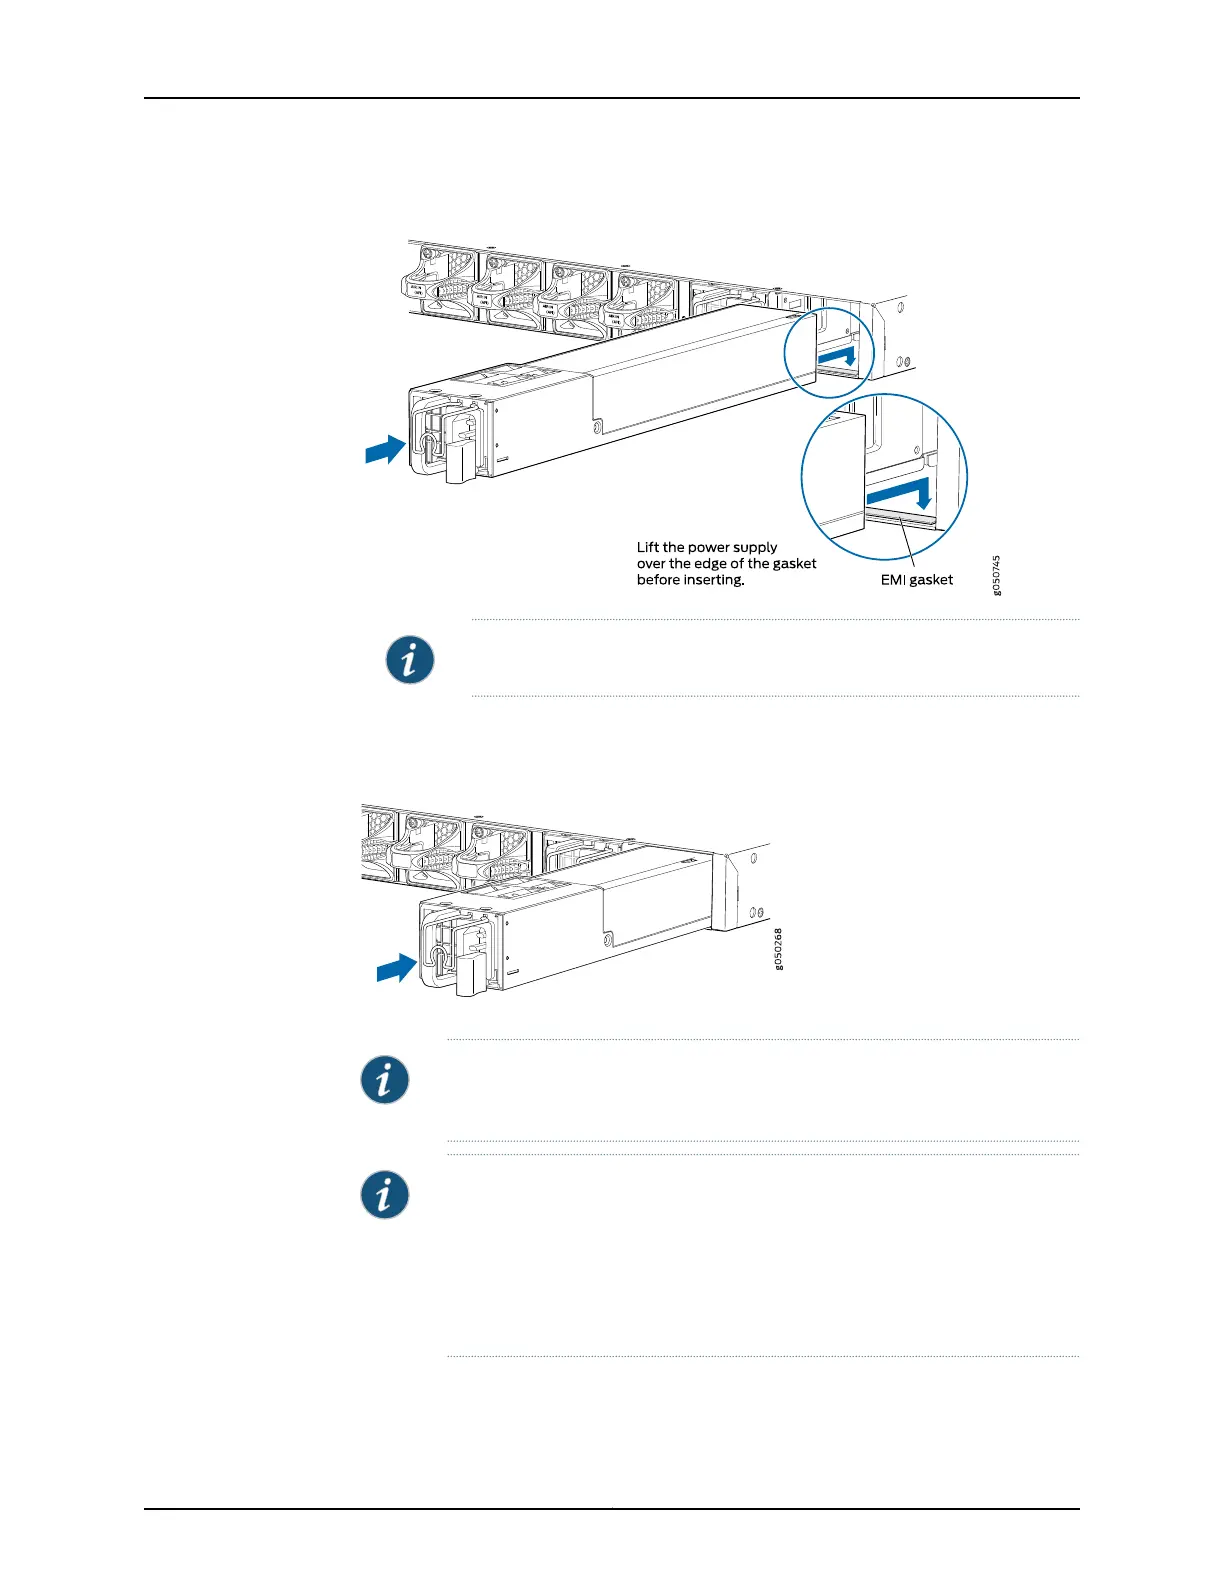
Figure 42: Installing a Power Supply in a QFX5110-32Q with EMI Gasket
NOTE: The EMI gasket is not present in QFX5110-48S switch.
4. Ensure the power supply is fully seated and the locking lever is in place.
Figure 43: Installing a Power Supply in a QFX5110-48S
QFX5100-48S
RUNNING JUN OS
NOTE: Each power supply must be connected to a dedicated power source
outlet.
NOTE: If you have a Juniper Care service contract, register any addition,
change, or upgrade of hardware components at
https://www.juniper.net/customers/support/tools/updateinstallbase/. Failure
to do so can result in significant delays if you need replacement parts. This
note does not apply if you replace existing components with the same type
of component.
Copyright © 2017, Juniper Networks, Inc.110
QFX5110 Switch Hardware Guide

Table of Contents

Questions and Answers:

Question and Answer IconNeed help?

Do you have a question about the Juniper QFX5110 and is the answer not in the manual?

Juniper QFX5110 Specifications

General IconGeneral
ModelQFX5110
Power SupplyDual, hot-swappable
Rack Units1U
Operating Relative Humidity5% to 90% non-condensing
Input Voltage100-240 VAC
Operating SystemJunos OS
Layer SupportLayer 2 and Layer 3
Virtual Chassis SupportYes
Ports48 x 10GbE SFP+
Jumbo Frames9216 bytes
Operating Temperature32°F to 104°F (0°C to 40°C)
Operating AltitudeUp to 3, 048 m
ManagementCLI
AC Input Frequency50/60 Hz
Storage Temperature-40°C to 70°C
MTBFConsult Juniper documentation for specific values.

Related product manuals