NOTE: If only one power supply is installed in your QFX5240 switch, you need to power o
the switch before removing the power supply. See "Power O a QFX5240 Switch" on page
109.
3. Disconnect power to the switch:
• AC power supply—If the AC power source outlet has a power switch, set it to the OFF (O)
posion. If the AC power source outlet does not have a power switch, gently pull out the plug end
of the power cord connected to the power source outlet.
4. Remove the power source cable from the power supply faceplate:
• AC power supply—Remove the power cord from the power supply faceplate by detaching the
power cord retainer and gently pulling out the socket end of the power cord connected to the
power supply faceplate.
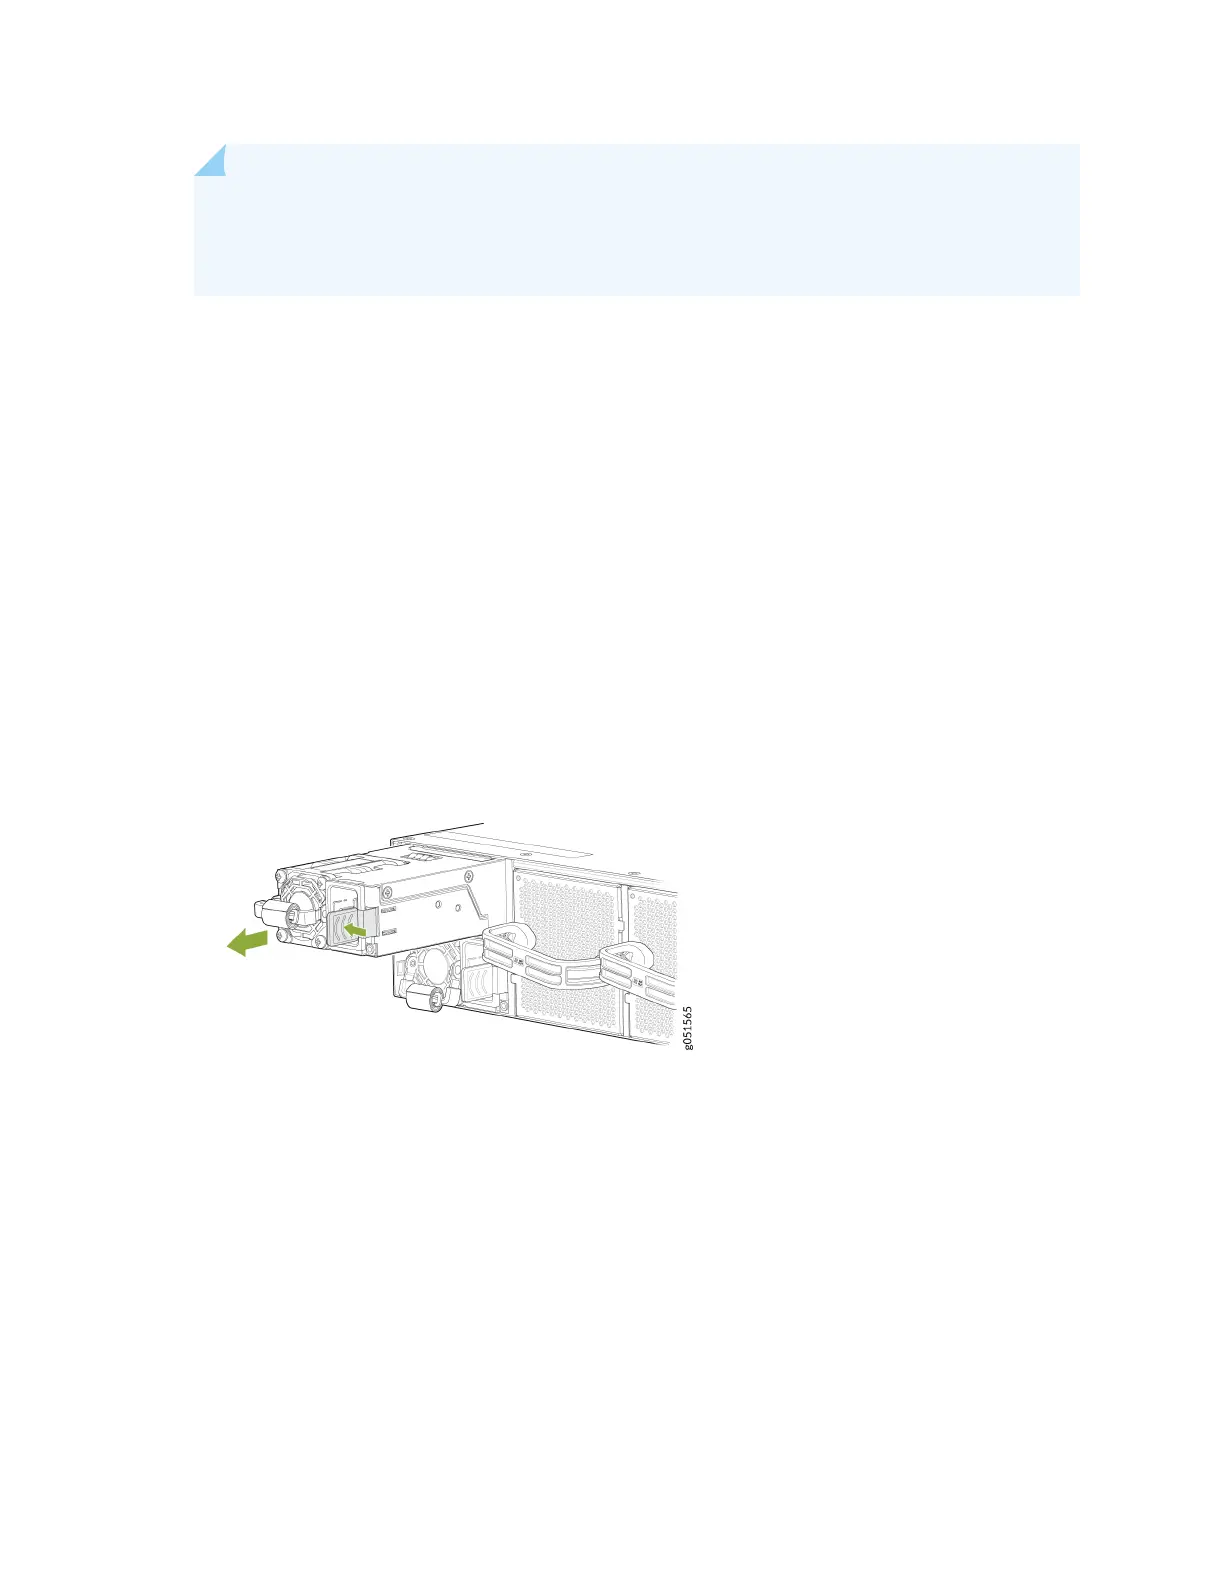
5. Press the power supply handle from the side.
6. Grasp the power supply handle and pull rmly to slide the power supply halfway out of the chassis.
Figure 33 on page 94 shows how to remove an AC power supply unit from a QFX5240 switch.
Figure 33: Remove an AC PSU from a QFX5240 Switch
7. Place one hand under the power supply to support it and slide it completely out of the chassis. Take
care not to touch power supply components, pins, leads, or solder connecons.
8. Place the power supply in the anstac bag or on the anstac mat placed on a at, stable surface.
9. Replace with another power supply module.
94