2. Wrap and fasten one end of the ESD grounding strap around your bare wrist, and connect the other
end of the strap to the ESD point on the chassis.
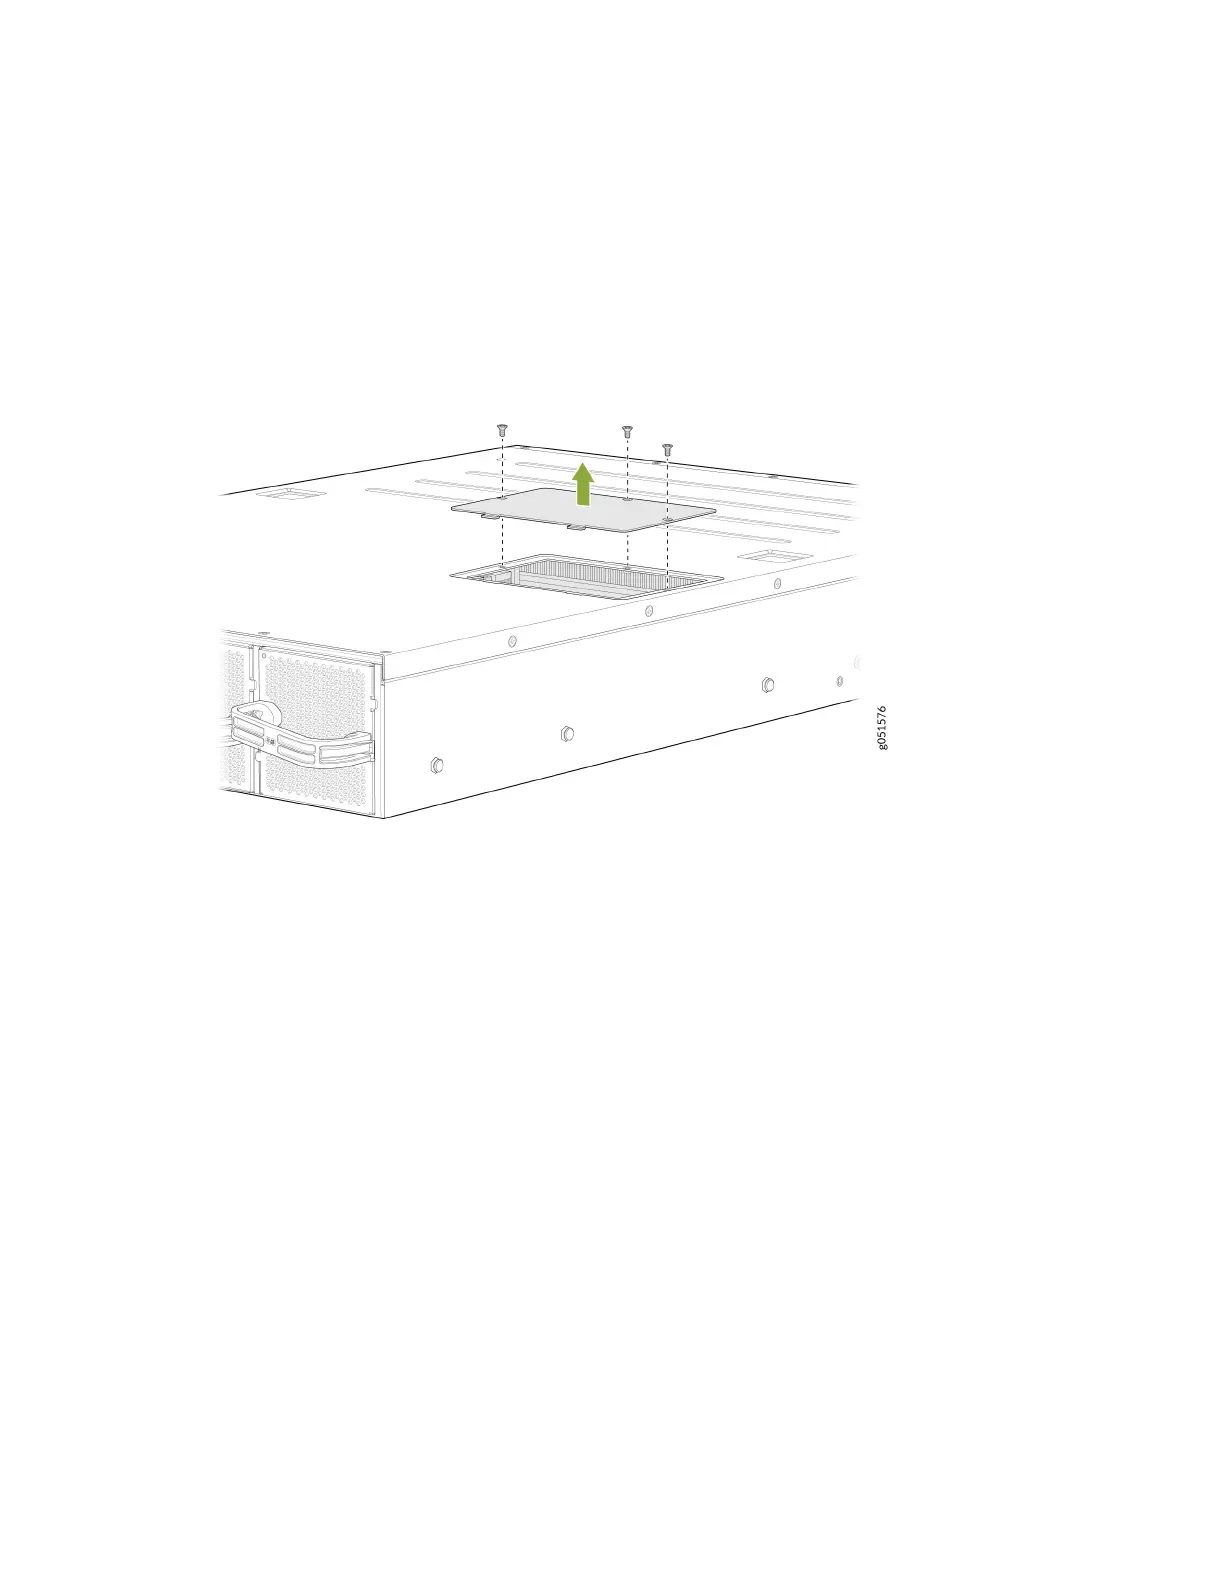
3. Turn the switch chassis upside down and locate the SSD cover plate.
4. Remove the three screws securing the SSD cover plate by using the Phillips (+) screwdriver. See
Figure 35 on page 97.
Figure 35: Remove the SSD Cover Plate
5. Remove the single screw holding the SSD in place and slide the drive out of the plug (see Figure 36
on page 98.
97