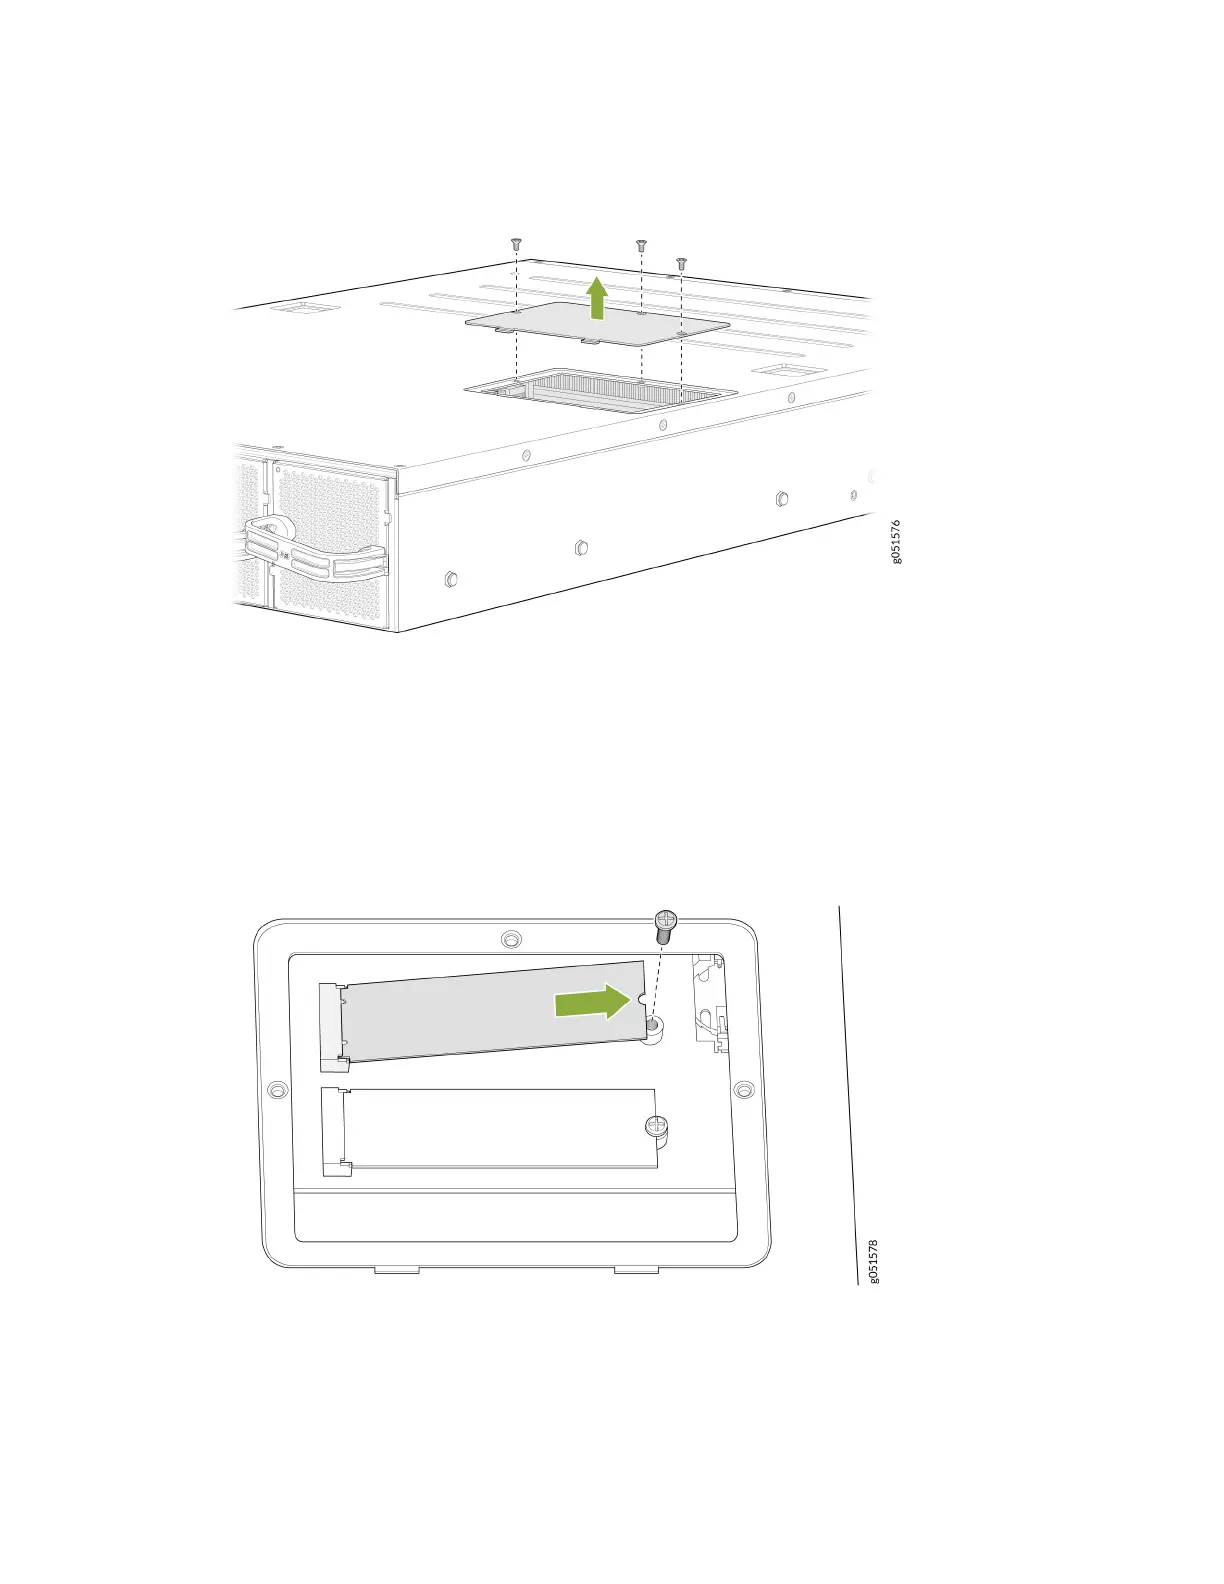
Figure 47: Remove Screws on SSD Doors for a QFX5240 Switch
4. Remove the doors and set aside the screws.
5. Use the Phillips screwdriver to remove the screw on one of the SSDs and set it aside. See Figure 48
on page 124.
Figure 48: Removing the Screw and Liing the SDD Out
6. Li the end furthest from the connector and remove from the cavity. Repeat Step 5 and Step 6.
7. Replace the screws and hand-ghten the screws using the Phillips screwdriver.
8. Replace the SSD doors and the six at-head screws. See Figure 49 on page 125.
124