5. Sequencer mode
46
Loop recording
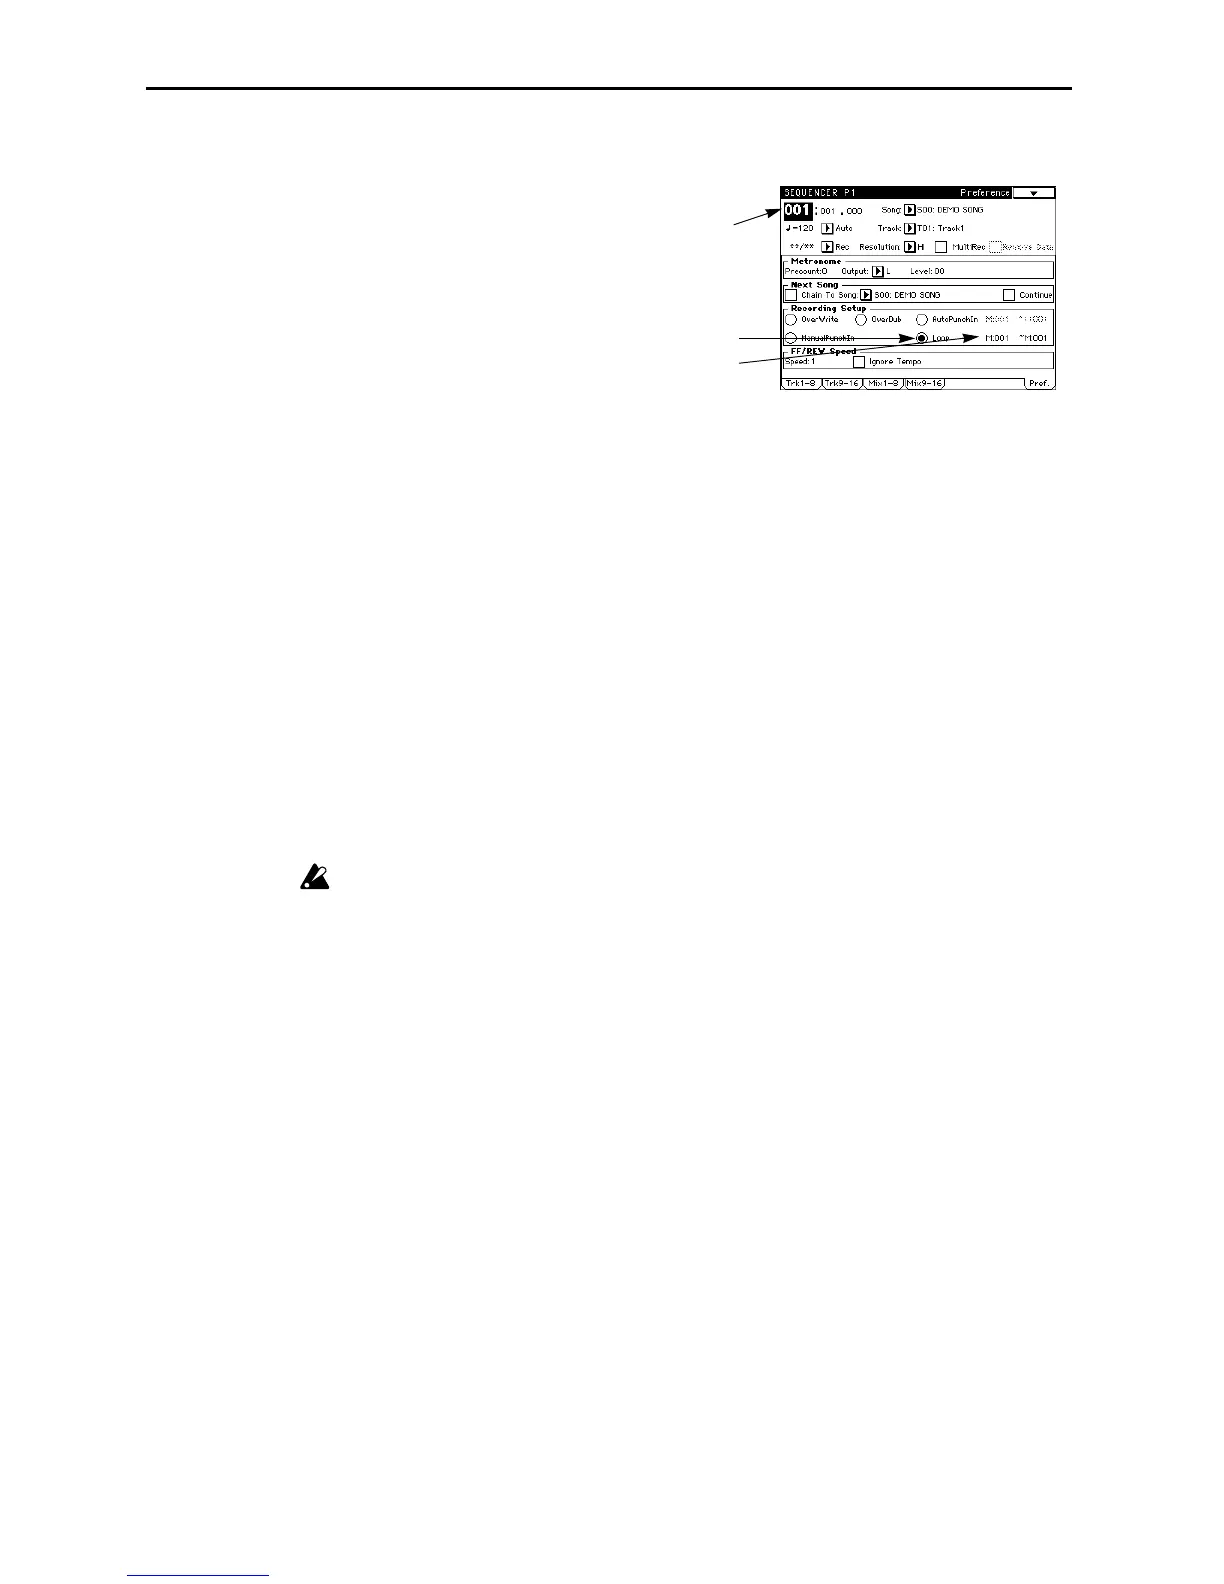
4 Use M (Measure) to specify the area in which recording will take place.
5 For Location, specify a location several measures before the area that you wish to record.
6 Press the [REC/WRITE] key, then press the [START/STOP] key.
Playback will start.
When the area specified in step
4 is reached, recording will begin. Play the keyboard and/or use
the controllers (joystick, etc.), and the data will be recorded.
When the end of the specified area is reached, you will return to the beginning of the area, and
recording will continue. The data newly recorded on each pass will be added to the previously
recorded data.
If you press the [REC/WRITE] key during loop recording, all data will be erased from the track
currently being selected for the interval that you continue pressing the [REC/WRITE] key.
If the Remove Data box in tab page 1 (2) is checked, you can erase specific data. During loop
recording, hold down a note (key) that you wish to erase, and all occurrences of the specified note
will be erased from the area that is played back while you continue holding the note.
In the same way, pitch bend data can be erased by holding the joystick tilted in the X (horizontal)
direction, or aftertouch data can be erased by maintaining pressure on the keyboard.
To resume recording data, un-check the Remove Data box.
7 Press the [START/STOP] key.
Playback will stop, and you will return to the location specified in step
5.
If Loop Recording is selected, the playback will be looped even during normal playback.
1 Make the preparations described in “Preparations
for recording.” (☞page 44 in this manual).
It should be noted that you cannot perform multi-
track recording. Uncheck the MultiRec check box
in step
5.
2 Press tab button 7 (Pref.).
The Preference display will appear.
3 In Recording Setup, select Loop.
Loop recording mode will be selected.
5
3
4