5-24 LeeBoy Model 8515D Conveyor Paver
Maintenance
Rear Conveyor Shaft, Bearings
and Sprockets
1. Drive paver onto a ramp to access undercarraige.
2. Disconnect the main conveyor chains. (Figure
5-29)
3. Disconnect any link.
4. Rotate chains away from the assembly.
5. Remove chain from drive motor to the conveyor
sprocket.
6. Remove bolt and washers holding the sprocket.
7. Remove the sprocket and bearing from the frame.
8. Remove bolts on the inner sprocket.
9. Slide out shaft and outer conveyor sprocket through
frame side.
NOTE: Rear tube can be removed for changing the
inner bearings.
NOTE: Remove the inner seals from replaced
bearings in the tubes to allow grease to enter into the
bearing area.
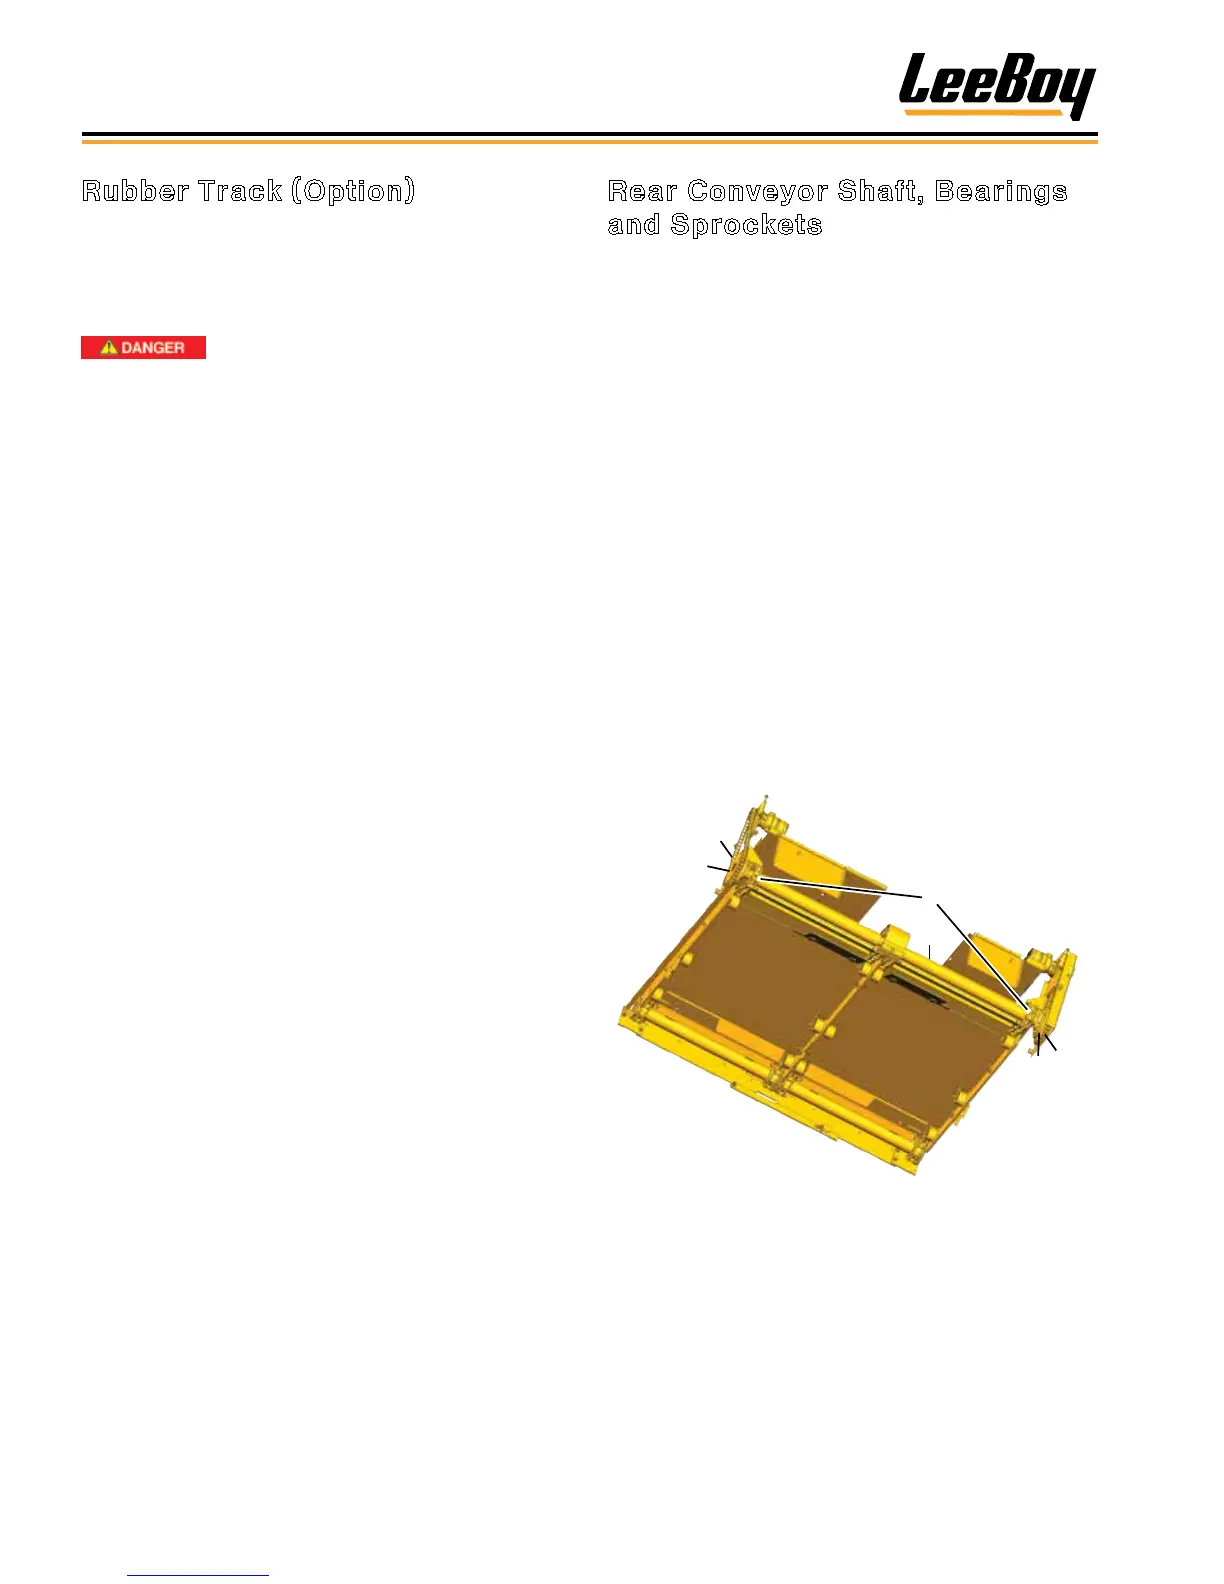
Figure 5-29. Rear Conveyor Shaft
1 - Main Conveyor Chains
2 - Conveyor Chains
3 - Conveyor Sprockets
4 - Conveyor Shaft (inside tubing)
Rubber Track (Option)
1. Raise conveyor and insert safety prop. (Page 5-6)
2. Jack up the paver at least two feet (61 cm) off
the ground for enough clearance under the
undercarraige to perform this procedure.
Crush hazard! Always use safety
blocks in addition to jack when working under the
paver to prevent serious injury or even death.
3. Loosen the track tension cartridge at the manifold
located at rear of the bottom hydraulic tank.
4. Label and disconnect the track tensions hoses from
undercarriage at track tension manifold.
5. Cap and plug all hoses.
NOTE: Remove generator cord at generator if
removing left undercarriage (electric heat
screed only).
6. Remove the two (2) bolts holding the drive motor
to the torque hub. (Figure 5-28) Support the
undercarriage with a forklift or jack before lowering
to the ground.
7. Unbolt the two (2) trunnions on the front of track
undercarriage and stops at each side of the rear of
the undercarriage.
8. Lower the track assembly.
9. Remove rubber track by prying from the idler end
rst.
10. If needed, replace idler, torque hub, sprocket,
rollers and/or cylinder. Lower the undercarriage for
replacing above components, except rollers.