55
LeeBoy Model 8515D Conveyor Paver 5-25
Maintenance
Auger and Inner Bearings
1. Remove rear grating over auger assembly.
2. Extend the screed extensions completely.
3. Clean asphalt build up from around cover.
NOTE: Heating asphalt may be required.
4. Remove the two (2) nuts holding top cover on and
pry cover apart.
5. Remove bottom portion of cover.
6. Rotate auger chains so that master link is centered
at front.
7. Loosen auger chains by sliding auger motors down
from backside after loosening the two (2) bolts
securing mounting brackets.
8. Remove bottom clamps that hold auger bearings in.
9. Remove auger end mounts so that augers can be
removed through opening in sides.
10. Remove augers and lay augers on the ground in
the same position as removed. This will help insure
proper installation of the new augers.
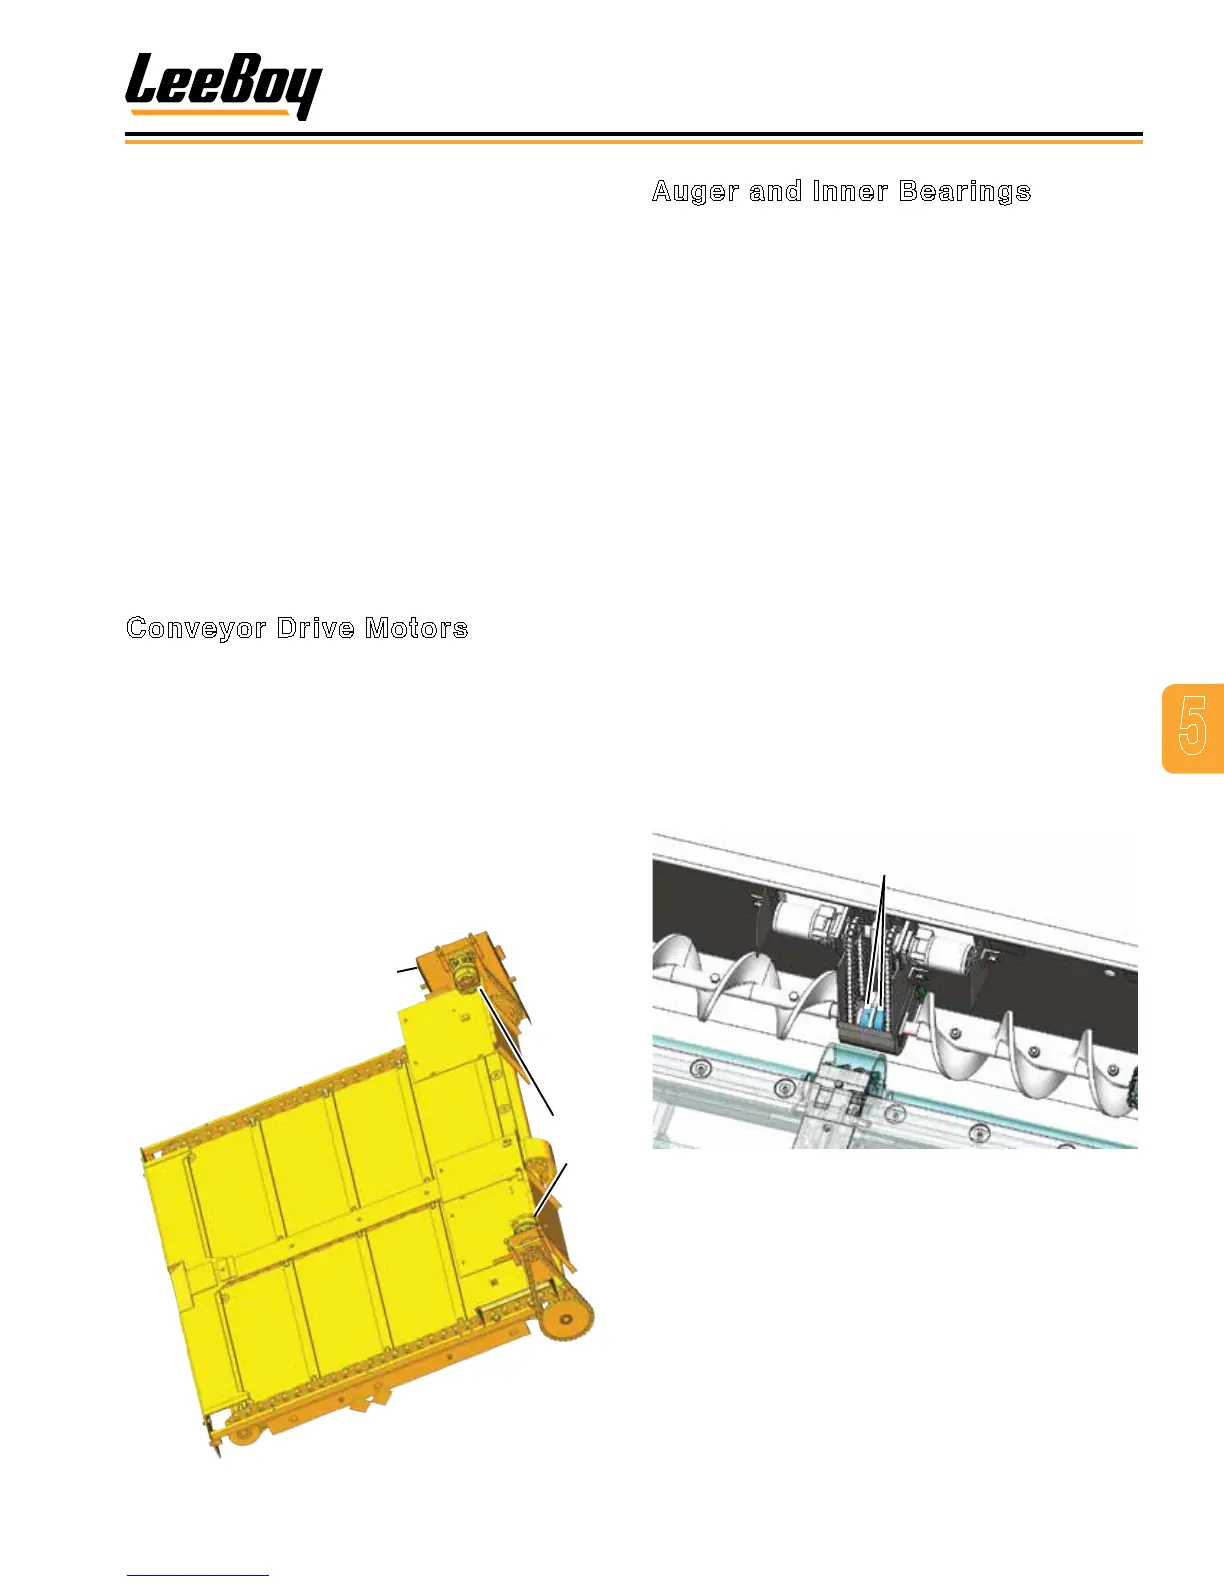
11. Check inner auger bearings and replace if faulty.
(Figure 5-31)
Auger Inner
Bearings
Figure 5-31. Auger Inner Bearings
NOTE: When installing the new augers, be sure to
align augers the same as the removed augers.
It is very easy to install augers backwards.
12. Install new augers making sure that they are on
correct side to auger material outward.
13. Tighten bearing setscrew to help hold auger shaft
from moving outward.
10. Place conveyor shaft into the inner conveyor
sprocket.
11. Insert bolt into shaft.
NOTE: The outer conveyor sprocket must be aligned
with the inner sprocket.
12. Rotate the outer sprocket on the shaft until properly
aligned.
13. Reinstall the outer bearing and outer sprocket.
14. Place thread-locking adhesive on the bolt and
torque to 180 ft. lbs. (244 N.m).
15. Reinstall the conveyor and drive chains and adjust.
16. Grease bearings in the tubes by using grease
blocks on each side below the hopper wing.
Conveyor Drive Motors
1. Remove hydraulic hoses from motor.
2. Remove four bolts holding hydraulic motor to slide
mount. (Figure 5-30)
3. Slide drive motor out of slide mount.
4. Slide new or repaired drive motor into slide mount.
5. Secure with four bolts.
6. Reconnect hydraulic hoses to motor.
7. Check for leaks.
Cover
Conveyor
Motors
Figure 5-30. Conveyor Motors