NOTE: The least amount of pressure on relief, the
longer the life of the pump.
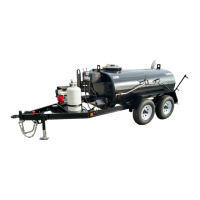
8. Hold the spray wand rmly by both hand grips, with
the spray end away from your body, then open the
grip valve by turning it counterclockwise as shown in
Figure 4-17 to begin spraying.
• You can close the hand spray valve by turning
the handle clockwise to its original position as
needed.
NOTE: The grips will remain cool as the hot asphalt
ows through the wand, however, DO NOT
spray without wearing protective gloves.
Grip
Grip and
Spray Valve
Keep bystanders at a safe distance
to prevent injury from hot asphalt spray.
Figure 4-17. Hand Spray Wand with Grip Valve in the
OPEN (ON) Position
9. Direct the wand using long, sweeping arcs while
spraying to evenly distribute the material.
NOTE: Hold the spray nozzle end nearer to the
ground if weather conditions are windy.
10. When nished spraying, turn the liquid asphalt valve
OFF by turning it LEFT.
11. Alternate opening and closing the spray wand grip
valve a few times to draw excess asphalt from the
spray wand and hose until any material ow has
ceased, then close valve by turning it clockwise.
Reel in hose and return spray wand to its mount.
12. Pull the spray wand valve lever UP.
13. Perform the Reverse Suction and Back Flush
procedures described on Pages 4-20 to 4-21.
NOTE: When allowing machine to run for short
periods of time without spraying, open and
close the circulating valve a few times to
relieve excessive pump pressure.
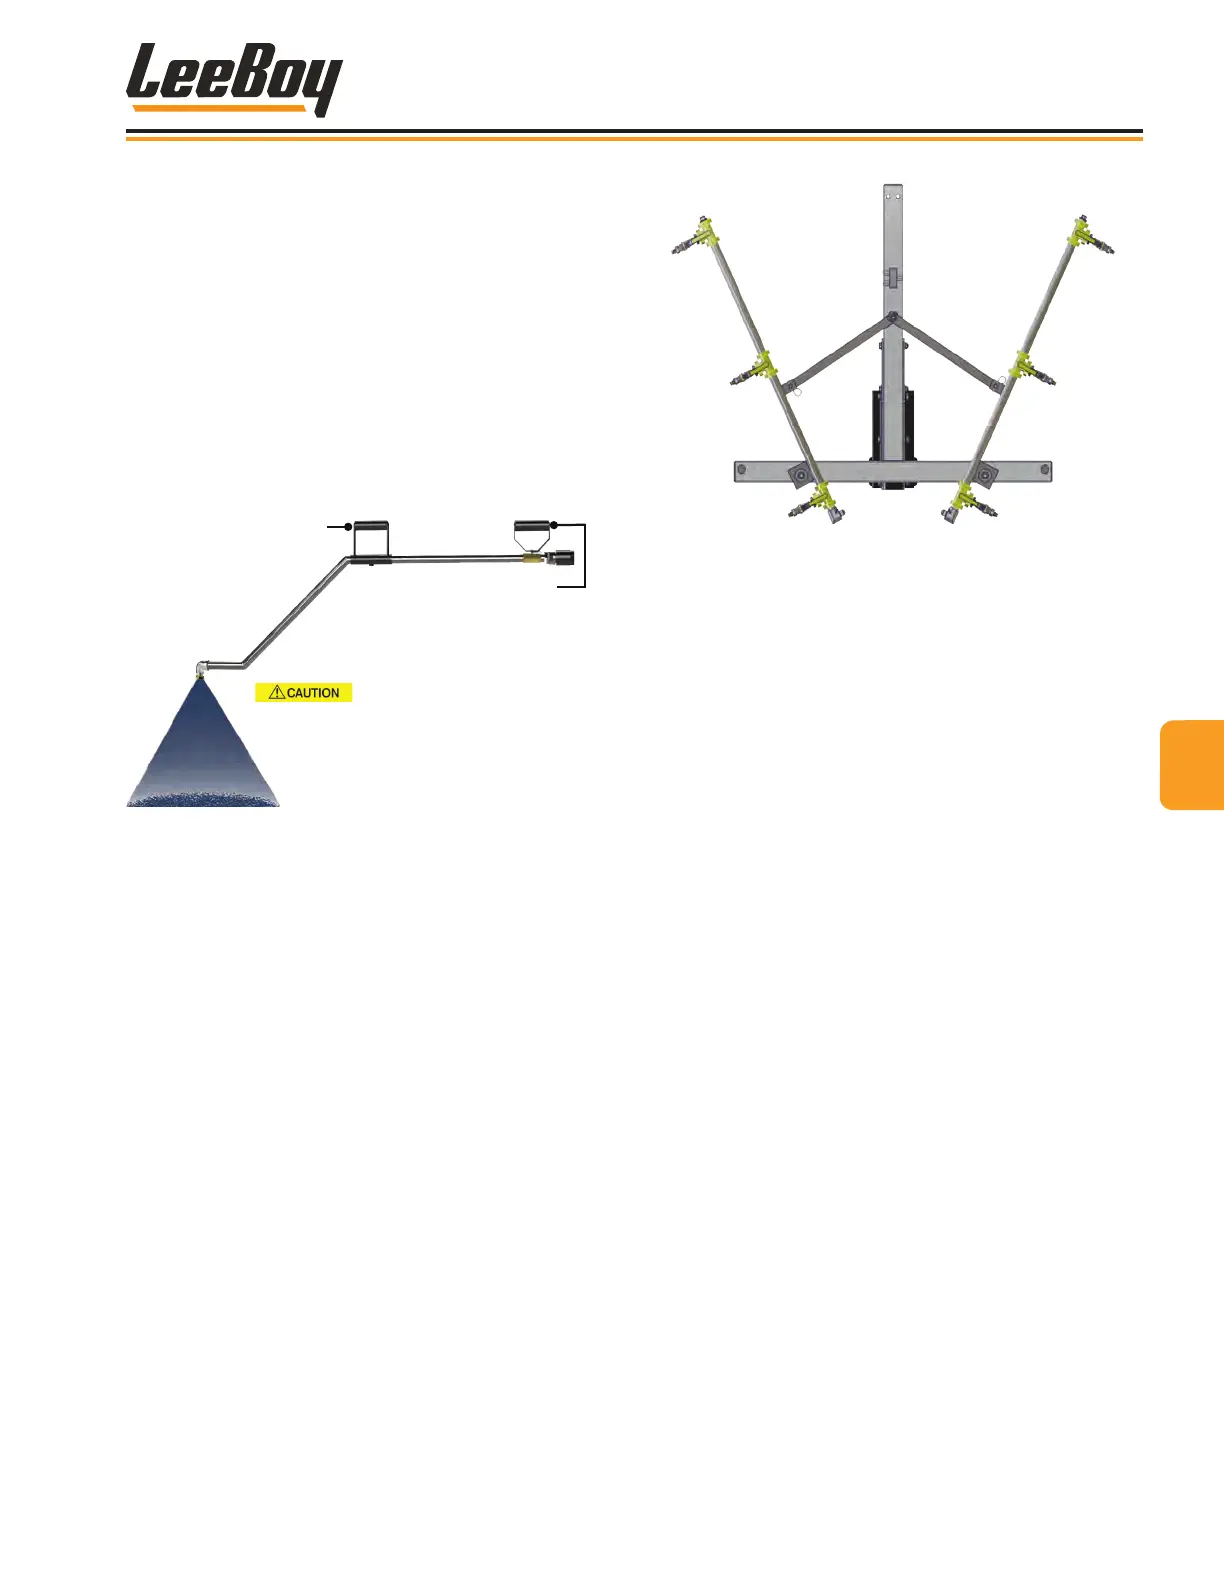
Figure 4-18. Optional Spray Bar
Spray Bar (Option)Spray Bar (Option)
The optional spray bar provides the ability to distribute
tack material over a larger area, i.e., a road or driveway
surface. Mounted on the rear of the unit, the spray
bars, one on each side, are equipped with individual
spray nozzle valves (three on each spray bar) evenly
spaced across. The two spray bars fold down to extend
the spraying width as needed for a coverage width up
to eight (8) feet (2.4 meters). The spray nozzles and
constant pressure along the length of the spray bars
work together to produce a triple-overlap, fan spray
pattern for uniform application. (Figure 4-18)
Proper surface coverage and spray pattern depends
upon the condition of the spray nozzles. The corrosion-
resistant nozzles are designed for long-lasting, trouble-
free performance. Factors that can increase nozzle
wear and negatively impact performance are plugging,
build-up or caking inside the nozzle.
• Inspect the spray nozzles daily to ensure they are free
from clogs and operating properly.
• Treat nozzles with care. The nozzle orice is very
precise, so be careful to avoid damage.
• Examine spray pattern and ow rate. A clogged
nozzle is very easy to notice.
• If a nozzle becomes clogged, clean or replace it
immediately. Clean the nozzle slots, being careful not
to damage the nozzle opening as the spray pattern will
be adversely affected. Cleaning tool should be softer
than construction material. NEVER clean the orice
with metal objects.
• To replace a spray nozzle, simply unscrew nozzle
from its mount and remove, insert new nozzle and
screw back into place securely.
44
Operation
L300 and L600 Tack Distributors 4-19