Repair information 4-9
7014-xxx
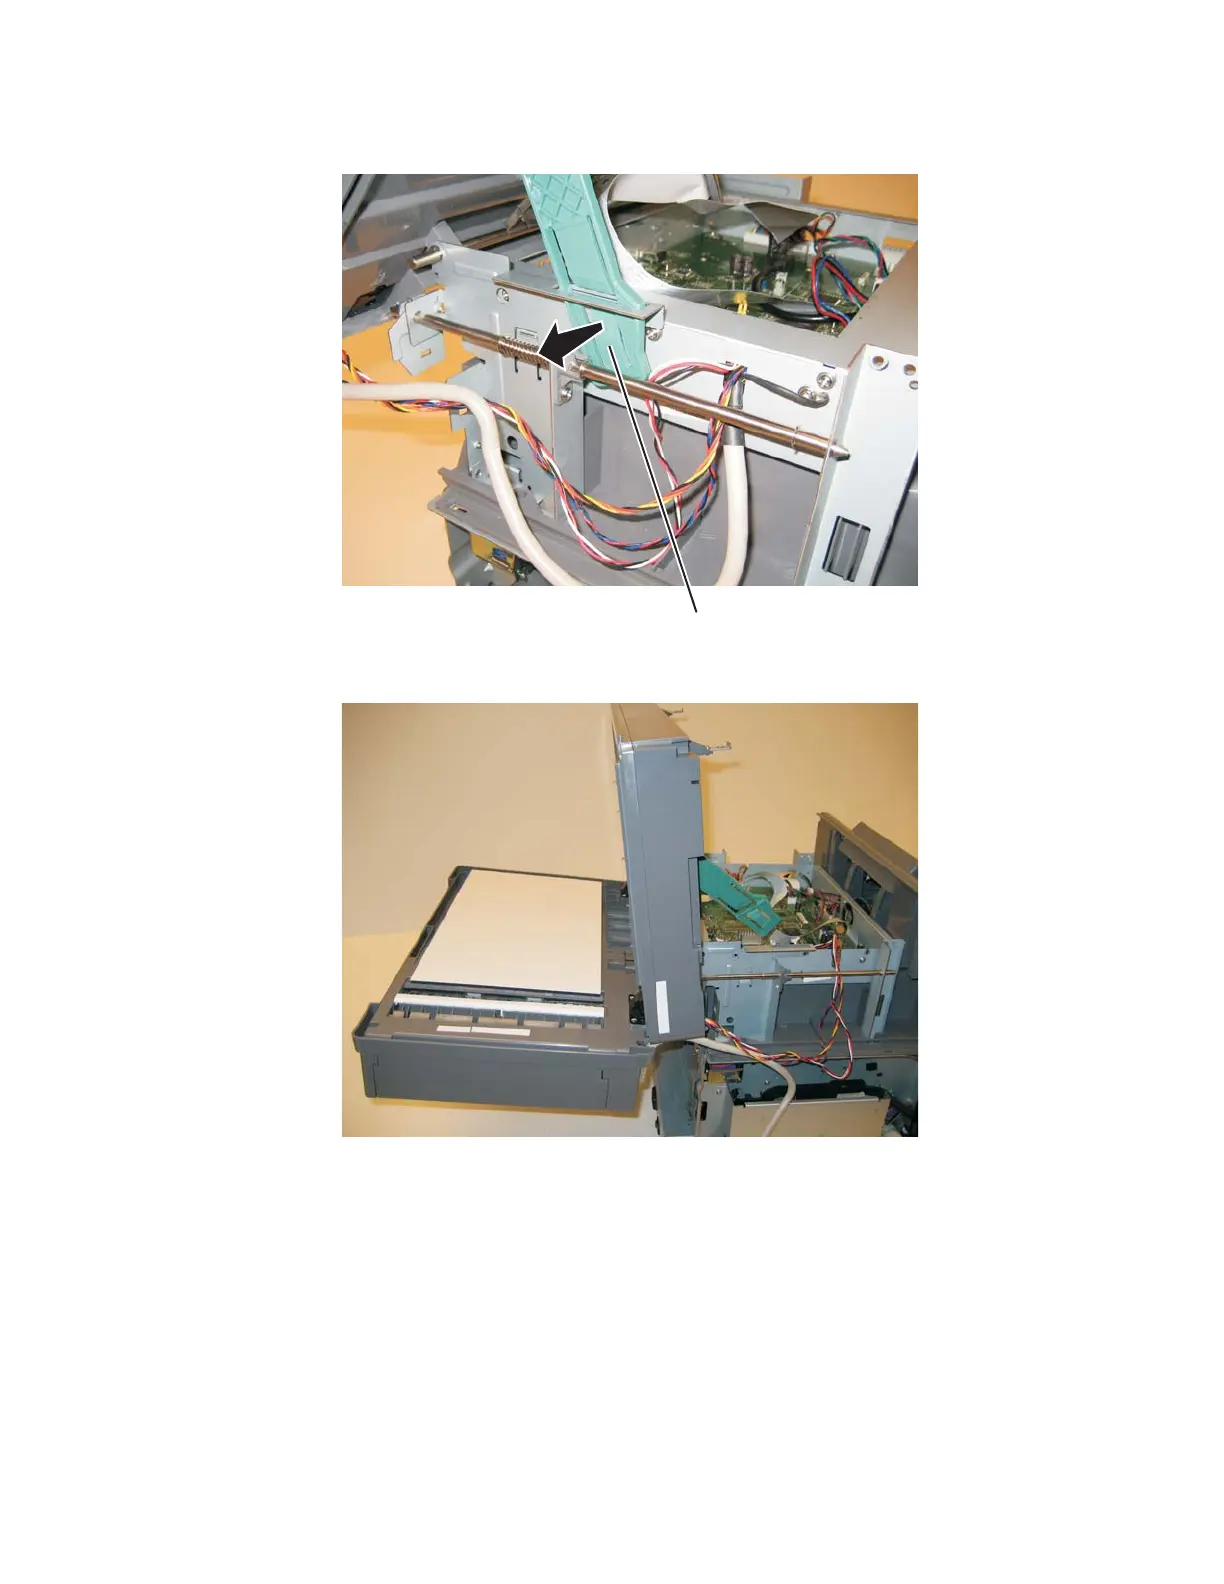
4. Using a flatblade screwdriver, depress the kickstand release tab (B).
5. While depresing the tab,lift the scanner assembly until it is fully vertical.
6. Carefully tilt the ADF down as shown.
Warning: To avoid damage to the rear frame assemblies, hold the ADF while raising the flatbed to the
upright position, then lower the ADF ,slowly a shown above.
7. Remove the controller board shield. See “Controller board shield” on page 4-11.
8. Disconnect all the cables from the controller board.
9. Tilt the operator panel display to the up position.
10. Route the UICC cable, the front USB cable, and the display panel cables through the hole in the front of the
controller board cage.

 Loading...


