LogTag TRIX-8/TRIX-16 Work Instruction Manual Revision 9.20 Page 39/53
Customisation (cont)
Procedure
1. Scan in the production batch id from the printed supplied production batch document and click on OK,
the screen then shows the labels to be attached.
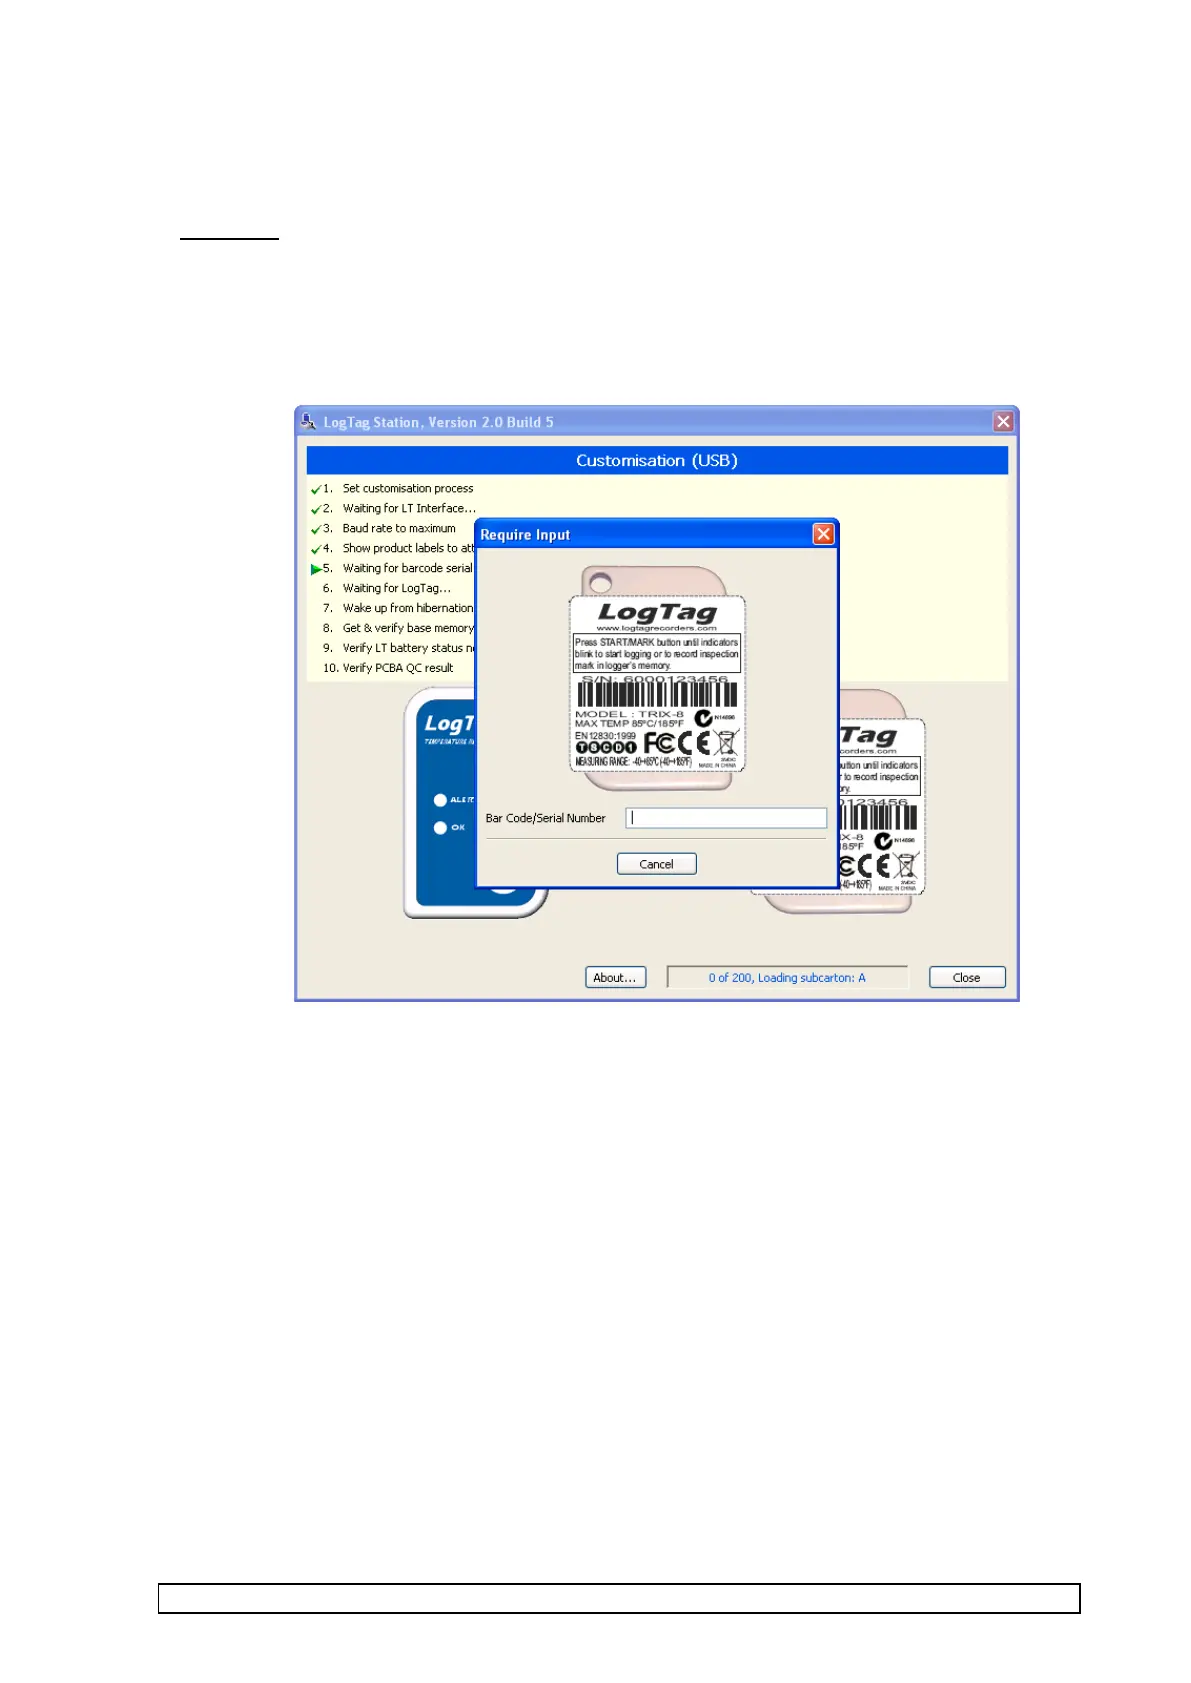
If the rear serial number label is to be attached then the screen below will appear otherwise it is skipped
and the screen on the next page is displayed.
2. If top label is be affixed then remove protective tape from LED & switch holes and afix top label.
3. Affix bottom serial number label (if required)
4. Scan label on LogTag (if prompted)
NOTE: This step is skipped (not presented by software) if the product to be customised has no rear
label. This is defined by the batch code provided by LogTag Recorders.
Using barcode scanner, scan the barcode on the label that is to be placed on the unit.
The barcode scanner beeps if the scan is successful, the Bar Code/Serial Number field is filled in and
the customisation proceeds to the next steps automatically.
If the barcode scan is bad then the above screen remains until a barcode serial number is successfully
entered. It is also possible to enter the serial number manually using the keyboard.