LogTag TRIX-8/TRIX-16 Work Instruction Manual Revision 9.20 Page 6/53
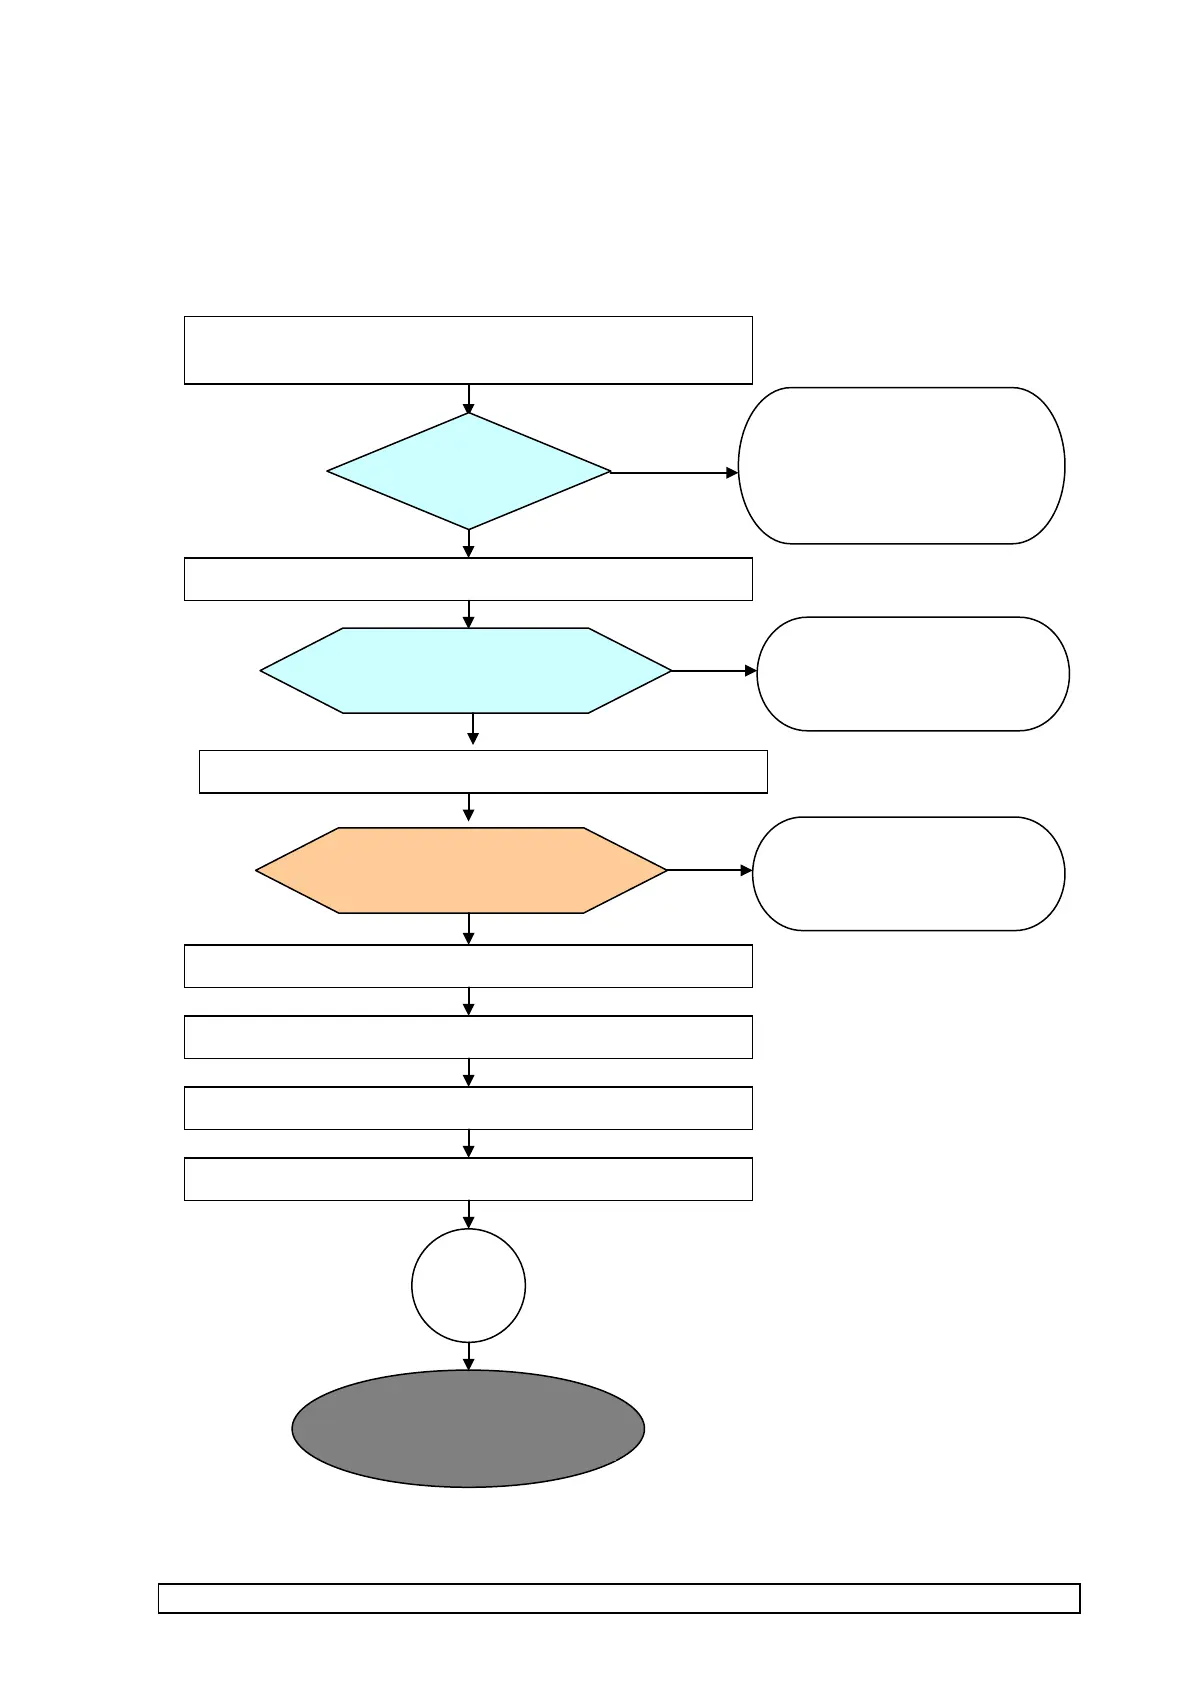
Summary flowchart of LogTag TRIX-8/TRIX-16 assembly
MANUFACTURING PHASE 1 : PCBA assembly and mounting in case
SMD mounting (section 1.1)
Paste/SMD mounting/Reflow/PCB break out from panel
INSPECTION
Solder quality (1.1)
rework and place panel in
marked container with this
inspection reference.
Undertake correction action
to correct soldering problem.
Crystal Mounting (section 1.2)
PASS
PCBA LED flash test
container with this test
number for servicing.
PASS
TEST FIXTURE: PCBA Test &
Calibrate
Mark PCBA with QC failure
tag detailing reason for
failure and place in separate
marked container
FAIL
Mounting in case/swaging interface contacts rivets (1.6)
Bend legs and solder on electro-cap (1.7)
Mount & solder on thermistor (1.8)
Separate PCBAs from panel (section 1.4)